Actual prep time: 1 hour
Level of difficulty: 2.75
Serves 4+
Ingredients:
Artichokes, whole, fresh, at least 2 each.
Corn, fresh, white, “on the cob,” at least 2 each.
Butter, a stick or two.
Kosher salt, as needed.
Ground black pepper, as needed.
Other stuff
Demi-glace, as needed, optional.
Frank’s Pepper Vinegar, wing sauce, Tabasco, etc., for splashing.
Flour, small amounts, as needed.
Eggs, 1 or 2, here or there.
Bread crumbs, fine, 2 cups or thereabouts.
Sweet and sour tomato emulsion
Ketchup, 2 oz/60 ml.
Vinegar, 1 oz/30 ml.
Corn syrup, 1 oz/30 ml (or 1 Tablespoon sugar).
Frank’s Pepper Vinegar, 1 Tablespoon.
Vegetable oil, 4 oz/120 ml.
Note: Use a stick blender or blender to combine all the ingredients except the oil. Drizzle in the oil in a steady stream. It’s as simple as that.
Garnishes–cherry tomatoes, cilantro leaves, chopped parsley, radishes, green peppers, green onions, things like that.
Coleslaw, that is, shredded cabbage, shredded carrots, mayo/sugar/vinegar/garlic powder/salt or your favorite deli or bottled versions.
Cream, 2 oz/60 g.
Foie Gras, WHAT? You don’t really need foie gras, but you might see some on the plate somewhere, it goes good with artichokes and corn.
At some point
Preheat your sous vide bath to
183 F/84 C.
Foreword
Most people think of sous vide as being best applied to proteins, but starchy vegetables also benefit from sous vide processing. Corn, artichokes, onions, carrots, potatoes, sweet potatoes, beets, and other “non-green-leafy” types all have something to gain, something to offer. Today we’re going to talk about two of my favorite sous vide vegetables.
Alphabetical artichokes; a thistle epistle
These awkward and squeakily noisy thistles usually get thrown into a pot with some lemon in that vain attempt to prevent the blackly doomed globe from discoloring. We wash that bitter stuff off our hands and then boil the otherworldly blossoms like laundry until the leaves start falling off. We check to see if a skewer will penetrate the now fragile heart, which reveals another problem.
Fishing the ‘chokes out of the hot water without destroying them completely can make a mess of a vegetable that is already expensive unless you are within a hundred miles of Monterey, California, and even then.
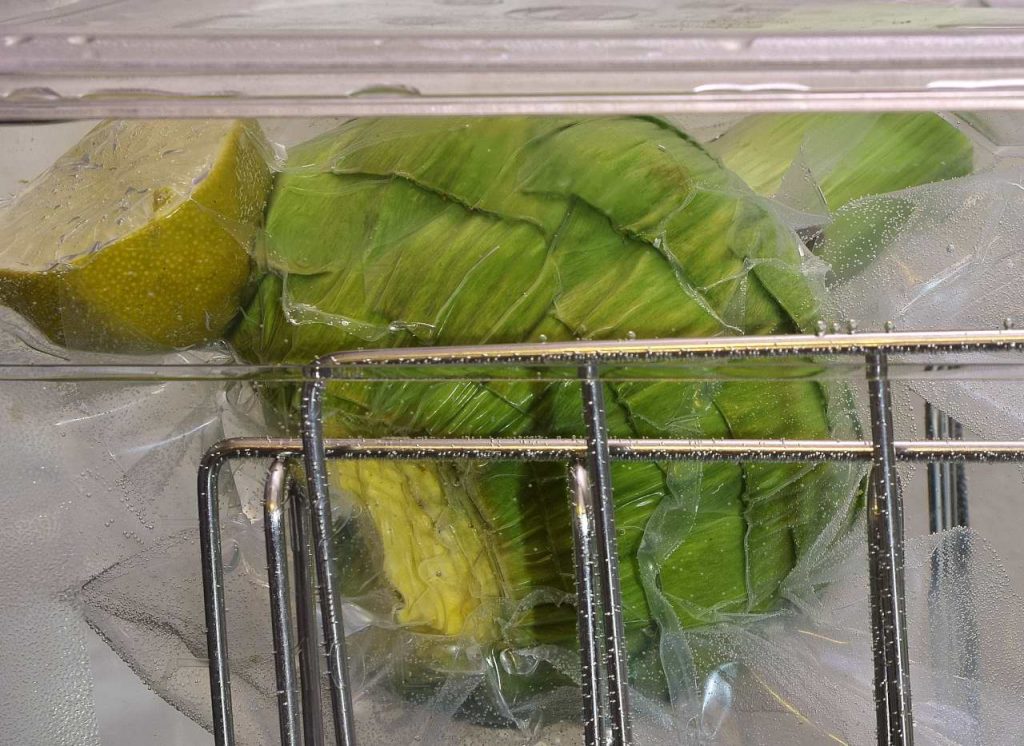
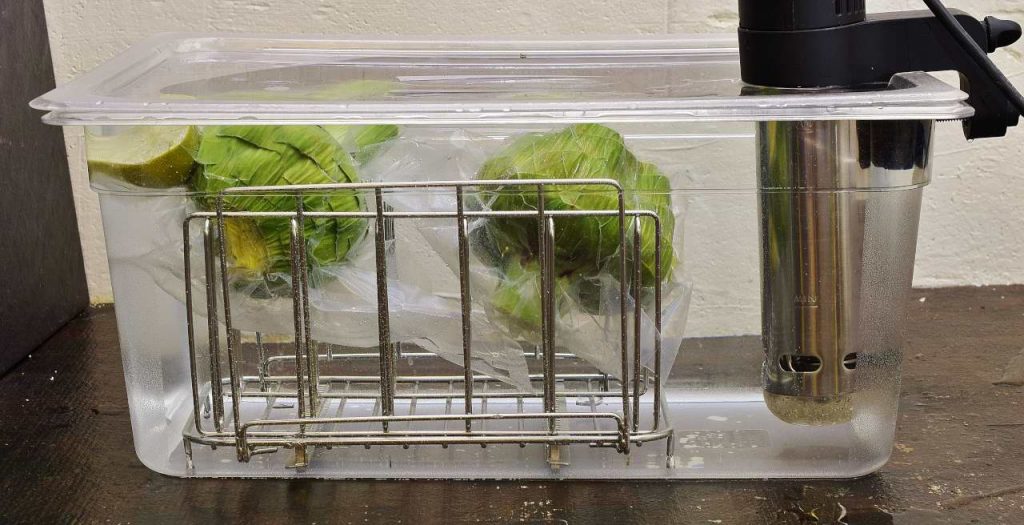
Whether sous vide is applied or not, artichokes are most commonly cooked whole. The problem with sous vide processing whole artichokes is that they are bulky and tend to float. Using a Lipavi vessel that is full to the brim with water and a tight-fitting Lipavi lid solves the flotation problem. Not even close to a crisis. NEXT.
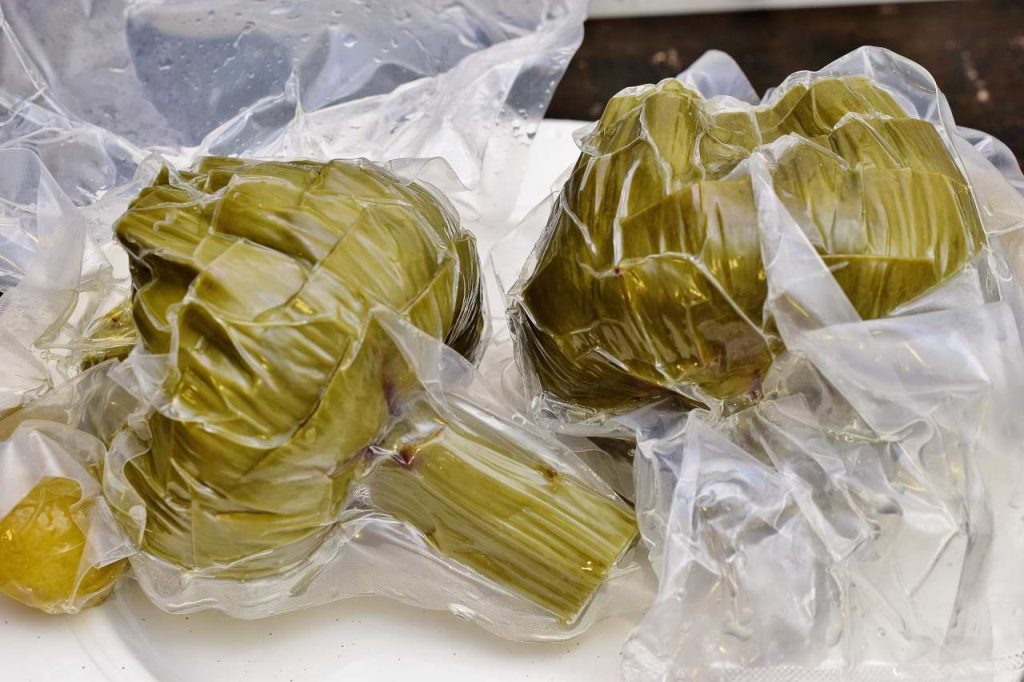
Artichokes take a long time even by sous vide standards, and the crisp/tender approach is inadvisable. They are also almost impossible to test for doneness while they are in the bag. If you want to use sous vide to process whole artichokes, use scissors to trim off the sharp points of the leaves, cut off the top, and seal in a heat rated bag with a wedge of lemon, lime, a splash of vinegar, something acidic to help prevent darkening of the weed. Here is the basic model:
183 F/84 C for at least 4 hours.
As long as artichokes take to cook, they are just as bad when they are overcooked as they are when they are under-cooked. If they are boiled or steamed for too long, they fall apart. This is is okay as long as you are the only one who sees and/or eats the finished product. Sous vide processed artichokes are extremely unlikely to overcook because there is no friction or jumbling about in the bag. Four hours seems like a long time for a vegetable, but what’s the rush?
Artichokes are great for parties; a healthy alternative to chips and dips yet equally as communal and festive. It’s easy enough to take advantage of the appearance of the vegetable that looks like no other.
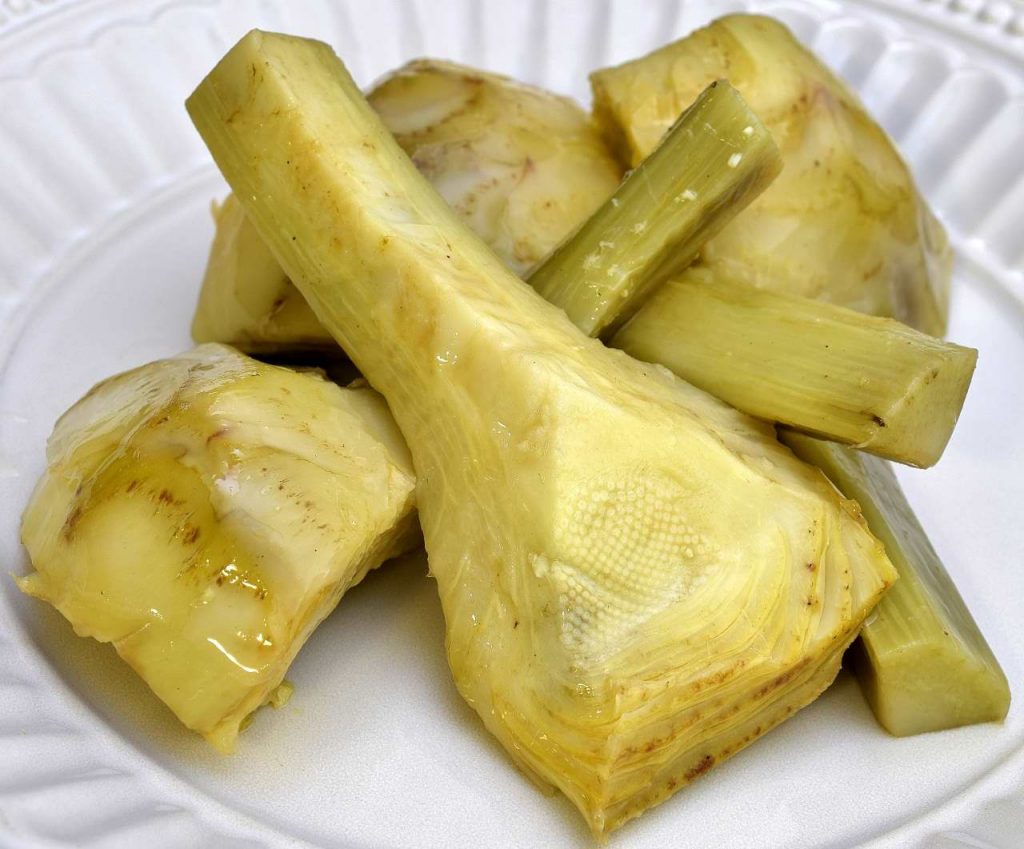
Once processing is completed, you can counter cool the package for a few minutes–traditional models frequently serve artichokes at room temperature, sort of that antipasto styling. Of course, you can cold shock them in ice water until they achieve 70 F/21 C and refrigerate at 40 F/4 C for at least two weeks. Prepared by traditional means, artichokes should be consumed within three days. They really don’t keep that well unless they are pasteurized and sealed.
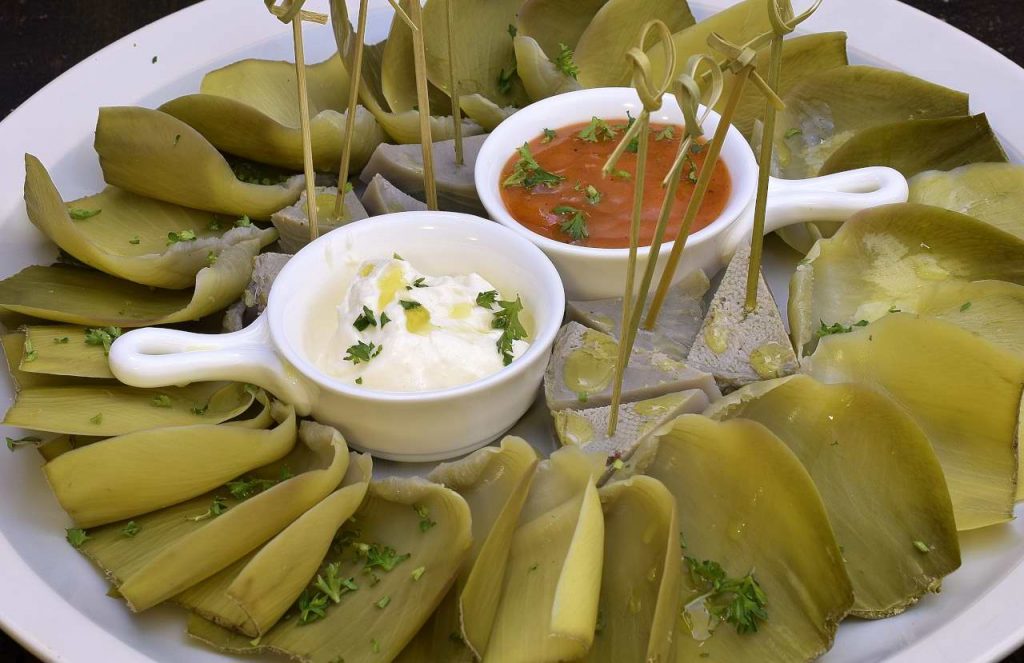
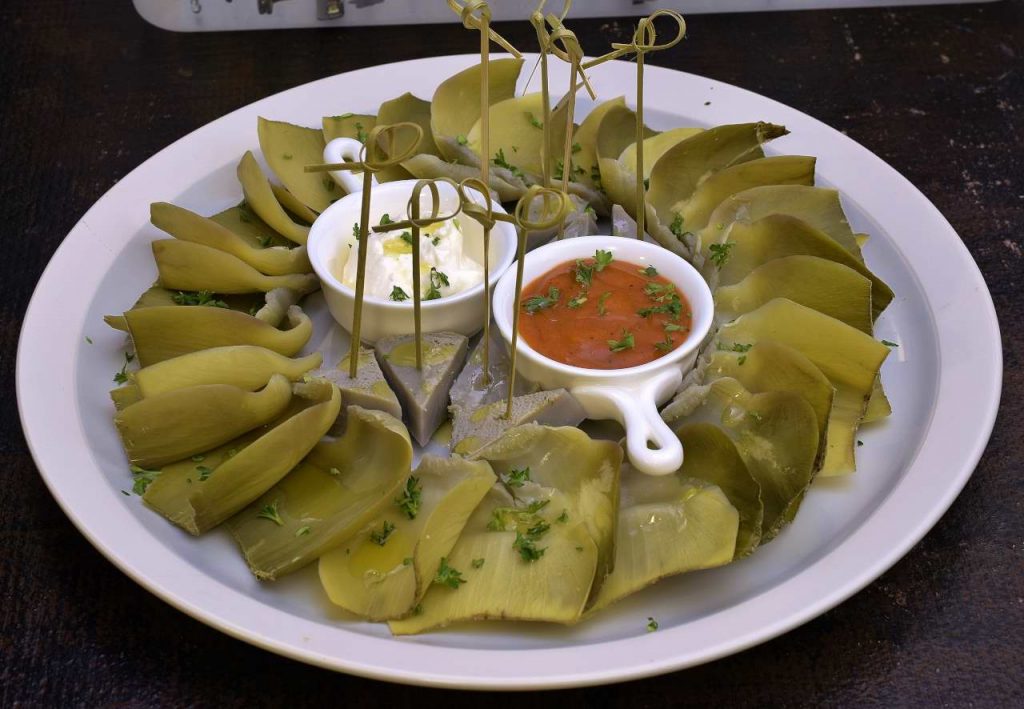
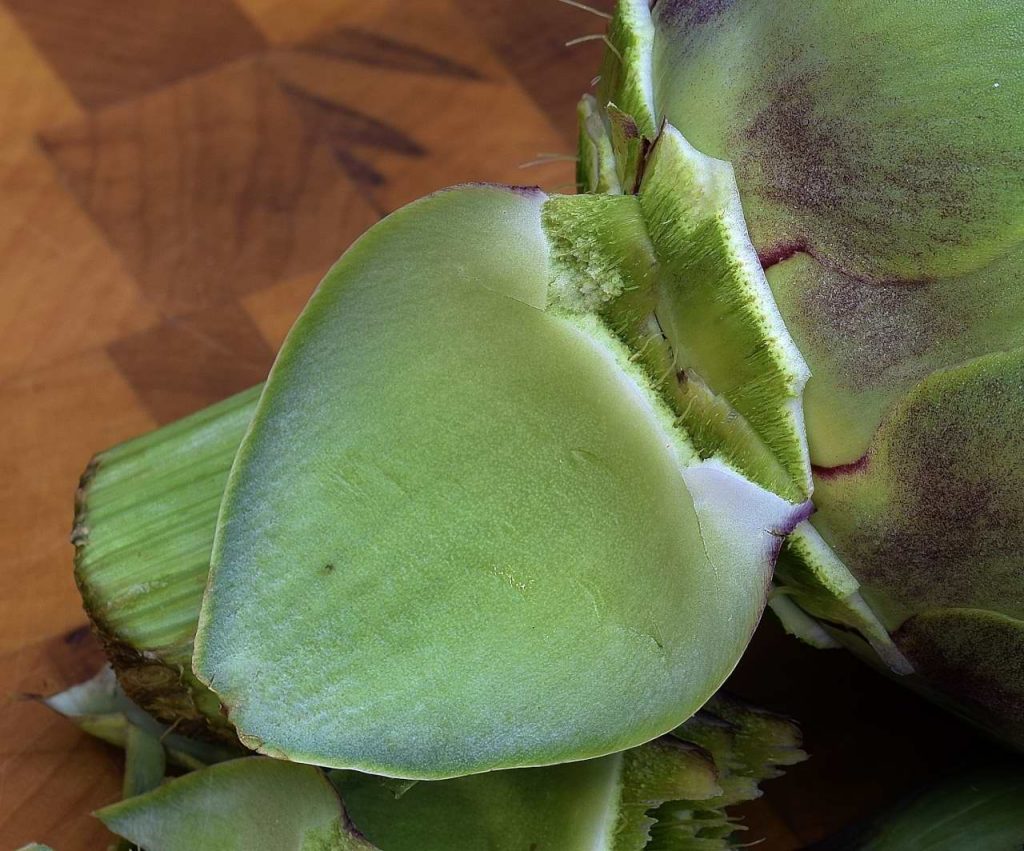
In the picture above, we simply worked our way around the artichoke, pulling off leaves towards the stem until we got close enough to the center to scrape out the choke with a spoon. Then it’s a simple matter of arranging the leaves to look like a flower. Cut the heart into eighths and skewer them into the middle. Garnish with a dip cup of mayo and a dip cup of the tomato emulsion outlined above and below.
Something you will never see anywhere else
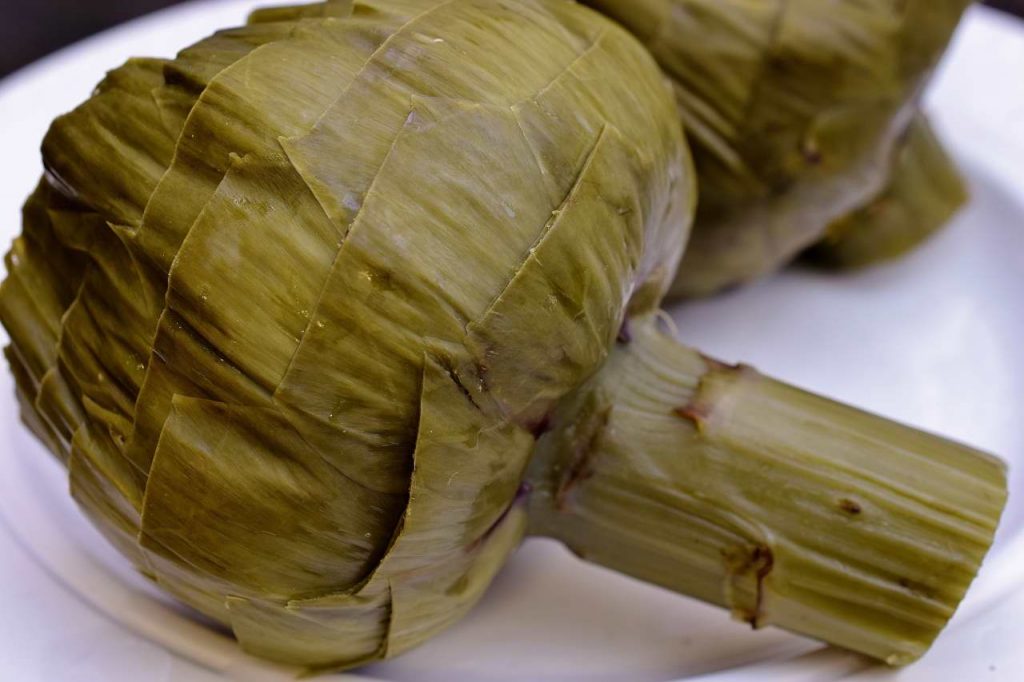
Remove all the leaves, pulling down towards the stem so you retain as much flesh as possible. Remove the hairy choke from the heart like we did above and dust everything lightly with flour. Combine 1 egg with 2 oz/60 ml of water and a Tablespoon of flour–mix well. Dip the tender half of the leaves in the egg mixture and then into bread crumbs. Deep fry at 350 F/176 C for about two minutes–don’t crowd the pan. Use a slotted spoon to lift out the leaves.
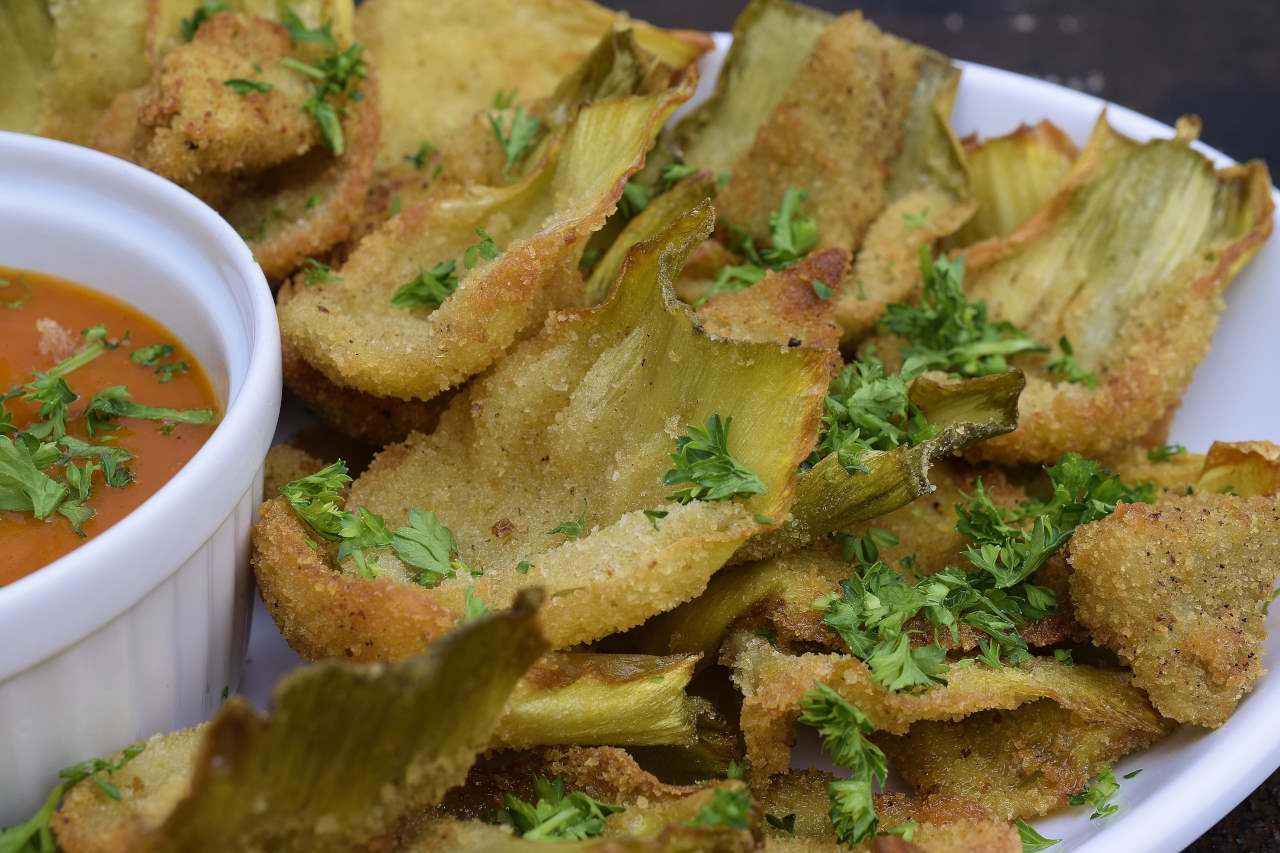
This leaves the “handle” bare as you can see in the picture above, something to grab on to.
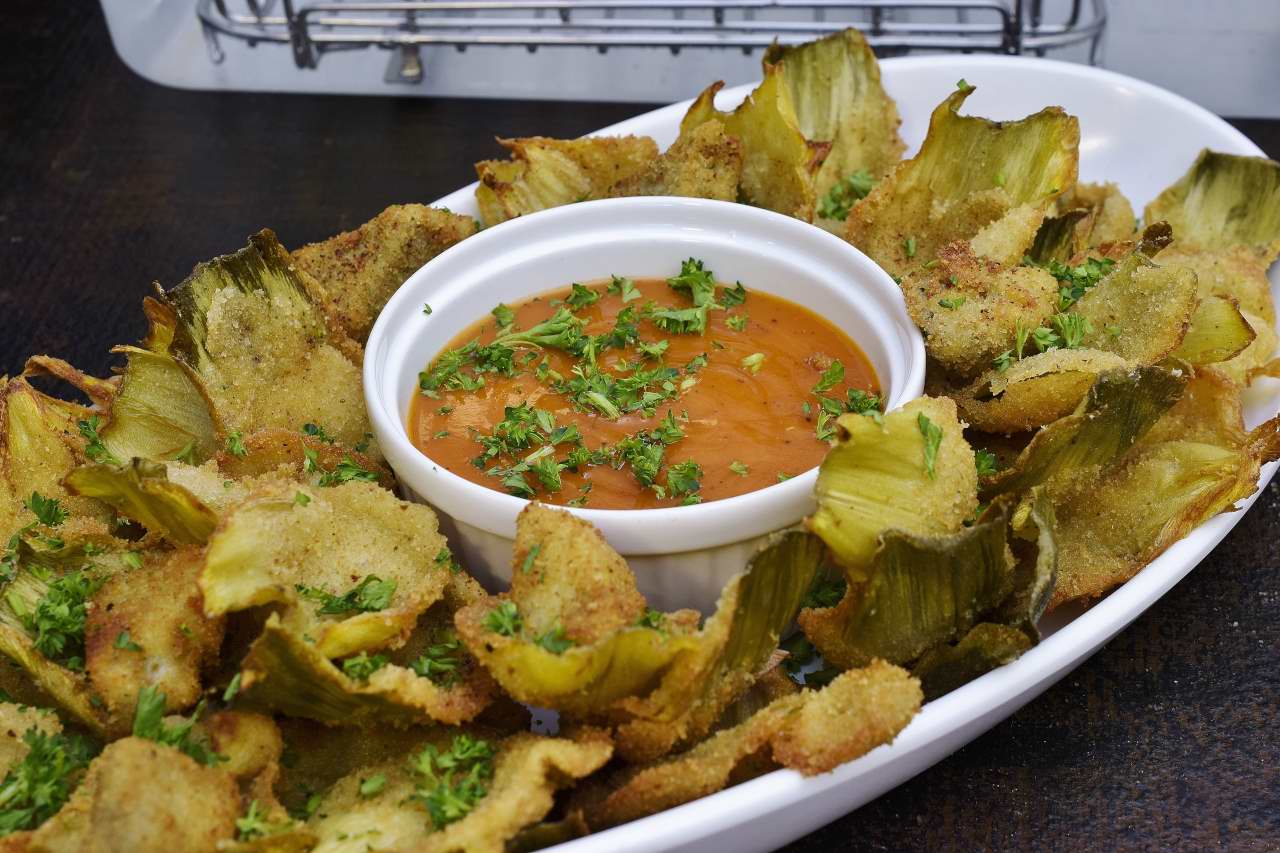
Then, you get this–we served this with some of what they used to call “French Dressing,” which is really a sweet and sour emulsion with ketchup as the base and oil as the dispersed phase.
Sweet and sour tomato emulsion
Ketchup, 2 oz/60 ml.
Vinegar, 1 oz/30 ml.
Corn syrup, 1 oz/30 ml (or 1 Tablespoon sugar).
Frank’s Pepper Vinegar, 1 Tablespoon.Vegetable oil, 4 oz/120 ml.
Note: Use a stick blender or blender to combine all the emulsion ingredients except the oil. Drizzle in the oil in a steady stream. It’s as simple as that.
A vegetable without a season
If you’re on the west coast, and there is just enough rain but not too much, and some fog that is otherwise inconvenient, you may find jumbo artichokes at $2/each for a few weeks out of the year. Rather than cook them whole, if you are willing to test your patience, you might try trimming them raw.
I hate that noise
One of the many disciplines that were cruelly pounded into us when we were aspiring chefs in the early days of California cuisine was how to properly trim an artichoke. Once we left school, we promptly and gladly abandoned all that tricky stuff. Soon, we learned to hate Alice Waters–she had cavalierly exposed how lazy we were all becoming. I never did like doing the artichokes if only because of that squeaky racket, chilling like fingernails on a chalkboard.
Before Alice came along, if we wanted to showcase artichokes on menus, we just bought the bottoms and hearts in a can as if they were just as good. A canned artichoke is a disappointing thing, not even worth bothering with.
And the Oscar goes to…
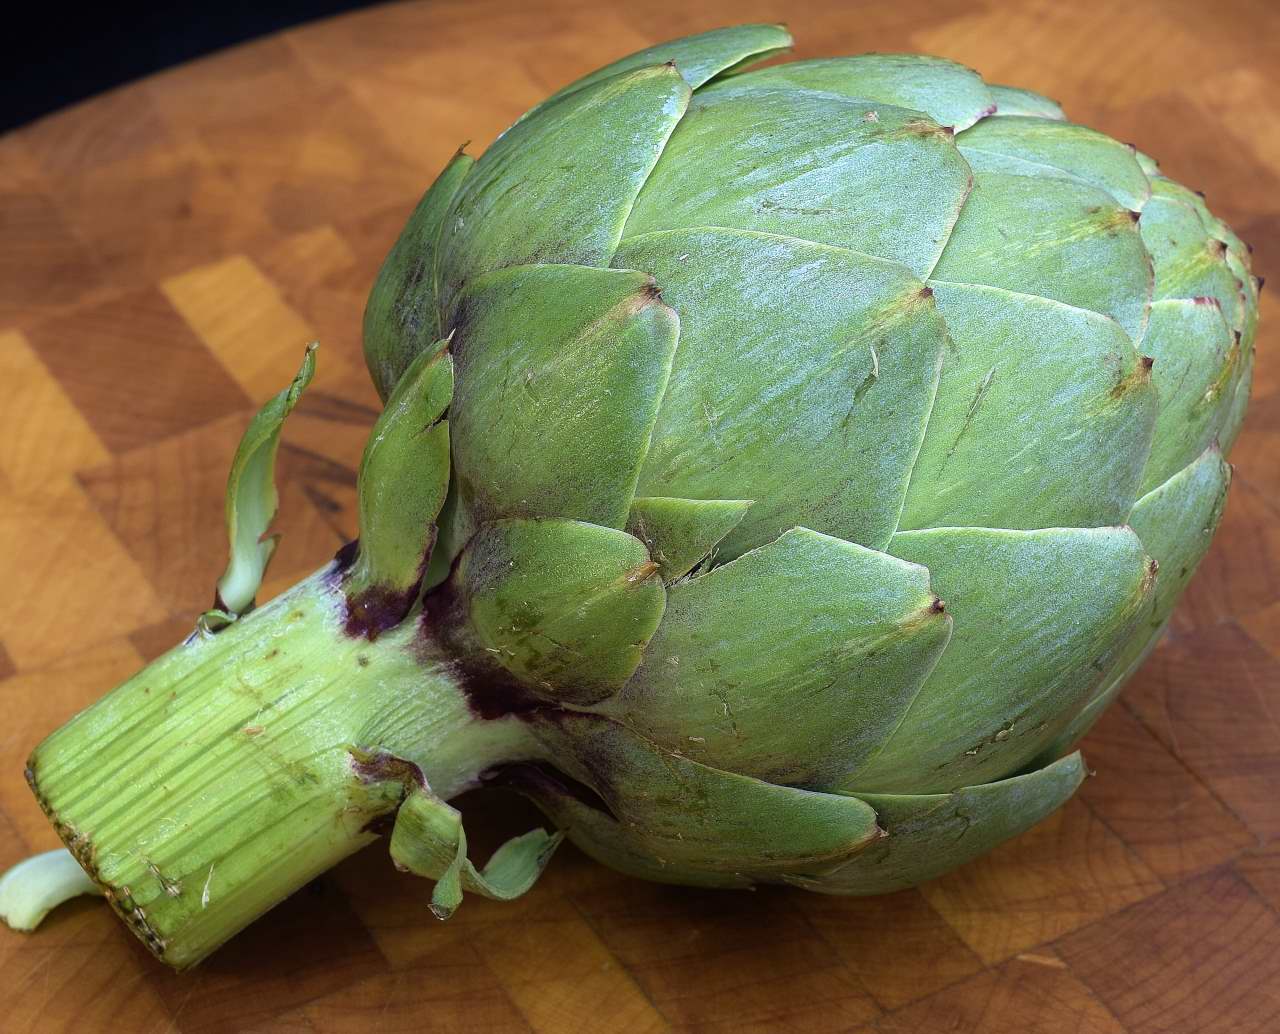
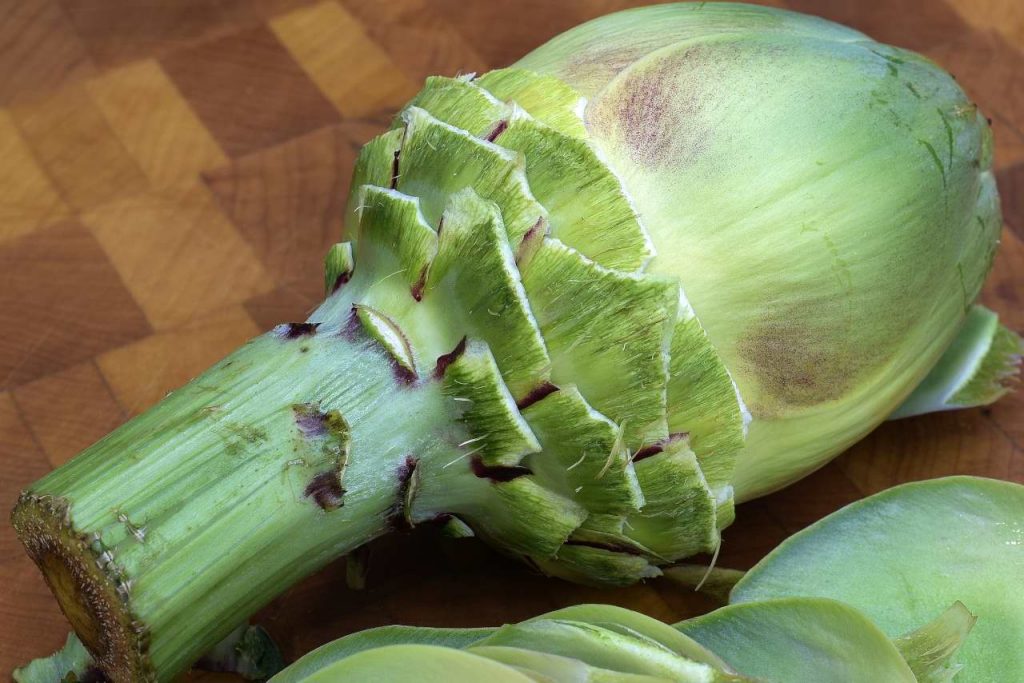
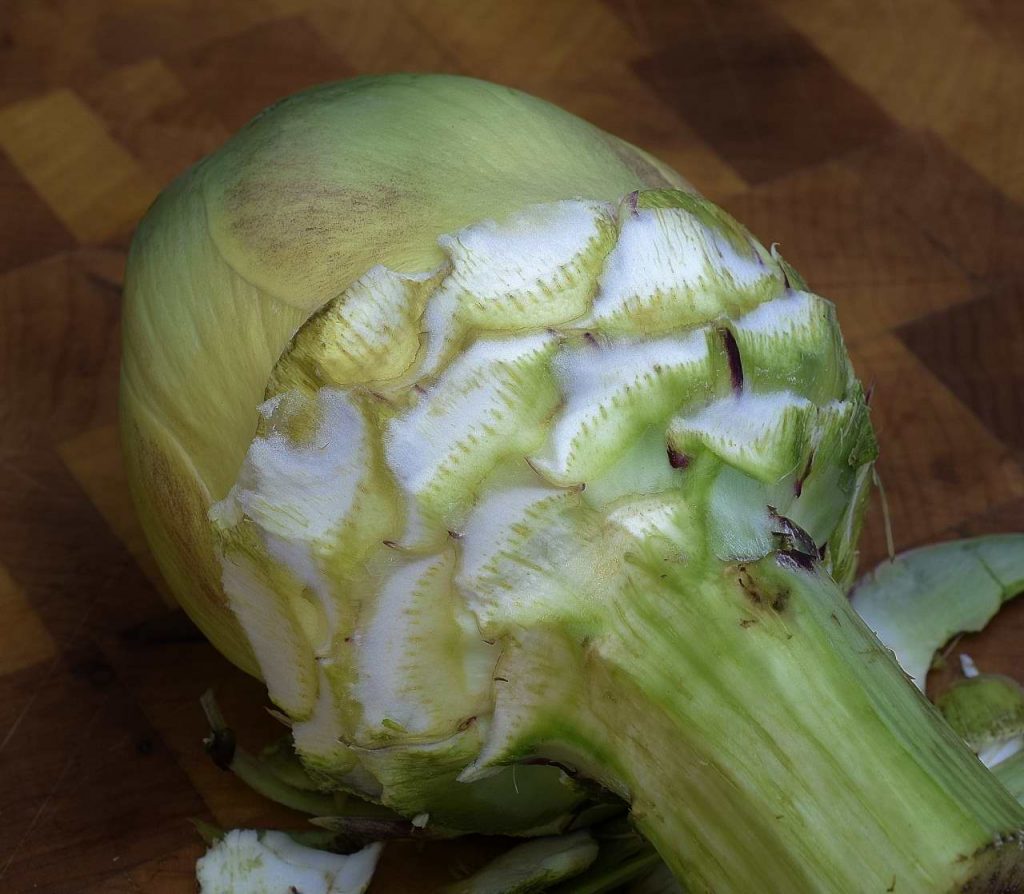
I looked on youtube for explanatory videos to see if I could avoid doing a real time shoot of the process. There are lots of them with cool jazzy Brubeckish music, but they all seem to contain some step that I find confounding or even offensive. I saw one where the otherwise highly skilled chef just roughly broke off the stem as if leaving that jagged edge was an okay thing to do. I found myself screaming at the screen “YOU KNOW, IF YOU PEEL THAT STEM LIKE A BANANA, THERE’S A LOT OF TASTY FLESH THERE!” I don’t think he heard me.
They cut off the top half of the artichoke, right, sure, you pretty much have to. But do you think they bother to even make any effort whatsoever to cut it straight so the thing doesn’t come out looking like a bad example of cubist sculpture? Most of them don’t nail it the first time, even in the video, so they have to take supplemental swings at it later, hack, hack, squeak squeak. Artichokes can do a number on a sharp knife. What bugs me is that they cut off the top of the artichoke FIRST. More on that later.
You’re tearing me apart
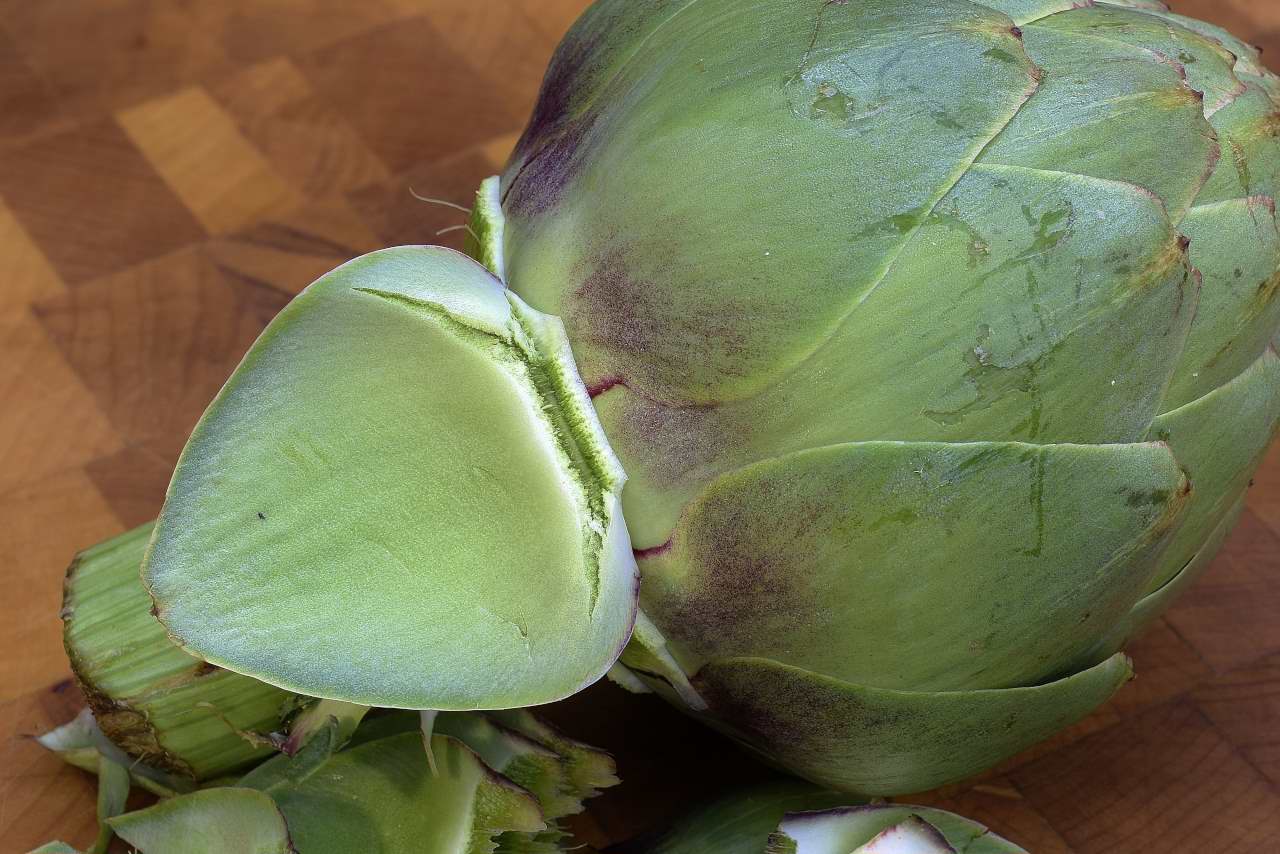
As expected, they tell you to remove the tough outer leaves, but they just rip at them while I cringe with despair. Yes, remove the outer leaves.
Stop and think for a minute. If you fold them back as if you were turning them inside out and pull DOWN on them towards the stem, they will leave behind that little bit of tender flesh at their base instead of a jagged acne scar in the rapidly shrinking artichoke.
One of the overly joyful demonstrators ripped off a few of the leaves and then just started hacking with a chef’s knife to remove the tough outer green. There aren’t many things that can make me cry.
Relax. Leave the knife on the table for now.
Yes, you will eventually have to sort of crudely chip away at the tough green surface.
At least try to acquire a reasonably sharp paring knife so you can show a little respect to the artichoke’s creator.
Okay, NOW you can cut off the upper half. Artichokes start turning black from the moment you rip into them, so why expose all that flesh any sooner than necessary? I also think it’s easier after you have removed a bunch of the weedy stuff.
Either way, you just keep chipping, or rather whittling away at the dark green husk.
And you do the same thing with the stalk, rather than just clumsily break it off and toss it. I’ve seen this done with a vegetable peeler, but I still prefer the paring knife.
Sure, there’s waste, we’re not really trying to make the most of the artichoke. A lot of guys “boil up” this part into a stock to make soup. I find artichoke stock to be, well, underwhelming.
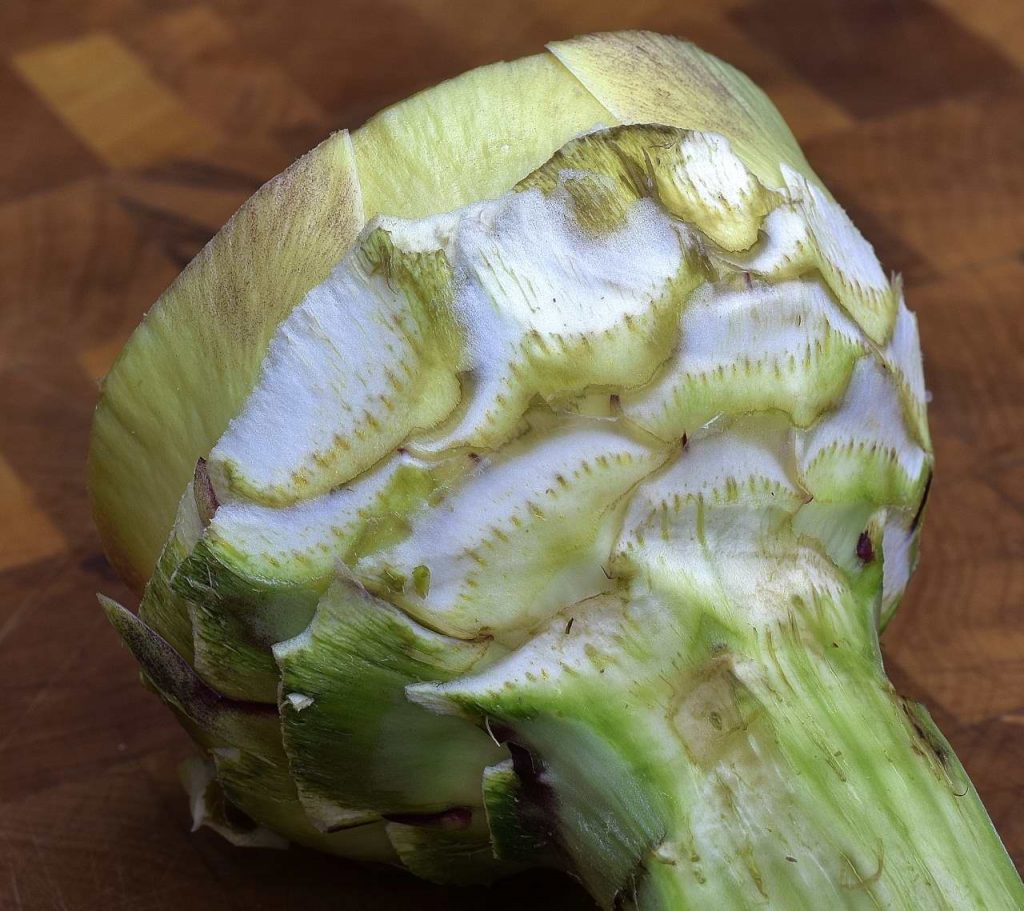
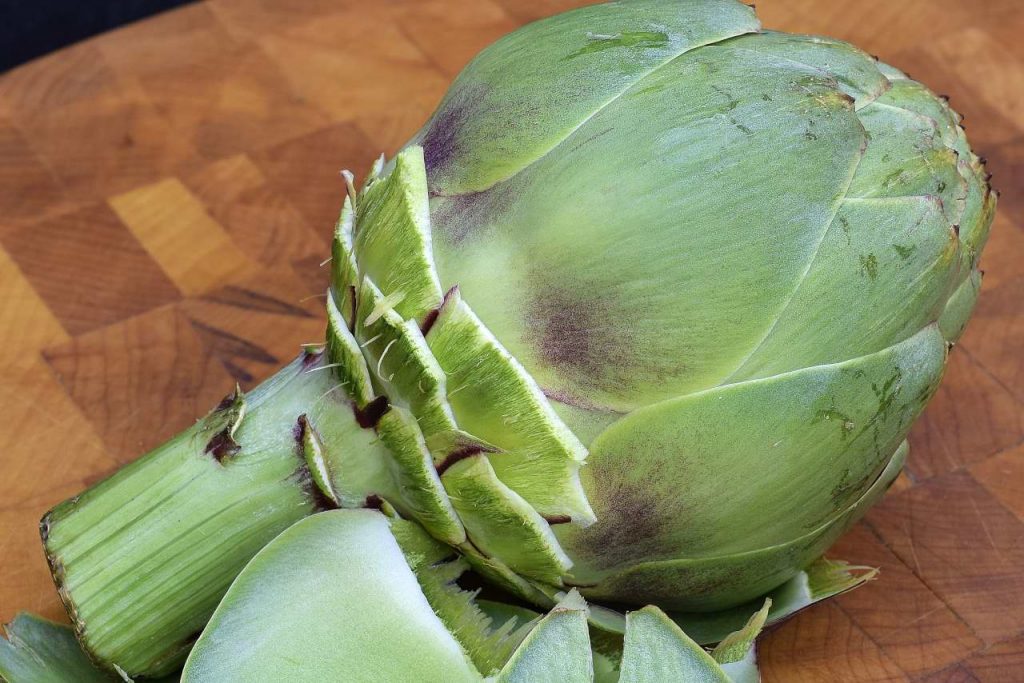
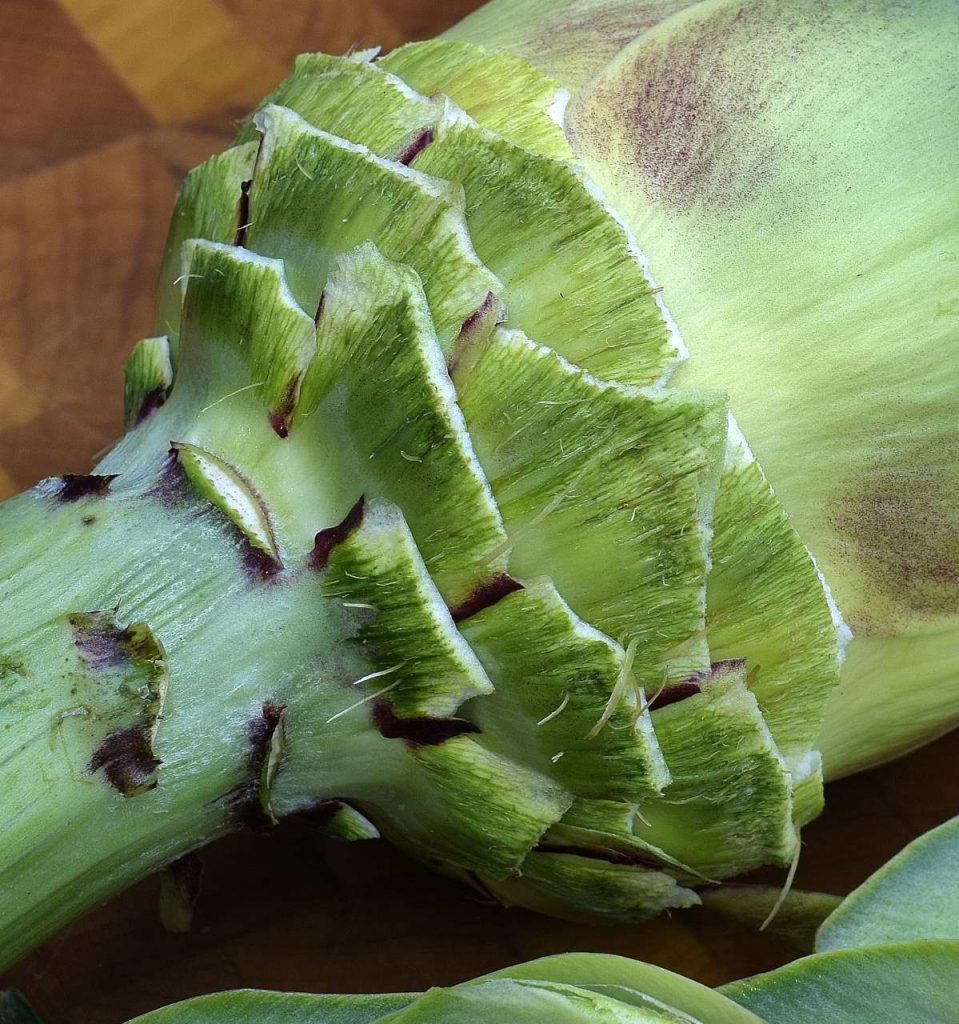
Eventually, you get this.
Above: you can see the beginning of the hairy choke. It is possible to dig it out to make the artichoke bottom/bowl, but that is definitely the hard way. It’s much easier after you cook it, but a whole artichoke bottom is pretty big, too big for our purposes. We will do this other thing.
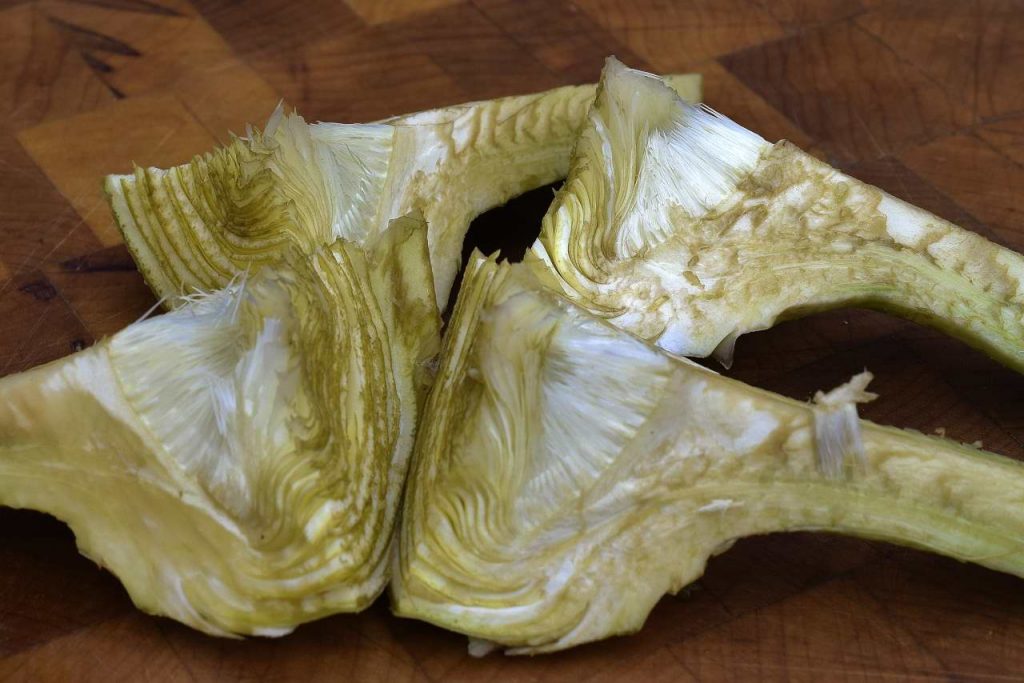
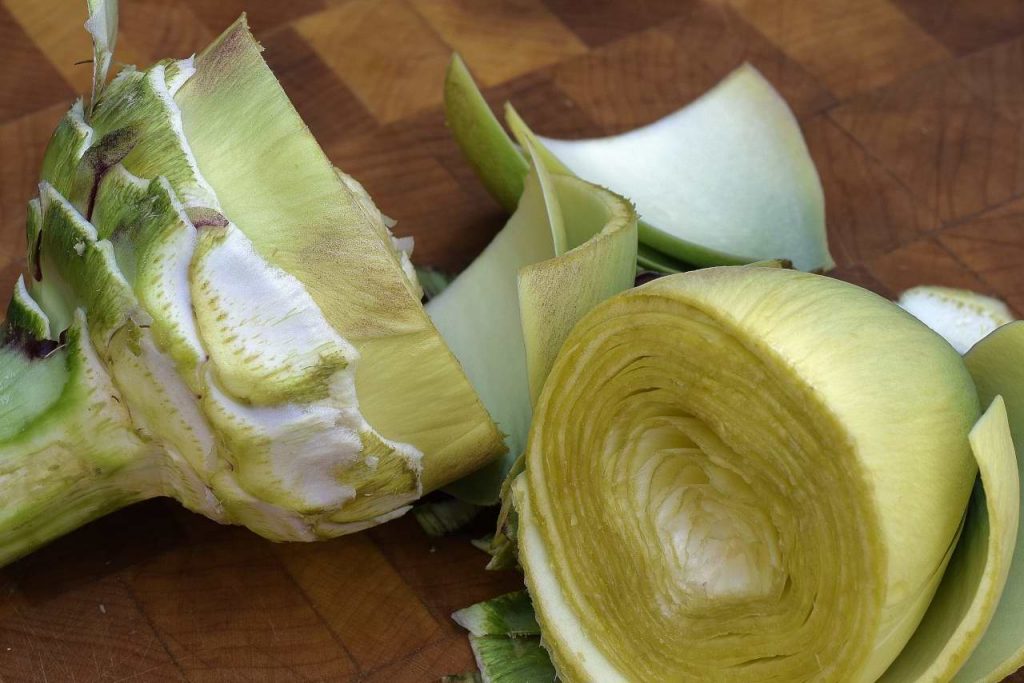
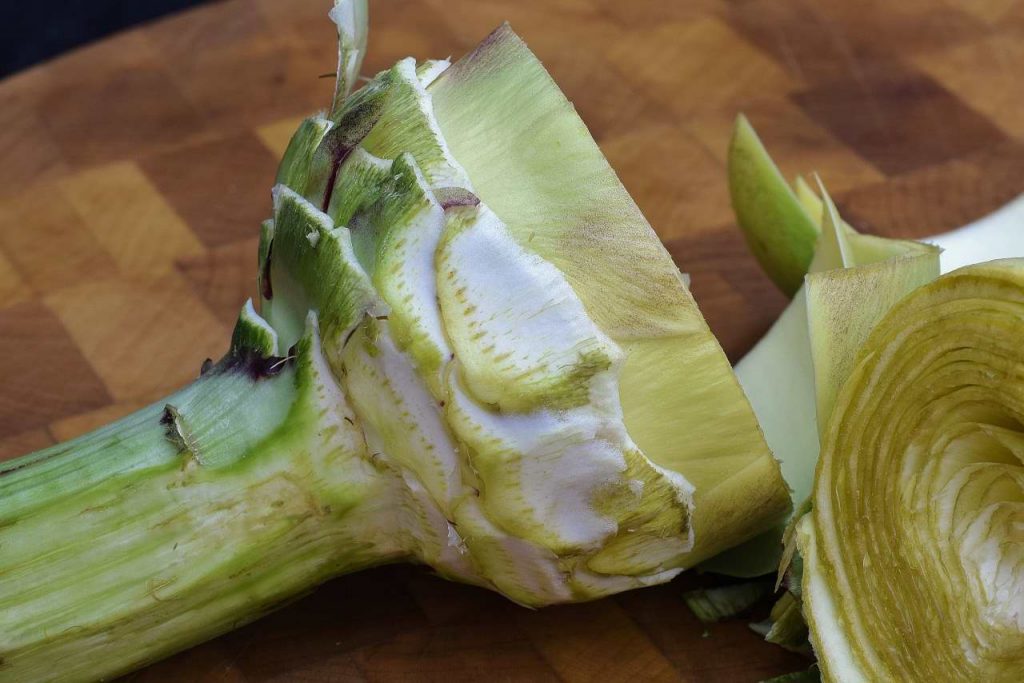
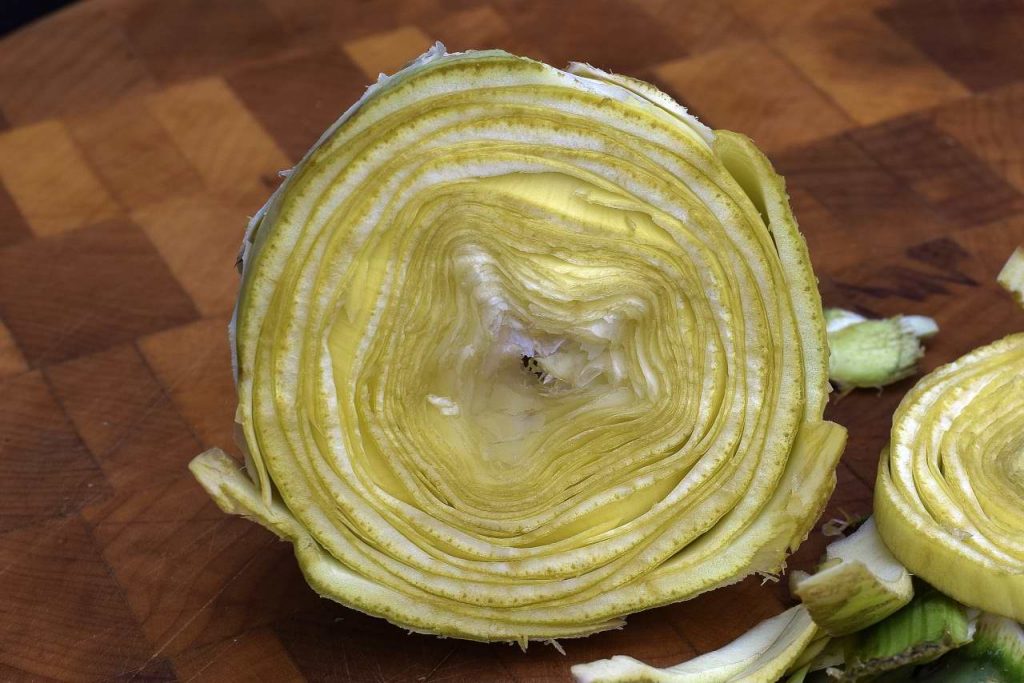
I cut the artichoke in quarters, taking care to preserve the stem on each piece.

Then you (or I) use the handy paring knife to remove the choke.

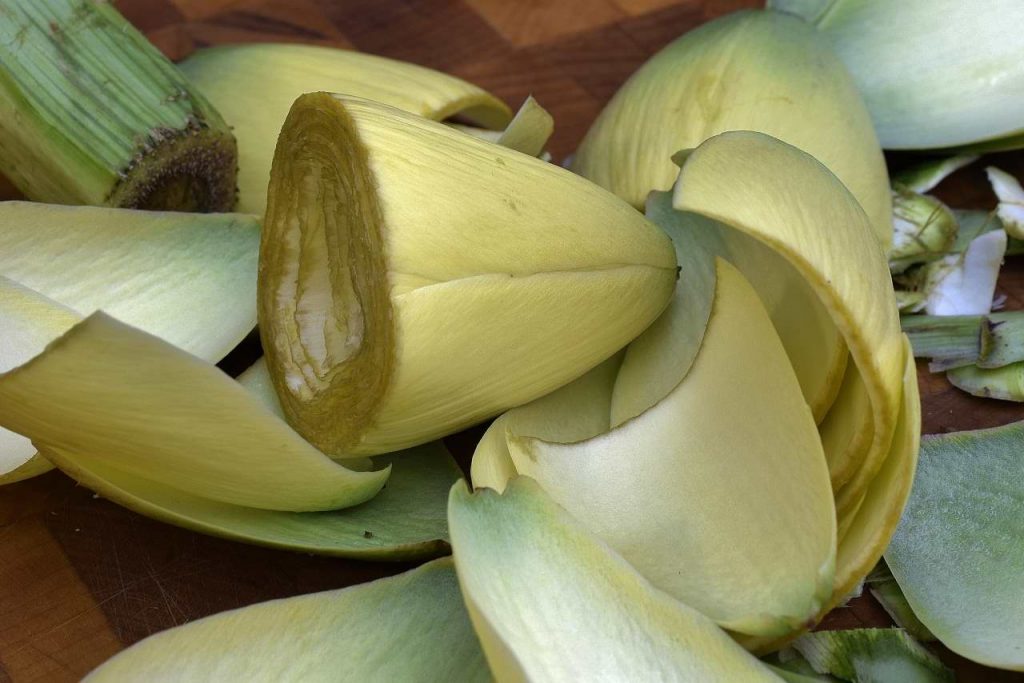
You can see that it is discoloring already, but the lemon in the bag will at least help arrest that effect.
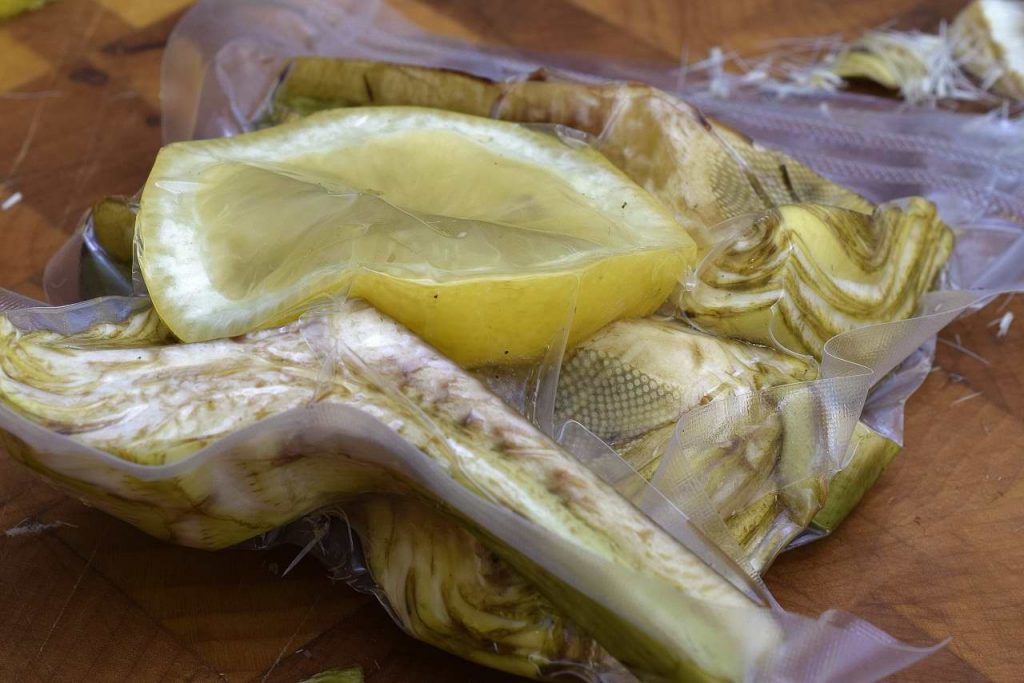
Vacuumed and into the tank, 183 F/84 C X an hour.
 I will stipulate that this is one of those “pick a cool and breezy day recipes” when you are willing to just sort of play in the sand box for most of the day. If people pester you, just ask them if they will help you process the artichokes. That usually makes them go away.
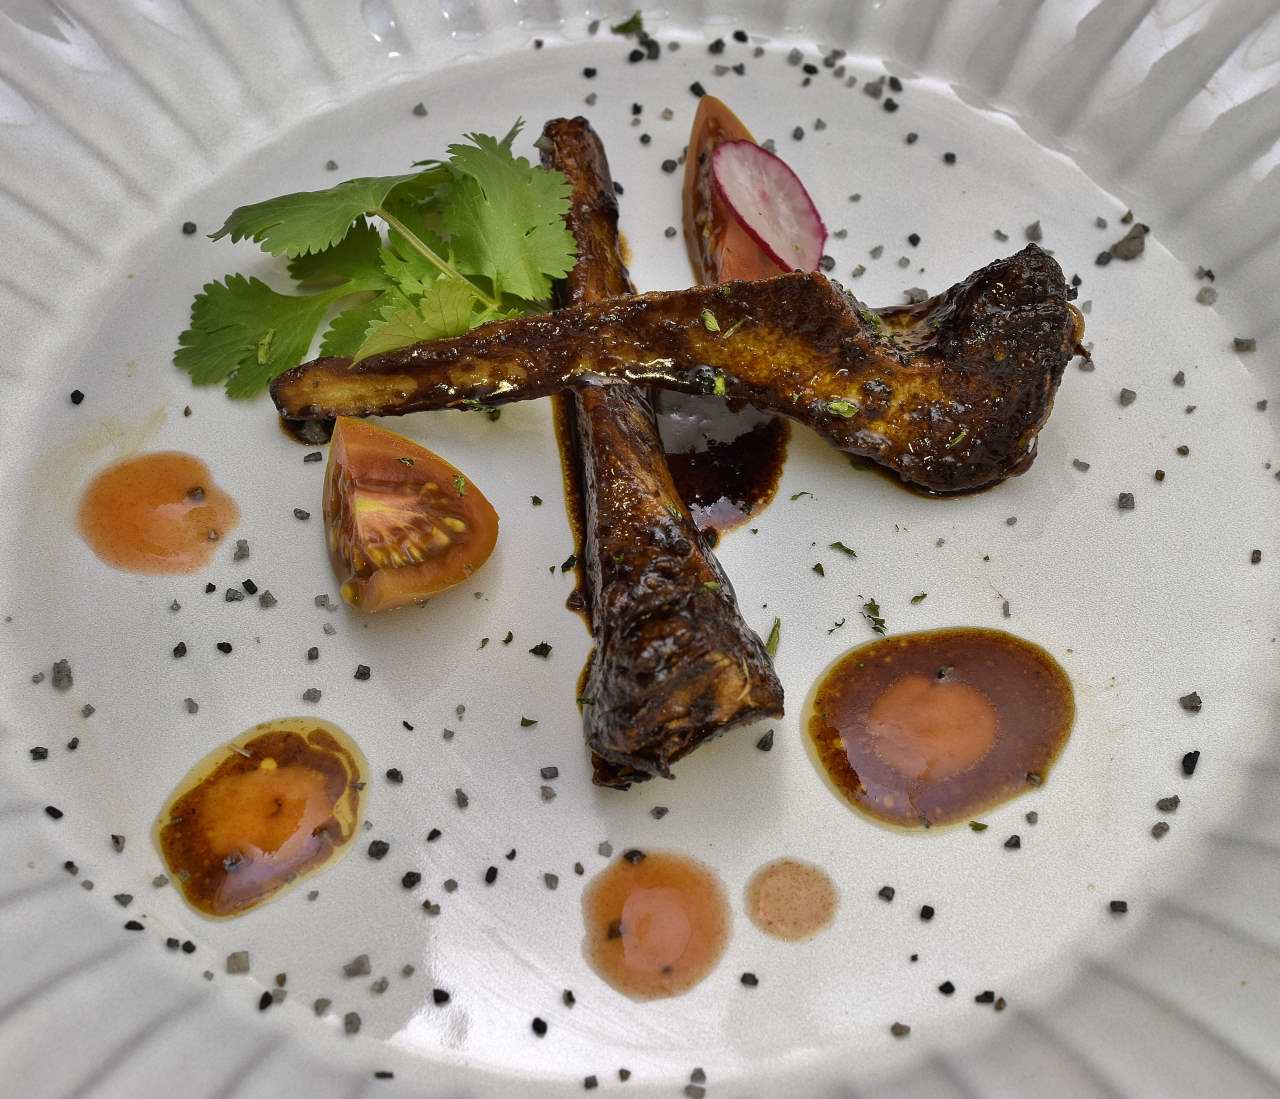
Here’s one
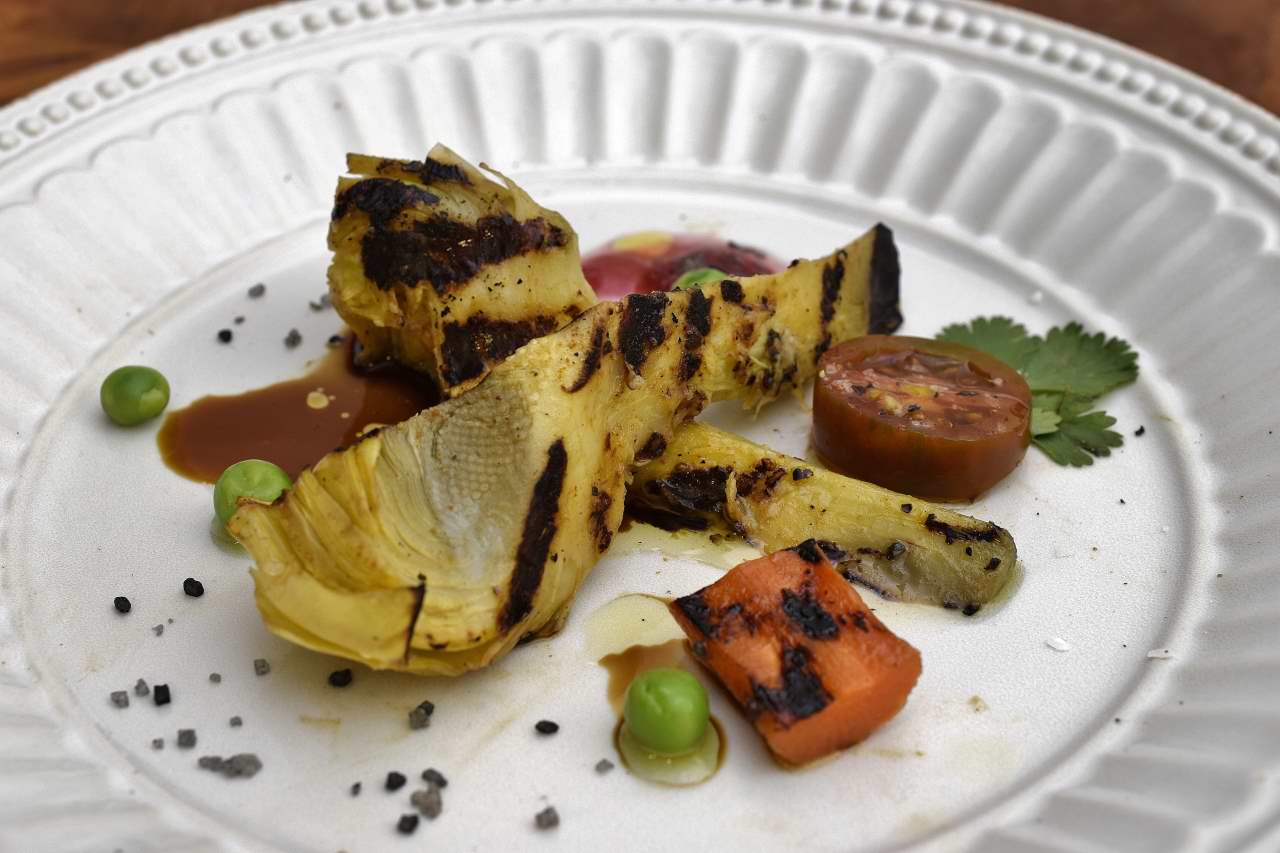
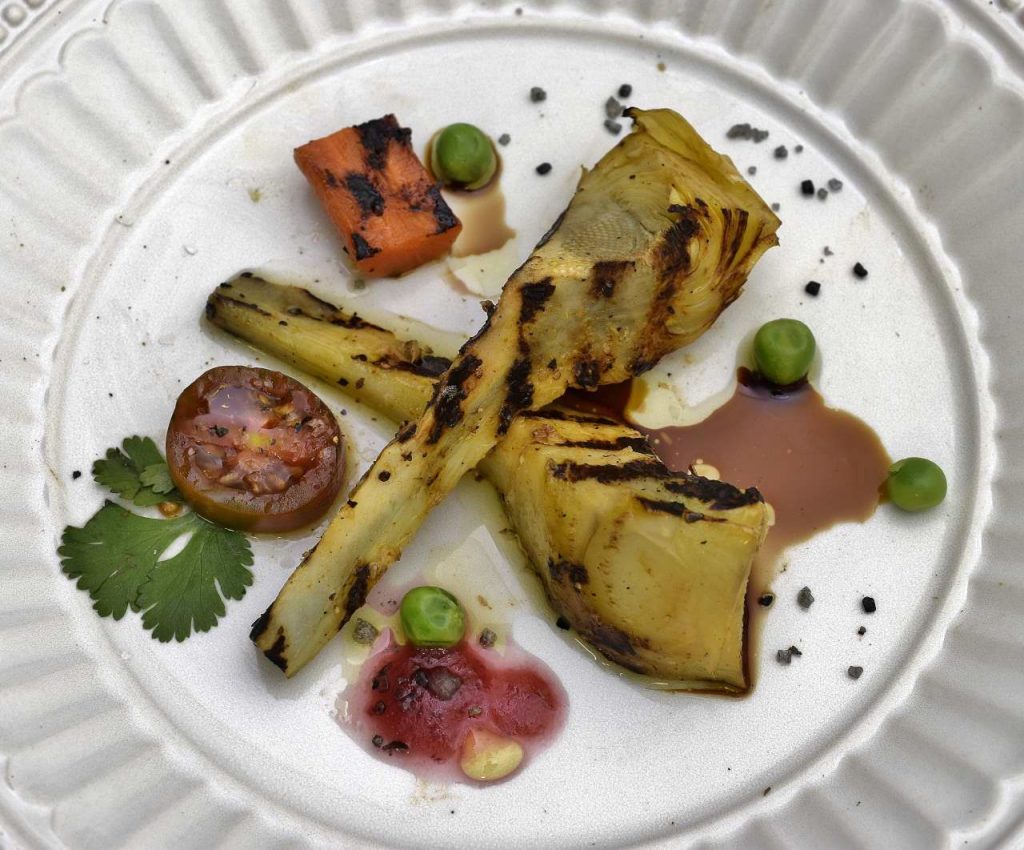
Above and below: grilled it in the cast iron broiler pan. Extra virgin olive oil, balsamic syrup, Hawaiian volcanic salt…cranberry dot…
Here’s another one
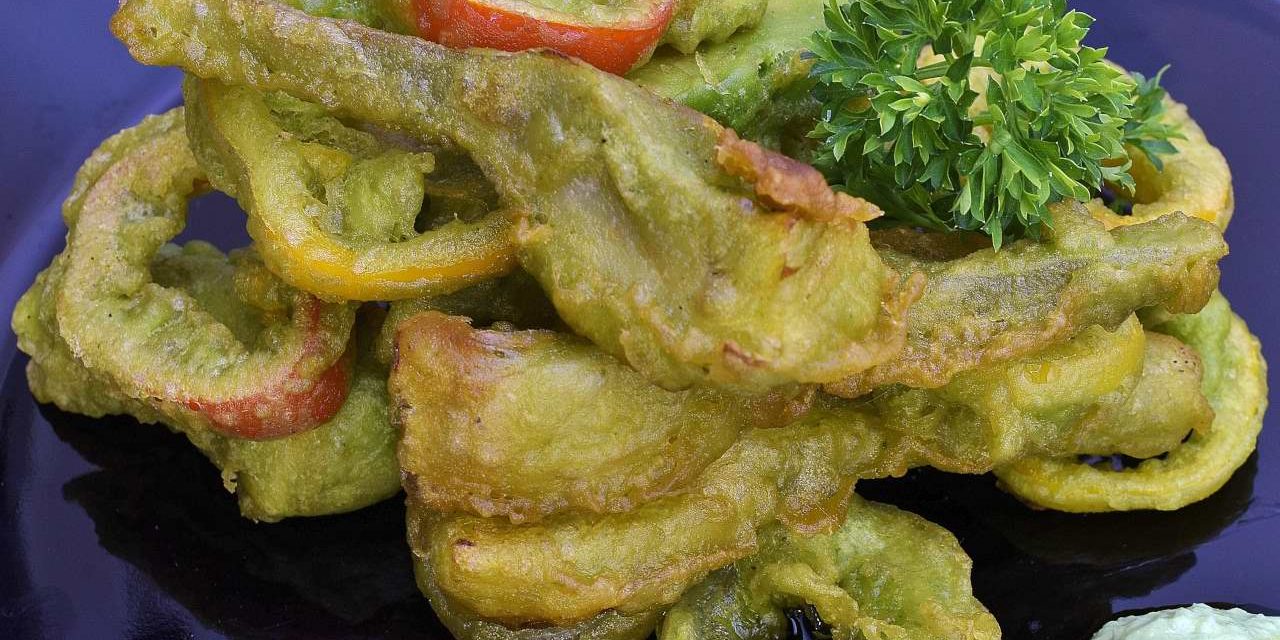
Cilantro tinted tempura batter,
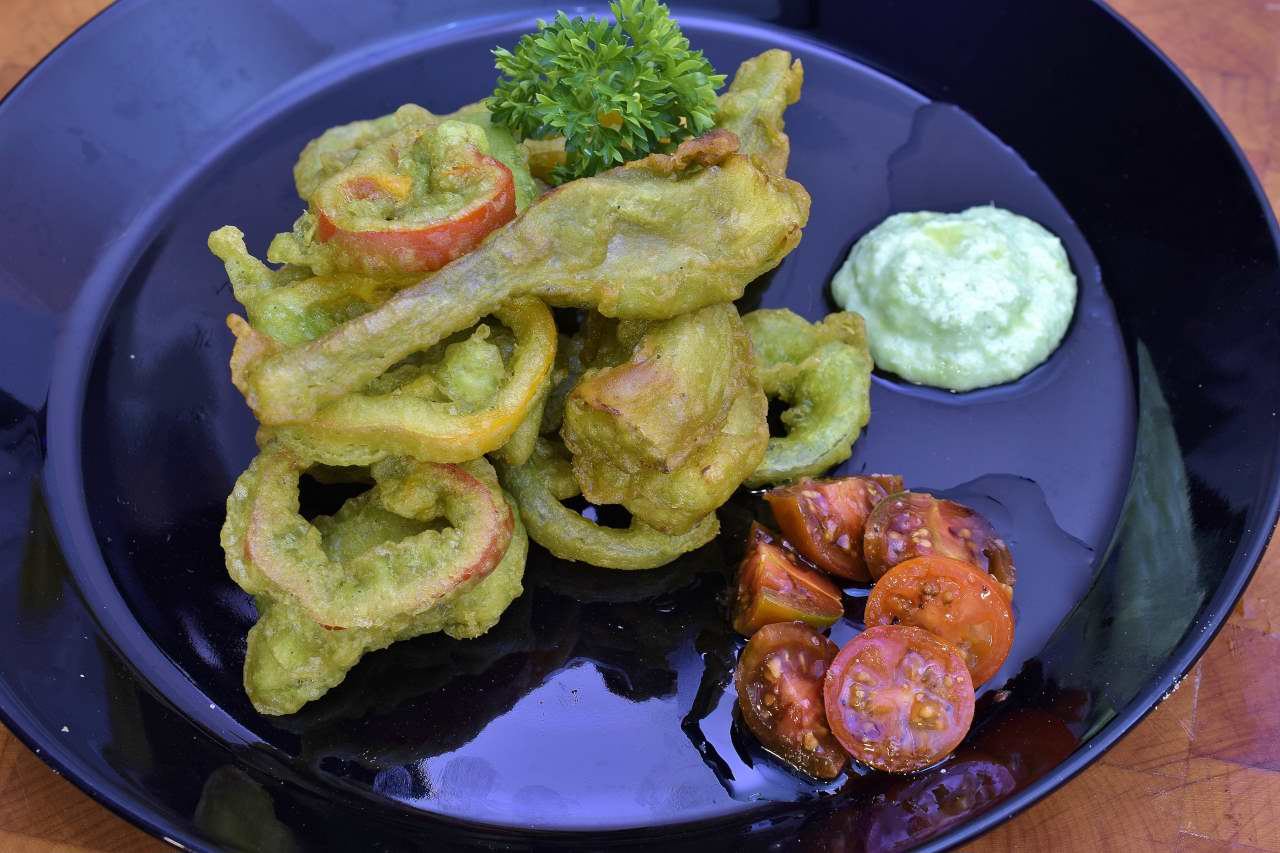
with assorted vegetables and wasabi horseradish…
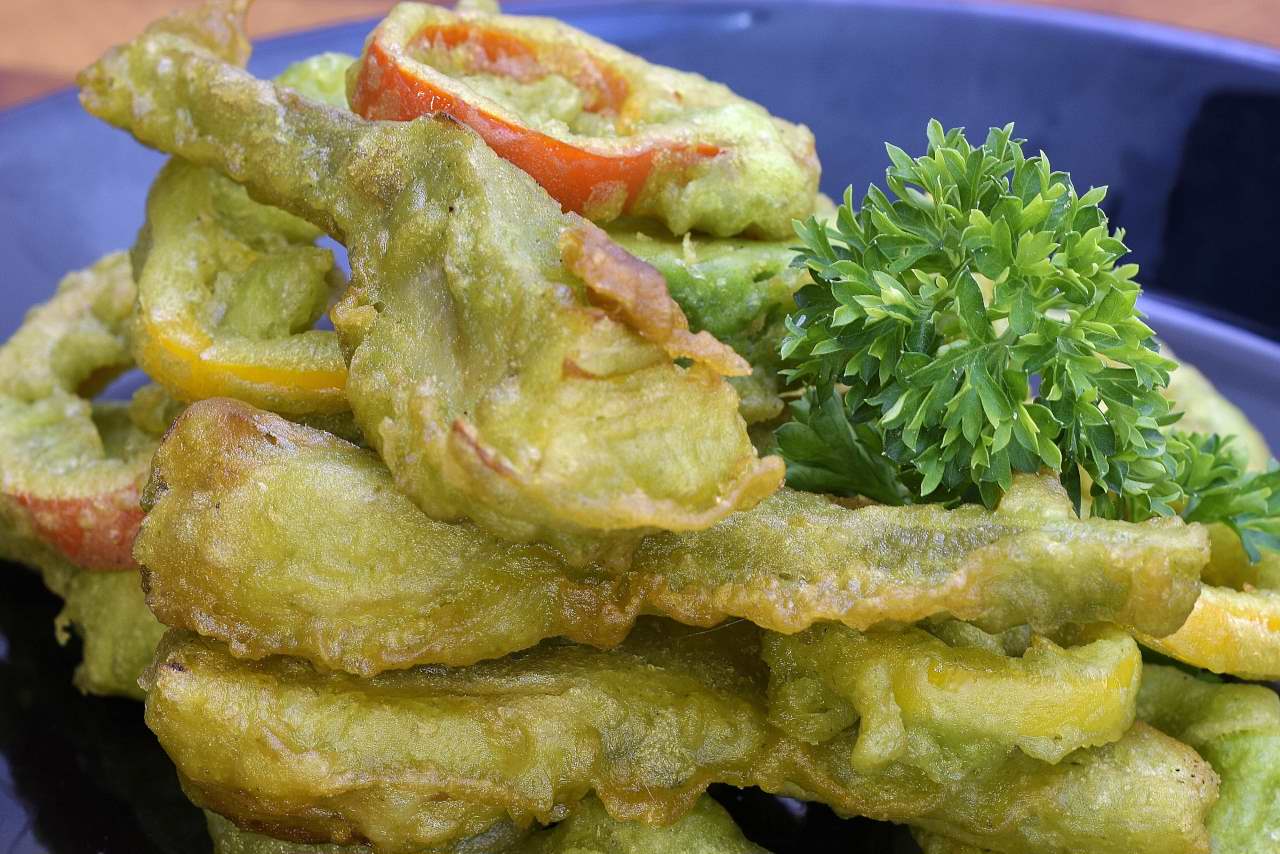
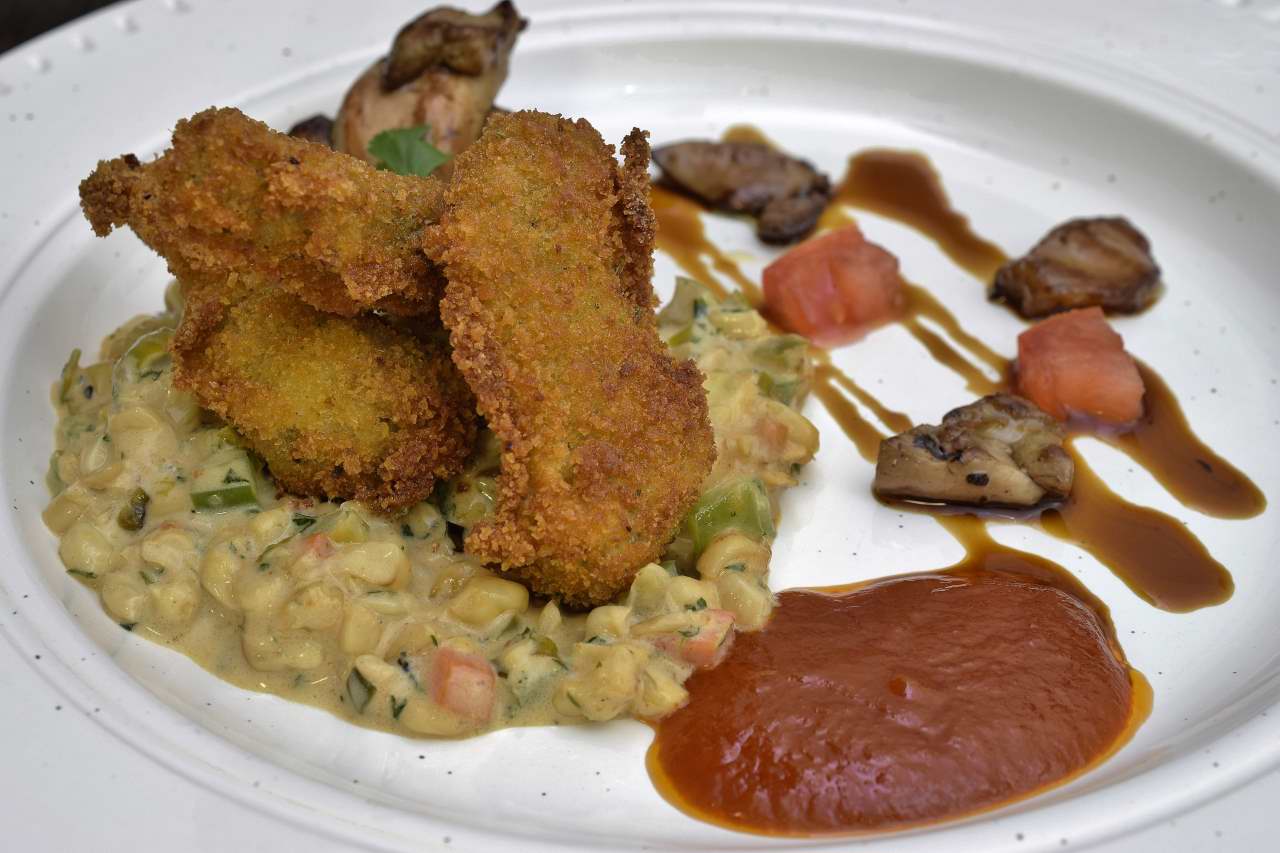
Even without coating, artichokes deep fry pretty well, some enthusiasts do it from the raw state. These I processed, cut into wedges, deep fried naked and then lacquered with demi glace.
“Lacquering” is a modernist term that seems to have worked its way into the lexicon lately. It’s not really new. We used to just call it “dipped in something thick enough to stick.” Little extra demi on the plate with some of Frank’s Pepper Vinegar, cilantro, volcanic black salt, ground black pepper.
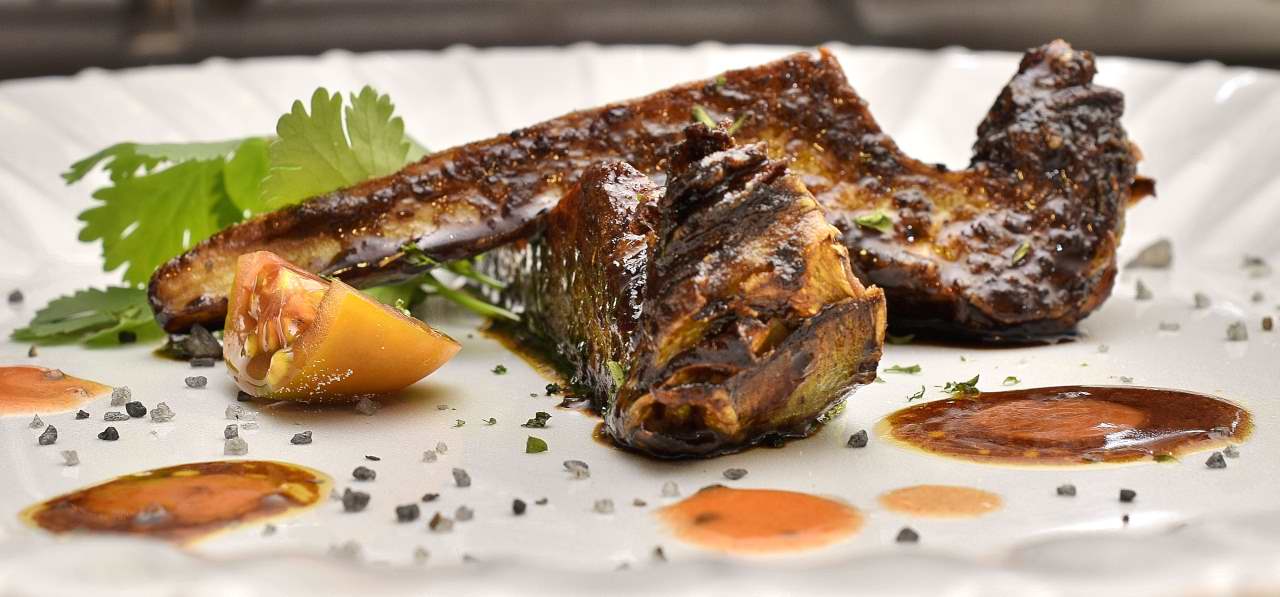
Lacquer? Maybe Semi-gloss.
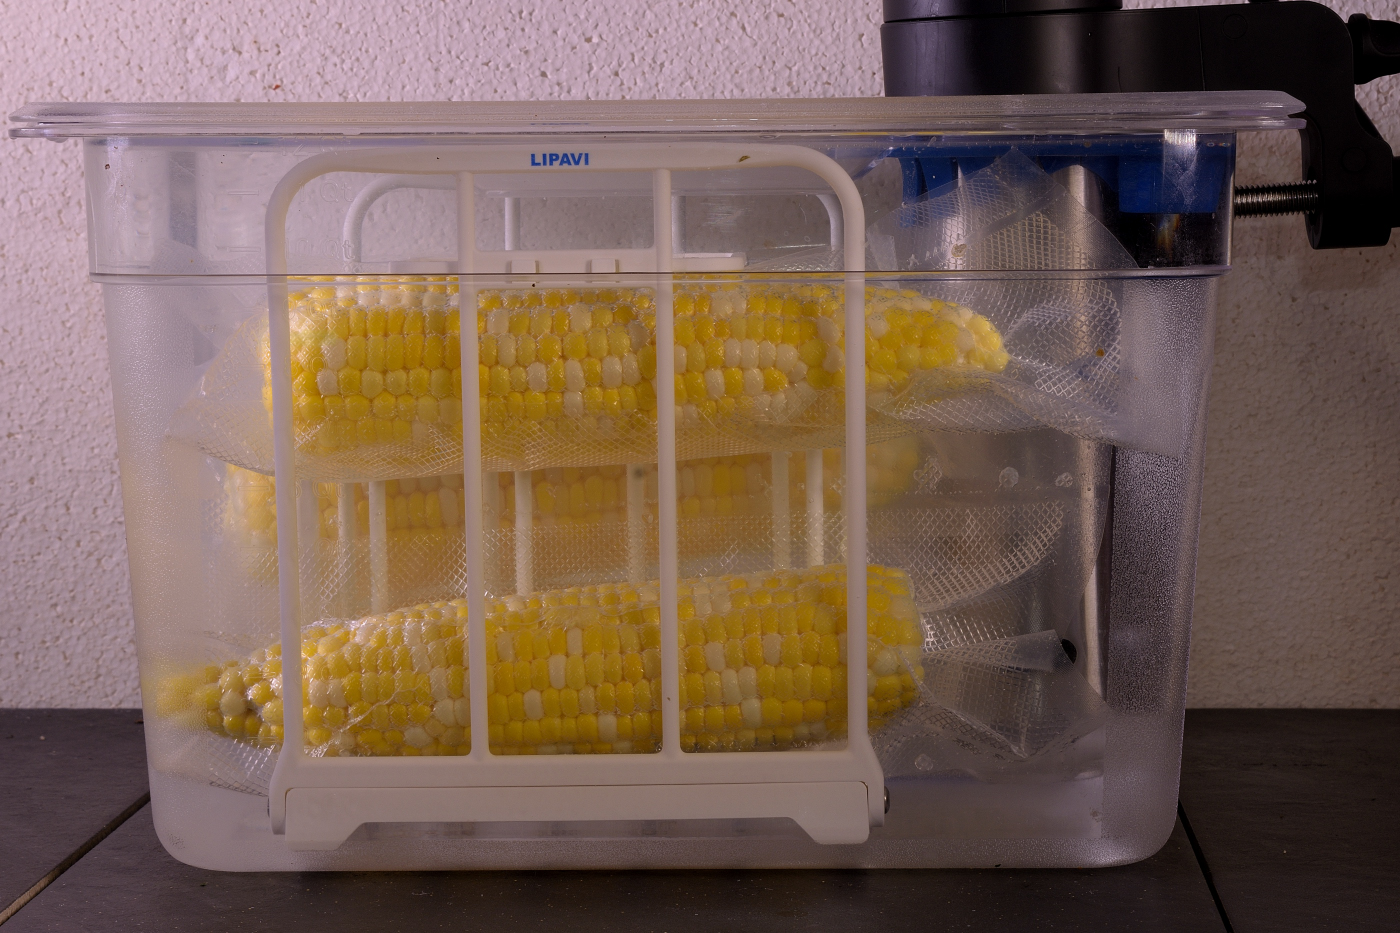
Corn
I host a Facebook sous vide group, linked HERE. When summer rolls around, we start posting pics and recipes for sous vide corn. Some members insist “never mind sous vide, just microwave the corn for two minutes and be done with it.” The more sensible among us embrace the idea that the group is not there to decide if something SHOULD be prepared sous vide, but to decide if it CAN be prepared sous vide. I am usually quick to remind people of that.
Mother denature
Everybody knows that most vegetables need
183 F/84 C
just to denature, so there isn’t much debate there. How long the corn should be processed is another matter. Some people swear that half an hour is perfect every time, works like a charm. Those same people think I’m crazy for leaving the corn in the bath for
Four hours or even longer.
I might be crazy, but that is not why. The point is, it doesn’t matter. You can believe that thirty minutes is enough to cook the corn, but if you get drunk and pass out, it will still be fine after 12 hours or even longer. Corn is basically indestructible.
Beyond that, some of us season the bag, some of us doesn’t. I don’t like exposing raw corn to salt, but I don’t really have a scientific argument for it. There doesn’t seem to be much literature on the subject. We all love butter on corn, but you can put it on before, after, whatever and I don’t know that anybody will be able to tell the difference.
People that know me are not surprised to discover that I put butter in the bag with the corn and then I put more on it later, the shotgun approach. No matter what happens, there will be butter, salt, and fresh ground pepper on my corn, and probably parsley too, thank you very much.
One more thing. Some recipes, and I mean ancient and southern recipes, call for piercing the kernels before cooking. Not one at a time, but like with the point of a knife or a fork run the length of the ear. Skeptics worry that the corn will be dry, but I have never seen or tasted dry corn unless it was popped, and then it’s SUPPOSED to be dry. That’s what the butter is for. Sealed in the bag, there is no more moisture released from the scored ears than there is from the un-scored ones, so there’s that. I do it both ways.
Crispy coated
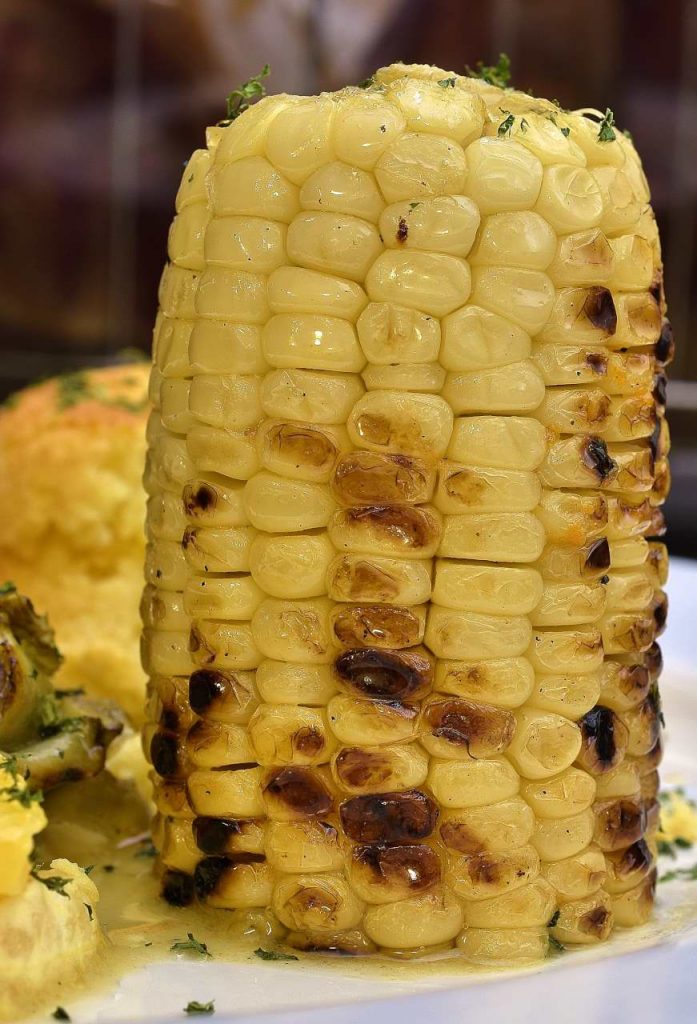
I am going to assume that my gentle readers don’t need me to display pictures of corn on the cob with butter, salt and pepper, I’m pretty sure that’s ingrained in our DNA, it is what it is. There are other things we can do, though. Like we already said, Americans will deep fry almost anything. Corn is no exception.
Melt a stick of butter, or even make a little Beurre Monte
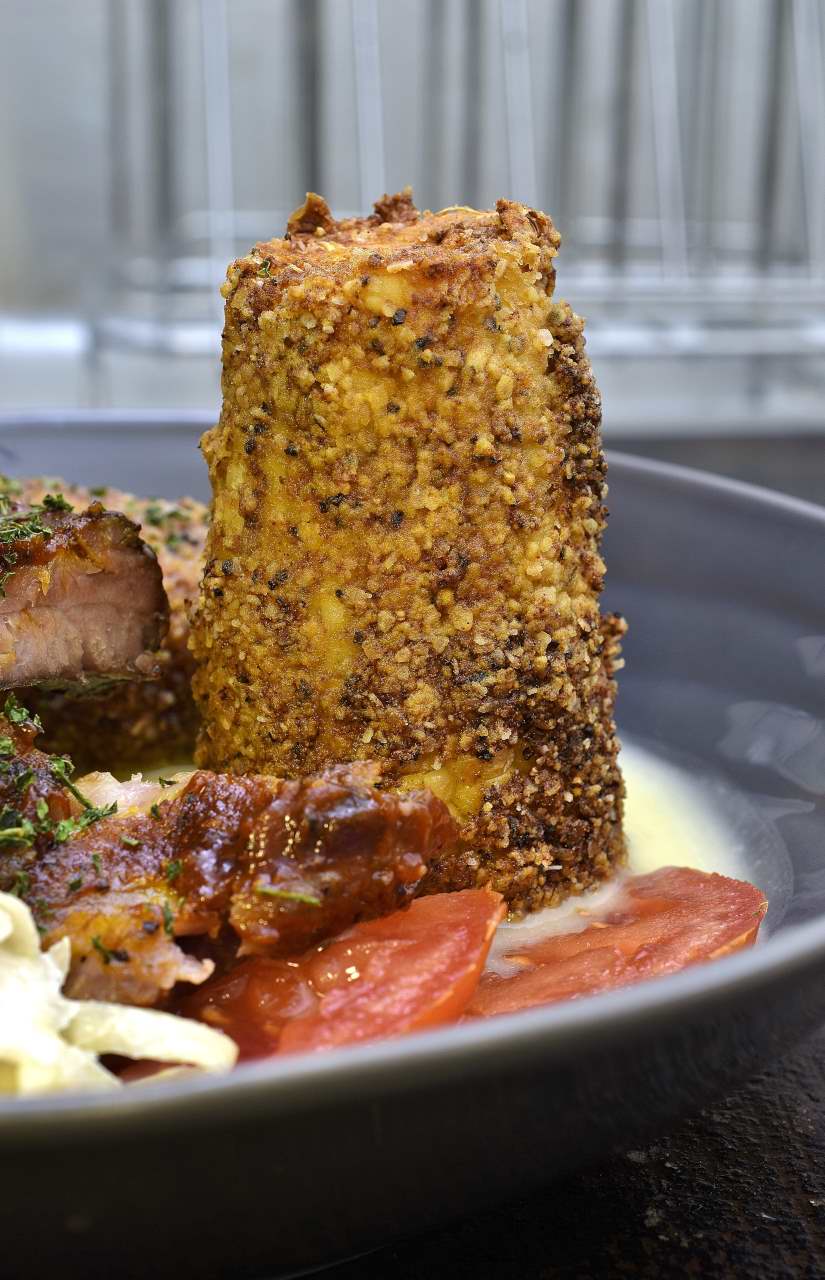
Cut the sous vide corn in half. Mix the special coating and roll the halved ears of corn in it:
1 Tablespoon kosher salt.
1 Tablespoon paprika.
1 Tablespoon ground black pepper.
1 teaspoon powdered egg white. Note: The alternative is to use fresh egg white to coat the corn first before rolling in the seasoning.
Then, roll the ears in flour and let them sit for a couple of minutes.
Deep fry at
350 F/176 C until you get that color. About a minute.
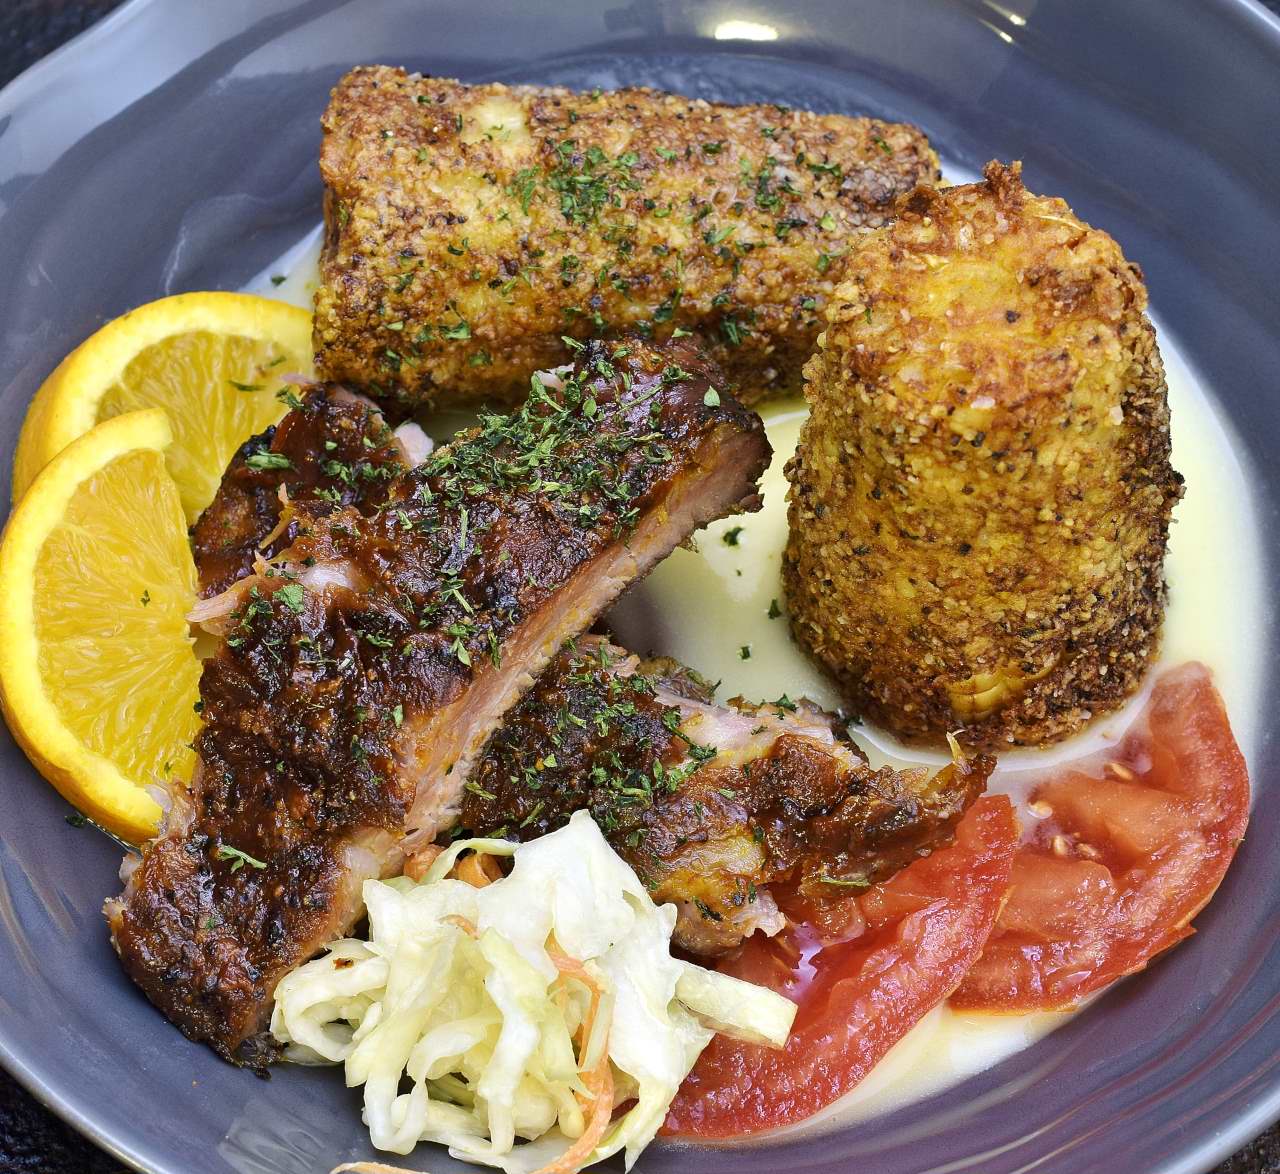
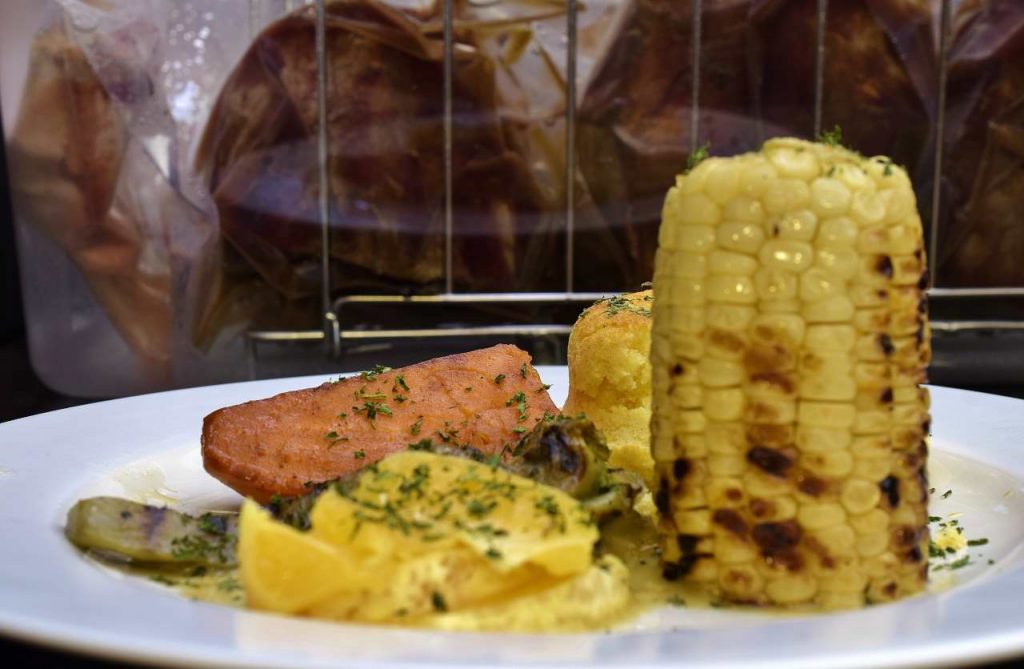
Pool the butter into the bowl, and moisten one of the ears with the melted butter. Leave the other half standing up and dry crispy. Ribs with corn, corn with ribs, ribs and corn with coleslaw, and so on.
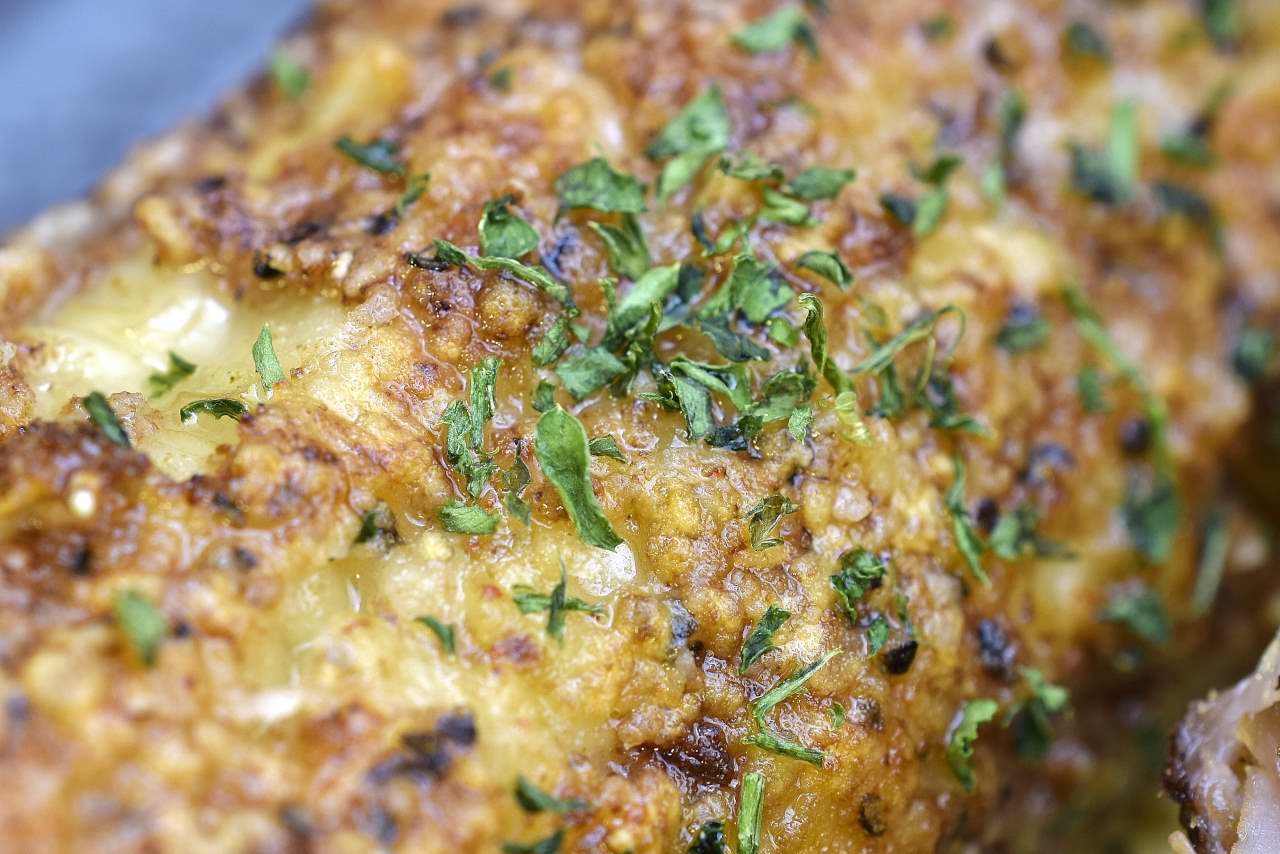
Southern suited. Parsley in, or parsley on. Parsley somewhere.
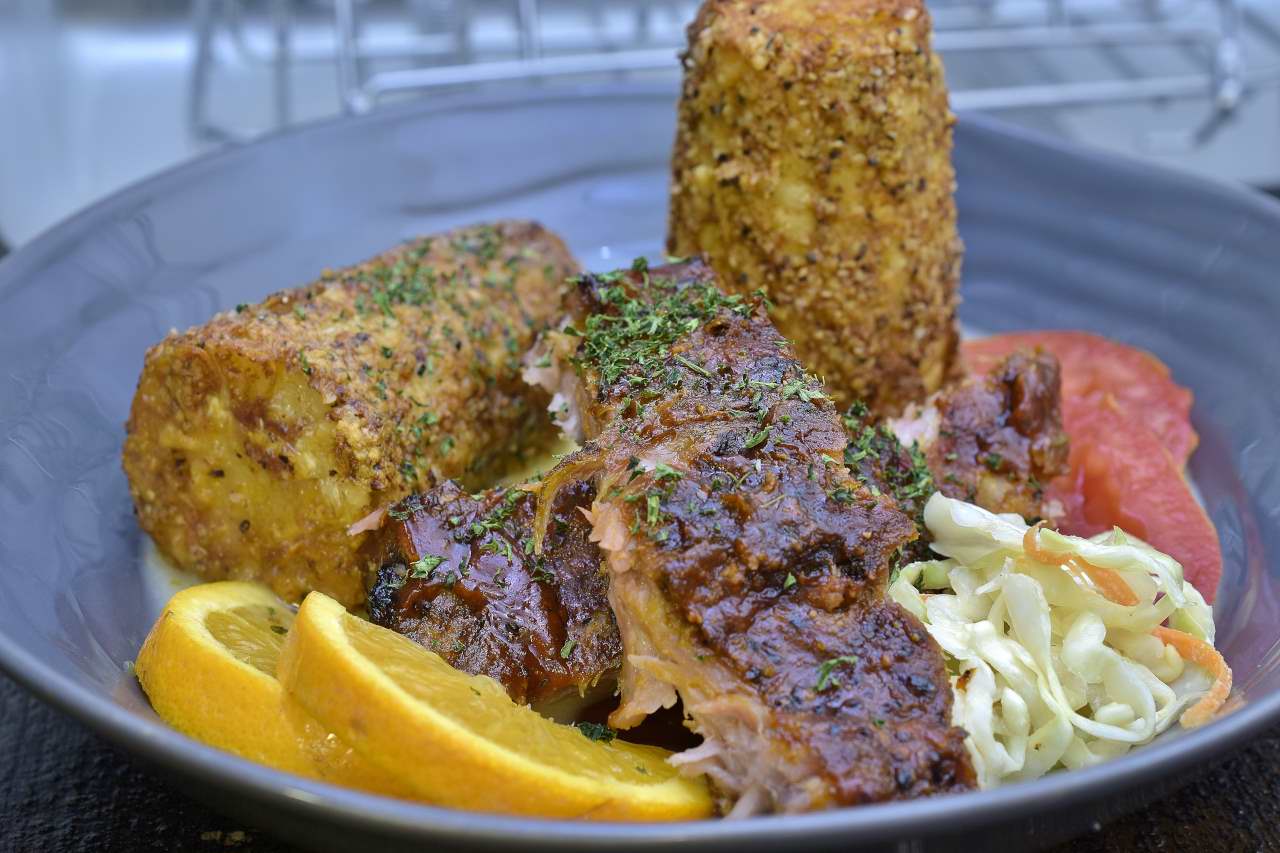
I like to eat this sort of thing, even the oranges.
One more; Corn. Creamed?
Nobody really MAKES creamed corn. We PUT creamed corn, like in the microwave or the cornbread or something. All recipes for creamed corn start the same way: “Go to the pantry and get a can of creamed corn. It’s right next to the corned beef hash and the Spam.” I don’t think I’ve ever even seen frozen creamed corn. I’m not sure there is actually cream in that can, or if it’s “creamed” in the same manner as “Cream of Wheat” or even “cream of tartar.” I’m hesitant to check the label. I think I’d rather NOT know what is actually in there.
I used to cream corn with cream in restaurants and serve it with BBQ items or pork chops. If you do that up North, they think you’re from down South. If you do that down South, they think you’re from up North and you’re just pretending to be from down South. If you do it in between, they don’t seem to notice one way or the other. When I was growing up in Nebraska, I really thought that tomatoes were SUPPOSED to be green. You would see red tomatoes in August, but I never really made the connection. Either way, I don’t remember anybody talking about it. Things were what they were. Mayonnaise and salad dressing were the same thing.
The old timey waitresses scorned my creamed corn. Younger servers had never heard of it, canned or otherwise, so they were usually intrigued by the novelty. Some guests liked it, but even they would say “that’s pretty good, but it’s not creamed corn, not the way my wife/mom makes it anyway.”
I have your corn right ear
There’s no reason not to cream corn, especially with cream. Cream is good. Corn is good. What could go wrong?
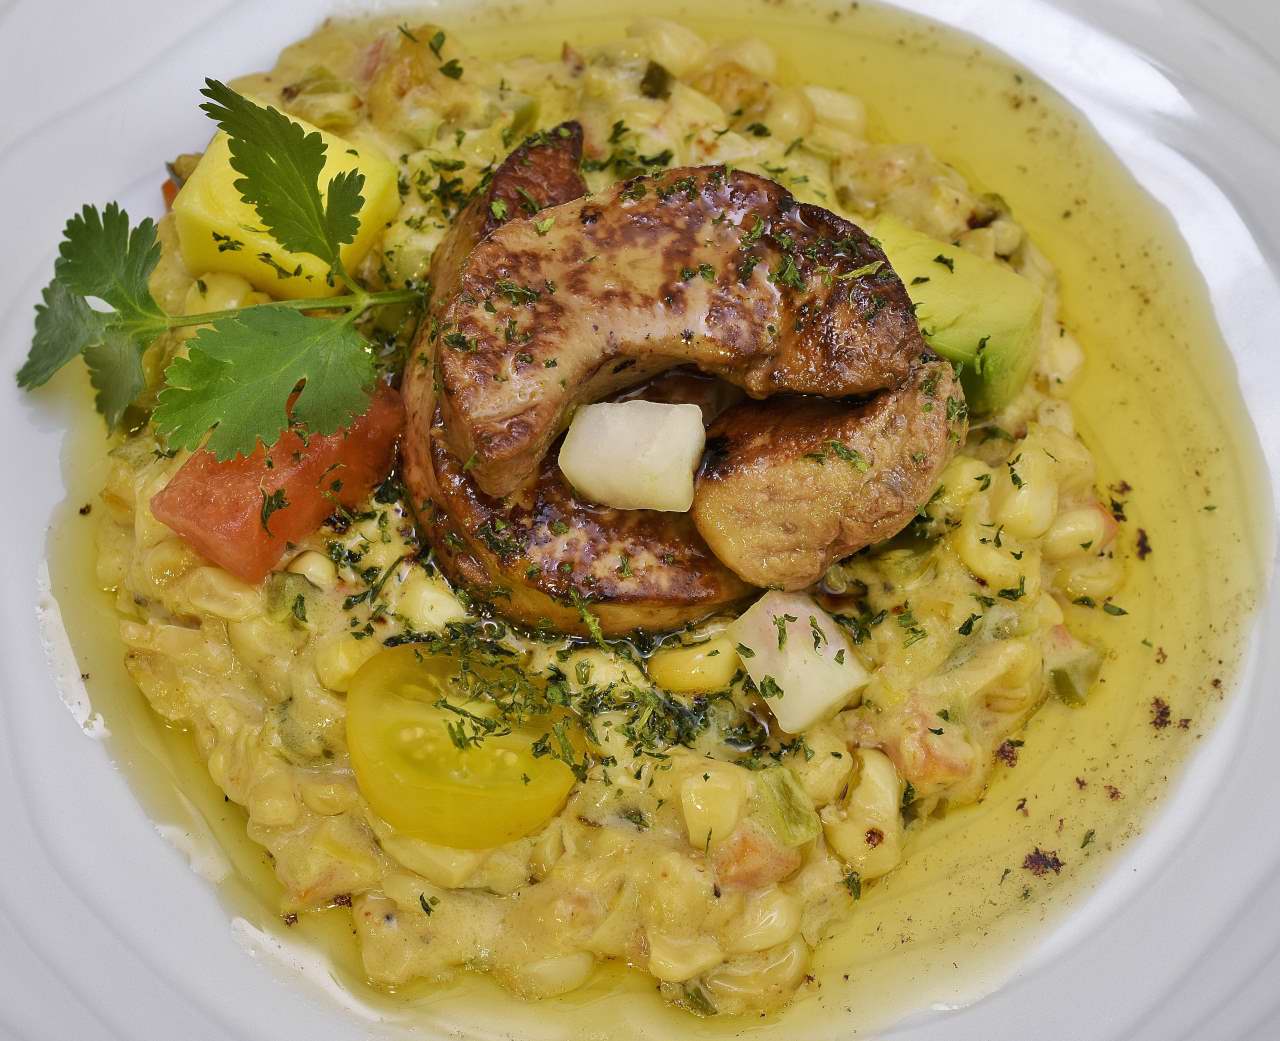
Below: I chopped and sauteed 1 small carrot, 3 green onions and one green bell pepper in a hot pan with 1 oz of oil just long enough to coat. While that was happening, I cut the corn off of two ears and added to the rustic mixture. I added 1 Tablespoon of flour and stirred until it disappeared, then added half a cup of water/stock and then half a cup of cream, real cream. Bring to a simmer and check for salt and pepper, it should not be complicated.
Speaking of complicated, I cut a little cube of mango, a little cube of avocado, a tiny little cube of radish, and arranged on top. Half a yellow cherry tomato. Sprig of cilantro because I was out of parsley. I know, shocking. Then the foie gras. Those that are into that don’t need me to explain, and those that aren’t into that don’t want me to explain. That’s where the buttery liquid comes from.
Tous les deux
Putting them all together opens a world of possibilities. Here’s one version. A little demi glace drizzle. A little sweet and sour tomato emulsion, which is ketchup, Frank’s, garlic powder, a little demi and a little foie gras melt. Ketchup is already sweet and sour.
Remember, you didn’t ear it from me.


