To see Part 1, Rack of Australian Lamb, click HERE
Part 2–Chicken Breasts, “Quarantine Florentine.”
I remember the days when whole chickens in the store ran about 3 lbs. As time passed, market forces changed and the chickens got bigger. A LOT bigger. Without delving into how all that came to be, skinless boneless breasts in the store have gotten almost turkey like–frequently over 16 oz. This bugs chefs–we are accustomed to just plopping one naturally shaped, 5-7 oz breast on the plate–almost universally applied for Marsala, piccata, parmigiana, etc. The smaller ones are still available wholesale, but they are almost always frozen and they are not cheap. “Market forces.”
Adapting to the change in appearance and bulk can be difficult, especially if you are using traditional methods to cook the chicken. I’m not going to go into the complexities of that here either, other than to say that sous vide really does simplify handling those huge chicken breasts. It also MINIMIZES handling them. Put on the gloves, one breast, one bag, vacuum, seal, and off you go. They are much safer to handle after pasteurization than when raw.
March 23, 2020
In part 1, we talked about making those last few trips to the store before we all got told to avoid each other and stay home. We plan to take full advantage of sous vide’s capability to pasteurize/preserve proteins (and other foods too). Hopefully, the logistical problems facing us will be resolved before we run out of food completely!
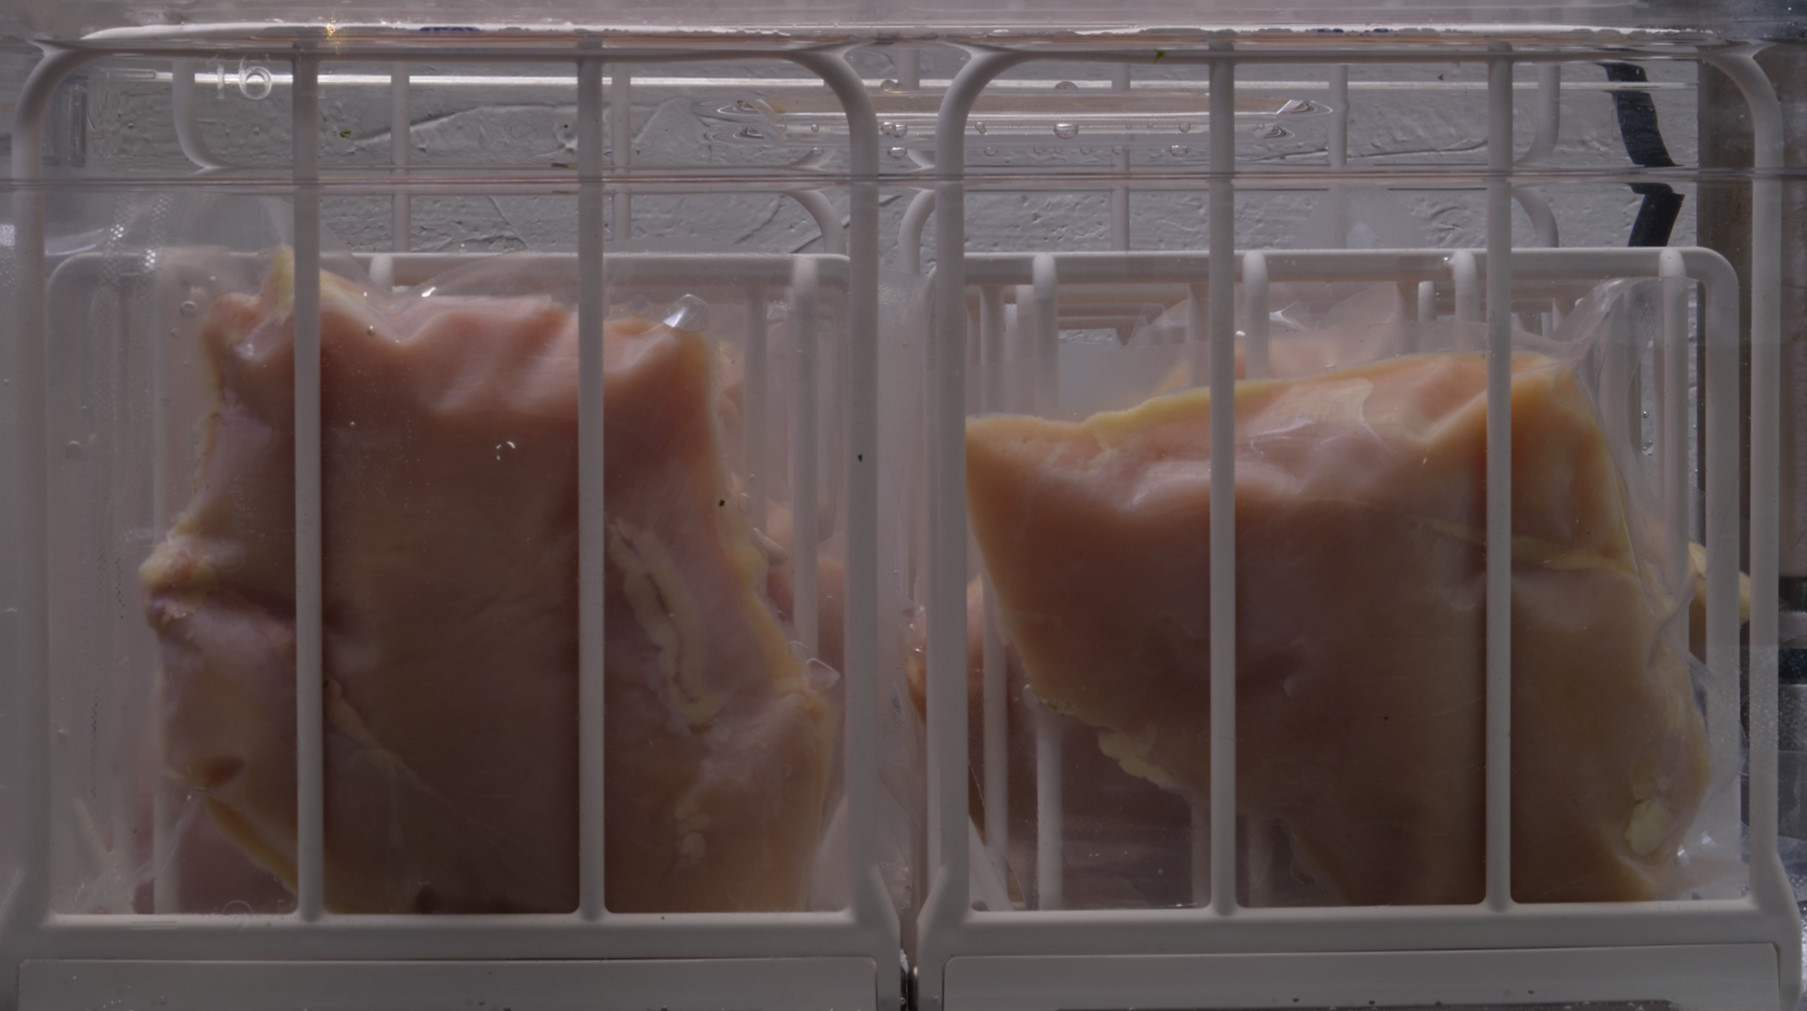
Vacuum seal the chicken breasts in heat rated plastic pouches. Preheat the sous vide bath to
135 F/57 C
and process the chicken for
5 hours
After this processing/pasteurization interval elapses, shock the packages in iced water until they achieve 70 F/21 C. They can then be safely refrigerated at 40 F/4 C until we are ready for service. In this pasteurized/preserved state, everything will keep at least two weeks.
Sous vide and vegetables.
Let’s face it–we may have to eat some frozen vegetables over the course of the next few months. Sous vide can be used to preserve carrots, potatoes and other root vegetables without freezing, but NOT fresh legumes like green beans, leafies or cruciferous vegetables. Things like spinach, broccoli, cauliflower, chard, etc. all emit gasses when they are exposed to heat. Sealed in the sous vide pouch, these gasses cannot escape. They leave an unpleasant flavor and odor behind and darken the vegetables themselves.
Fresh or frozen spinach emits a lot of water when it gets hot. It’s difficult to remove without using a brick or some other heavy blunt object. Sous vide can remove that water without a second thought. We are going to use frozen spinach, but if you have fresh spinach in stock, just dip it in boiling water, drain and chill. Let it breathe. Make sure your frozen spinach is fully defrosted. Put it in a strainer to remove as much water as practical.
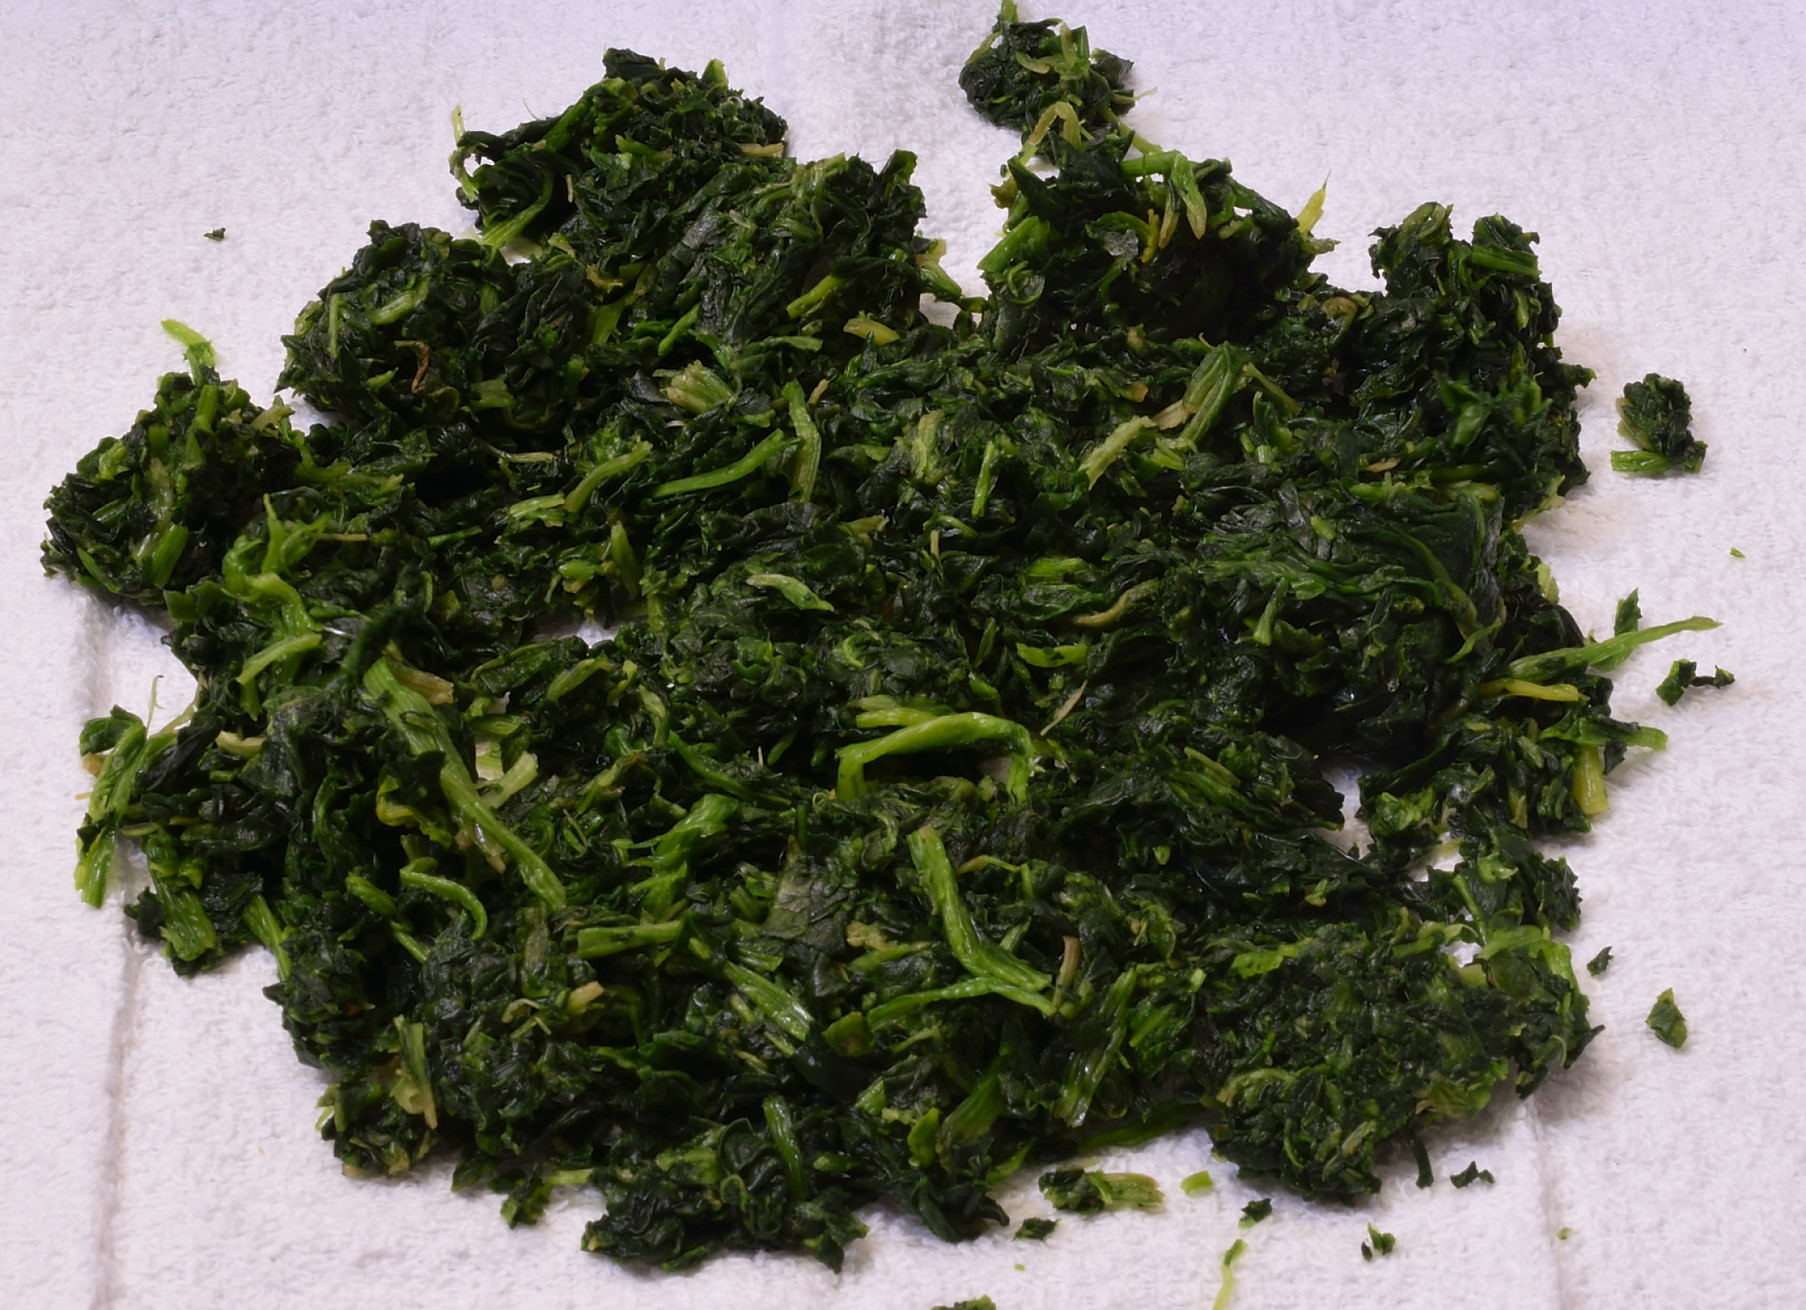
Lay the spinach on a clean, absorbent towel. Put another towel on top of it.
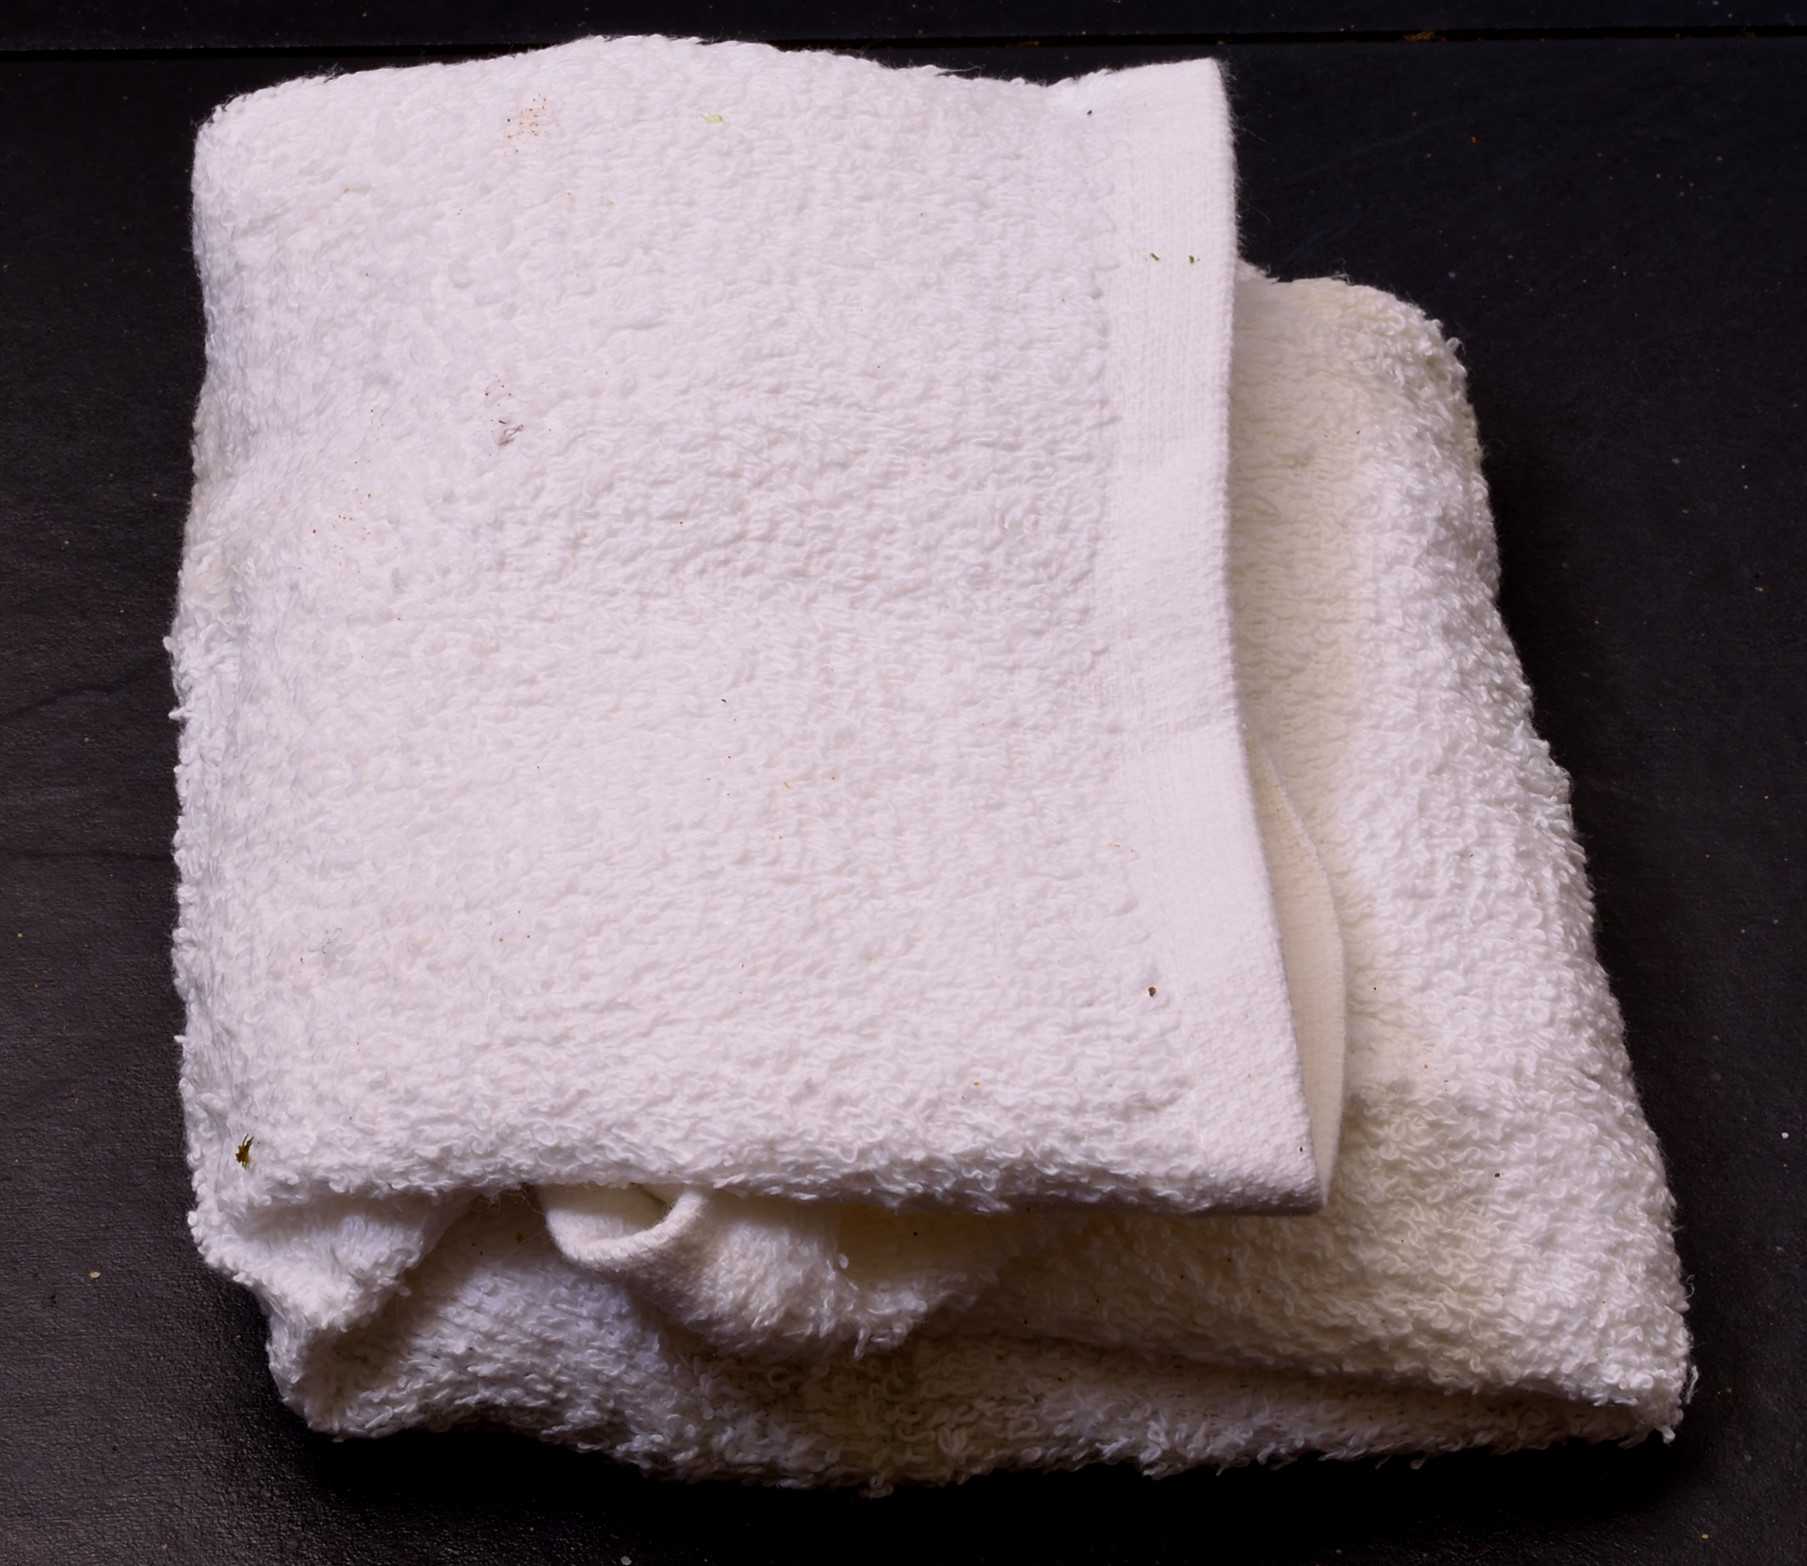
Fold the whole thing into a package.
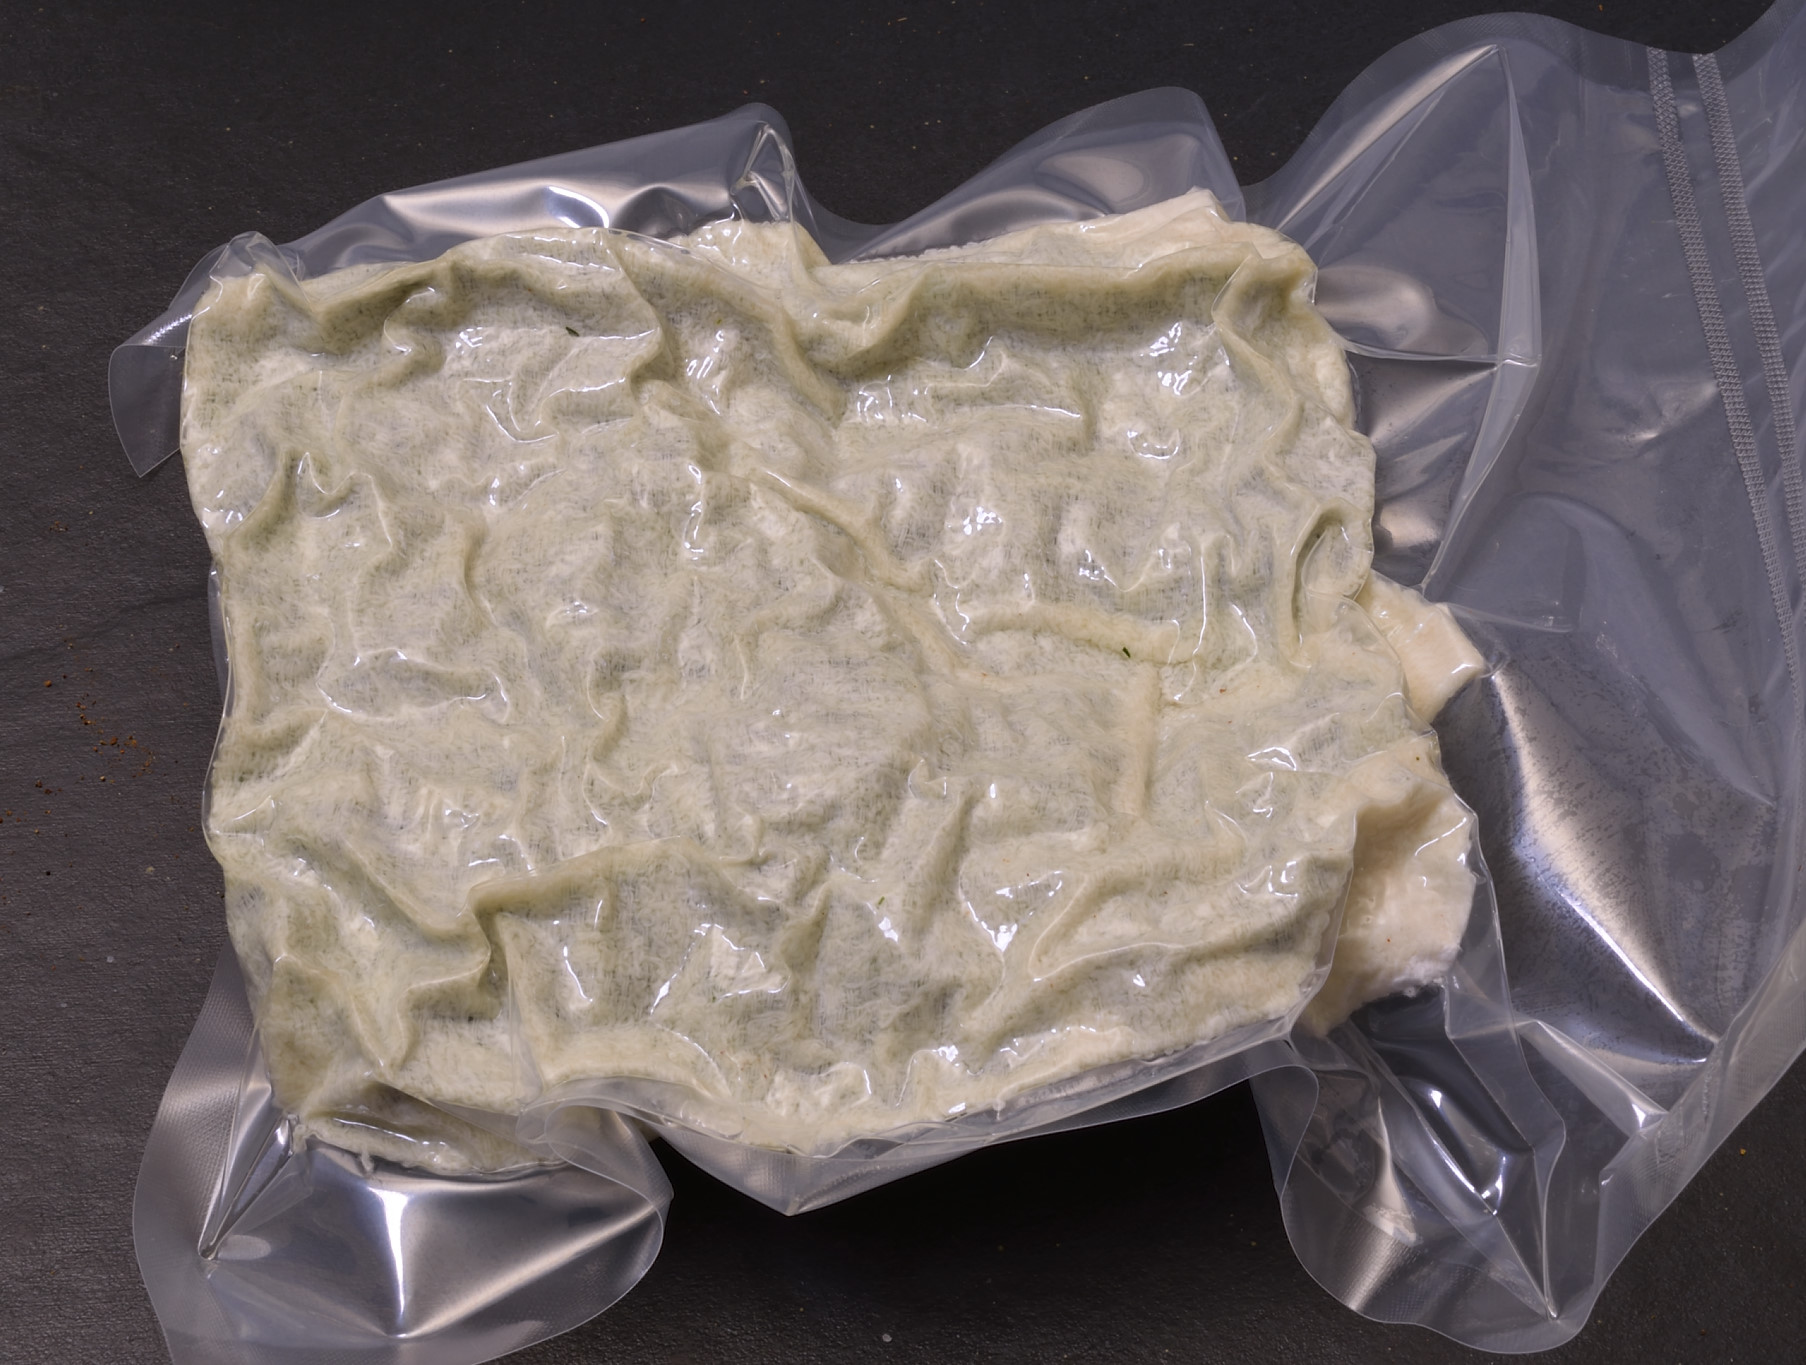
Stage into a suitable plastic bag and vacuum. Remember, “sous vide” means “under vacuum.” It does not mean “cook.” Do NOT expose the package to heat!
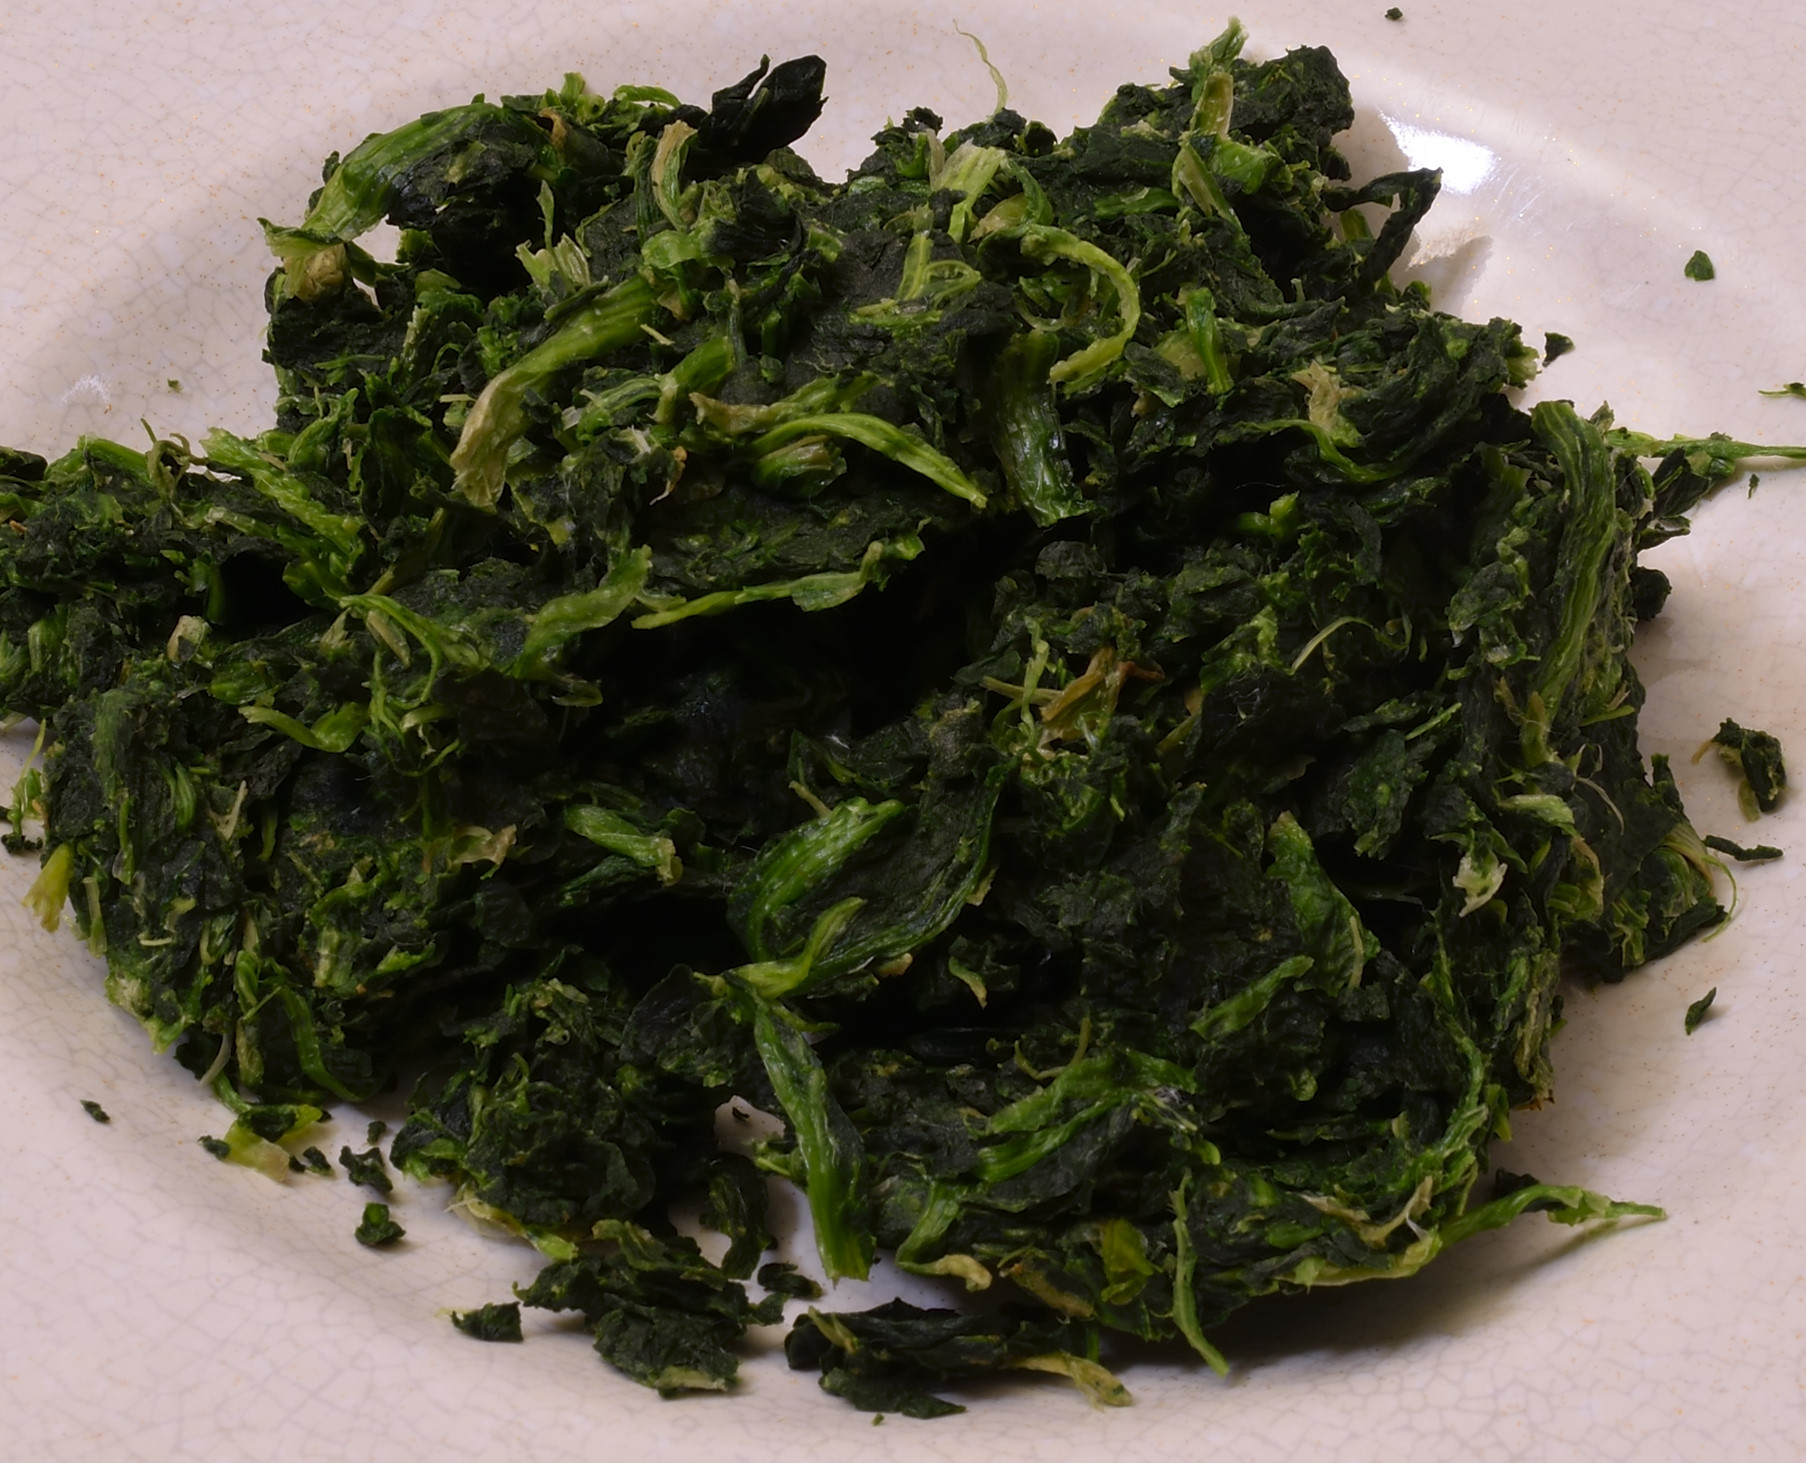
Wait at least 15 minutes and unwrap. Store covered in the refrigerator until use.
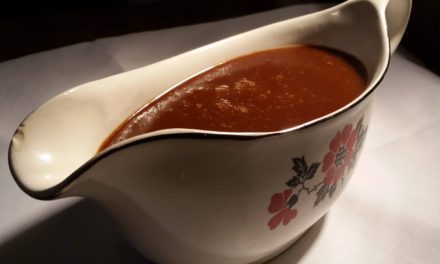
The Cream Sauce Conundrum/Bechamel Bugaboo/Alfredo Enigma
A lot of things can go wrong when making cream sauce. For the novice and even some seasoned pros, it seems to have been specifically designed to scorch. Not only does this ruin the sauce but the smell is nasty and cleaning the pan afterwards is no fun either. When thickened with flour/roux, it’s usually too thick or too thin and almost impossible to adjust afterwards. When reheated from cold, it is bound to break. It’s enough to make most people just throw a piece of Swiss or Mozzarella cheese on top instead. And there’s no shame in that, either. But a well executed creamy sauce has a texture that is impossible to duplicate. Chefs will go into lengthy, unfathomable explanations of how to create the perfect cream sauce and then screw it up as soon as the cameras run.
There is a way out. First, put away the flour. Cream sauce thickened with flour is a “suspension.” We are going to remodel it as a simple “emulsion.” BTW, you noticed I did not say “reduction.” This term is commonly misapplied to contemporary sauces, but let there be no misunderstanding. In Norm’s kitchen, reduction is used to concentrate flavors, not to thicken. Some reductions will eventually become more viscous, but that is not the purpose of the reduction process. End of first rant.
Resistance is futile
You need a stick blender. A regular blender or food processor will also work. You need a microwave oven and a microwaveable container. That’s right, a MICROWAVE OVEN. Don’t pretend that you don’t have one. You can use a small sauce pan if washing pots unnecessarily is your thing. You need real whipping cream and cold butter–I prefer unsalted, but salted will not interfere with the chemistry. How much of each? Brace yourself:
Cream Sauce Ingredients:
Whipping cream, 2 oz/60 ml.
Unsalted butter, 6 oz (1.5 sticks)/180 ml.
(No, I didn’t get that backwards. This is the way emulsions work.)
Kosher salt, 1 tsp.
Put the butter, cream and salt in a microwaveable container, large enough so that it doesn’t boil over. Process in the microwave for 1 minute and let it sit for a few seconds. Process for another minute. The mixture should boil and a small amount of butter should be visible on the top, especially around the edges.
Put the mixture in a tall container. The stick blender should just barely fit in the bottom. This matters, believe me. For a detailed explanation of emulsions, visit HERE. Start the stick blender but do not lift it up–it will slowly pull the top down into the bottom, just the way a regular blender does.
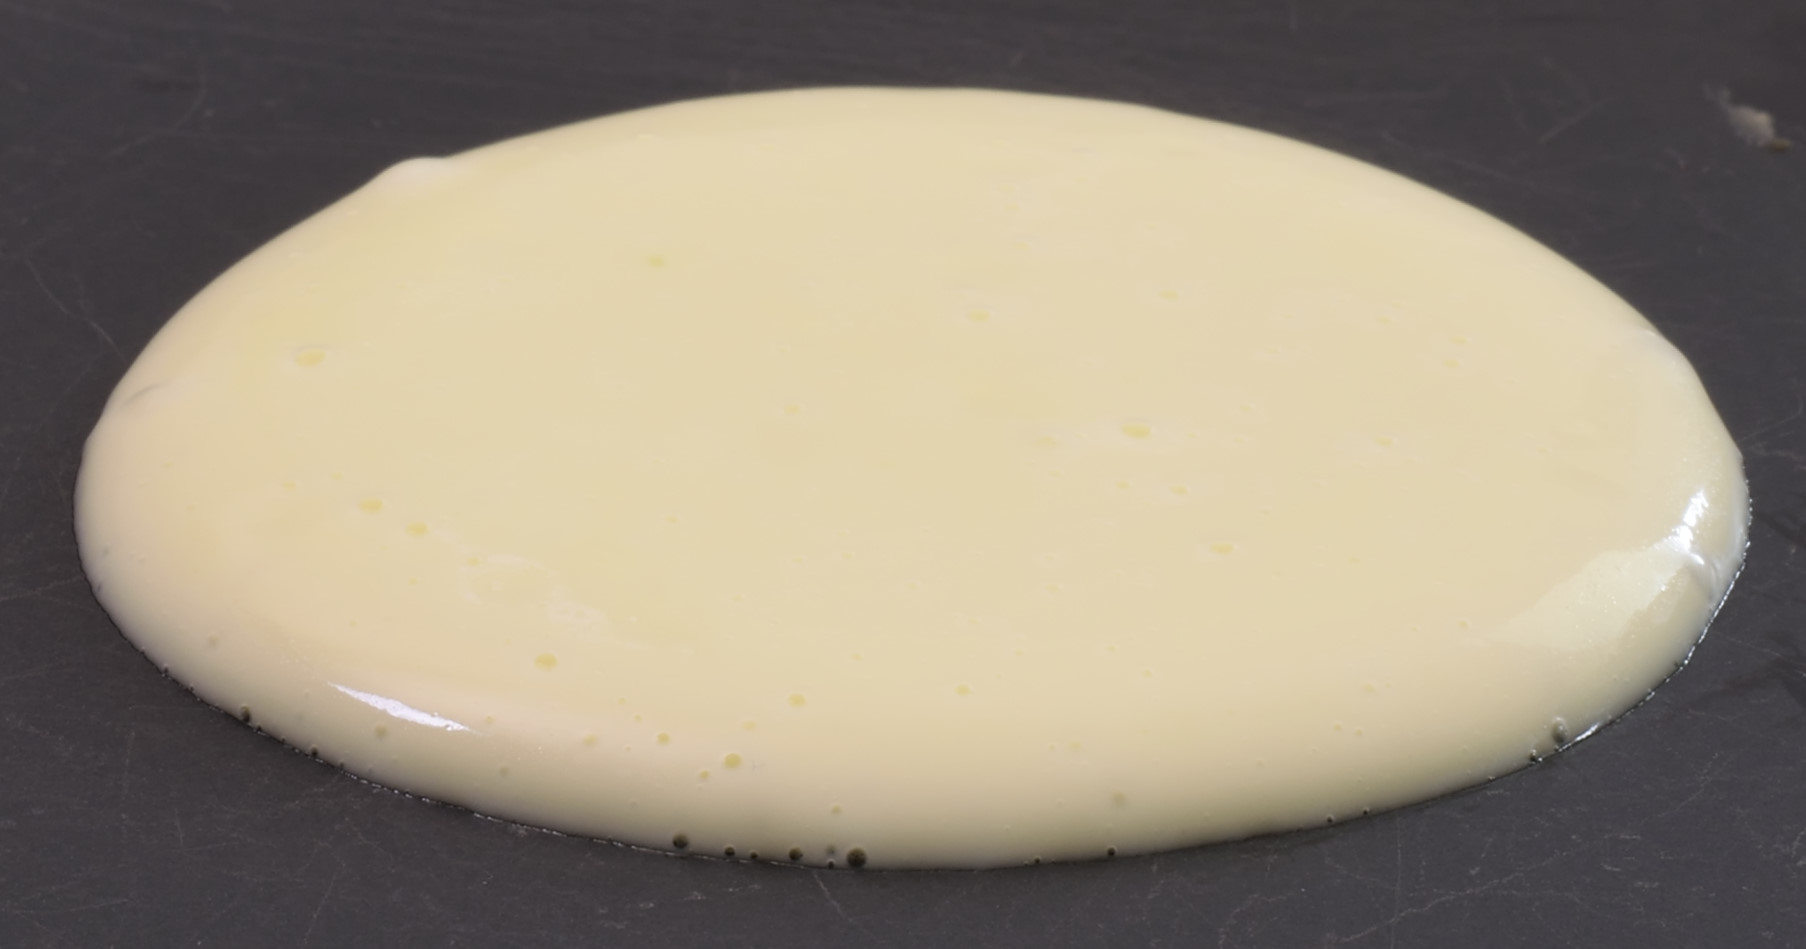
A sample should stand up a little bit on a plate. If it is too thin for your liking, return it to the microwaveable container and process for another 30 seconds to a minute. If it gets too thick, it will start to look like melted butter with cheese in it. If this happens, just add a tiny bit of cream and blend again to reconstitute.
Service
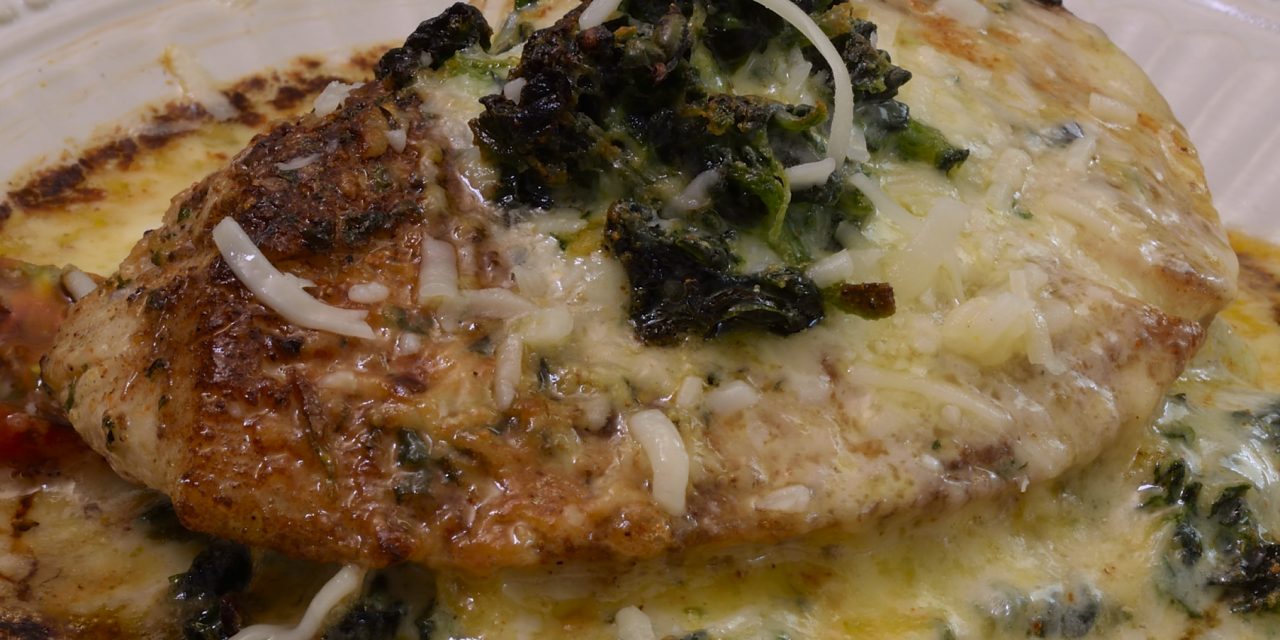
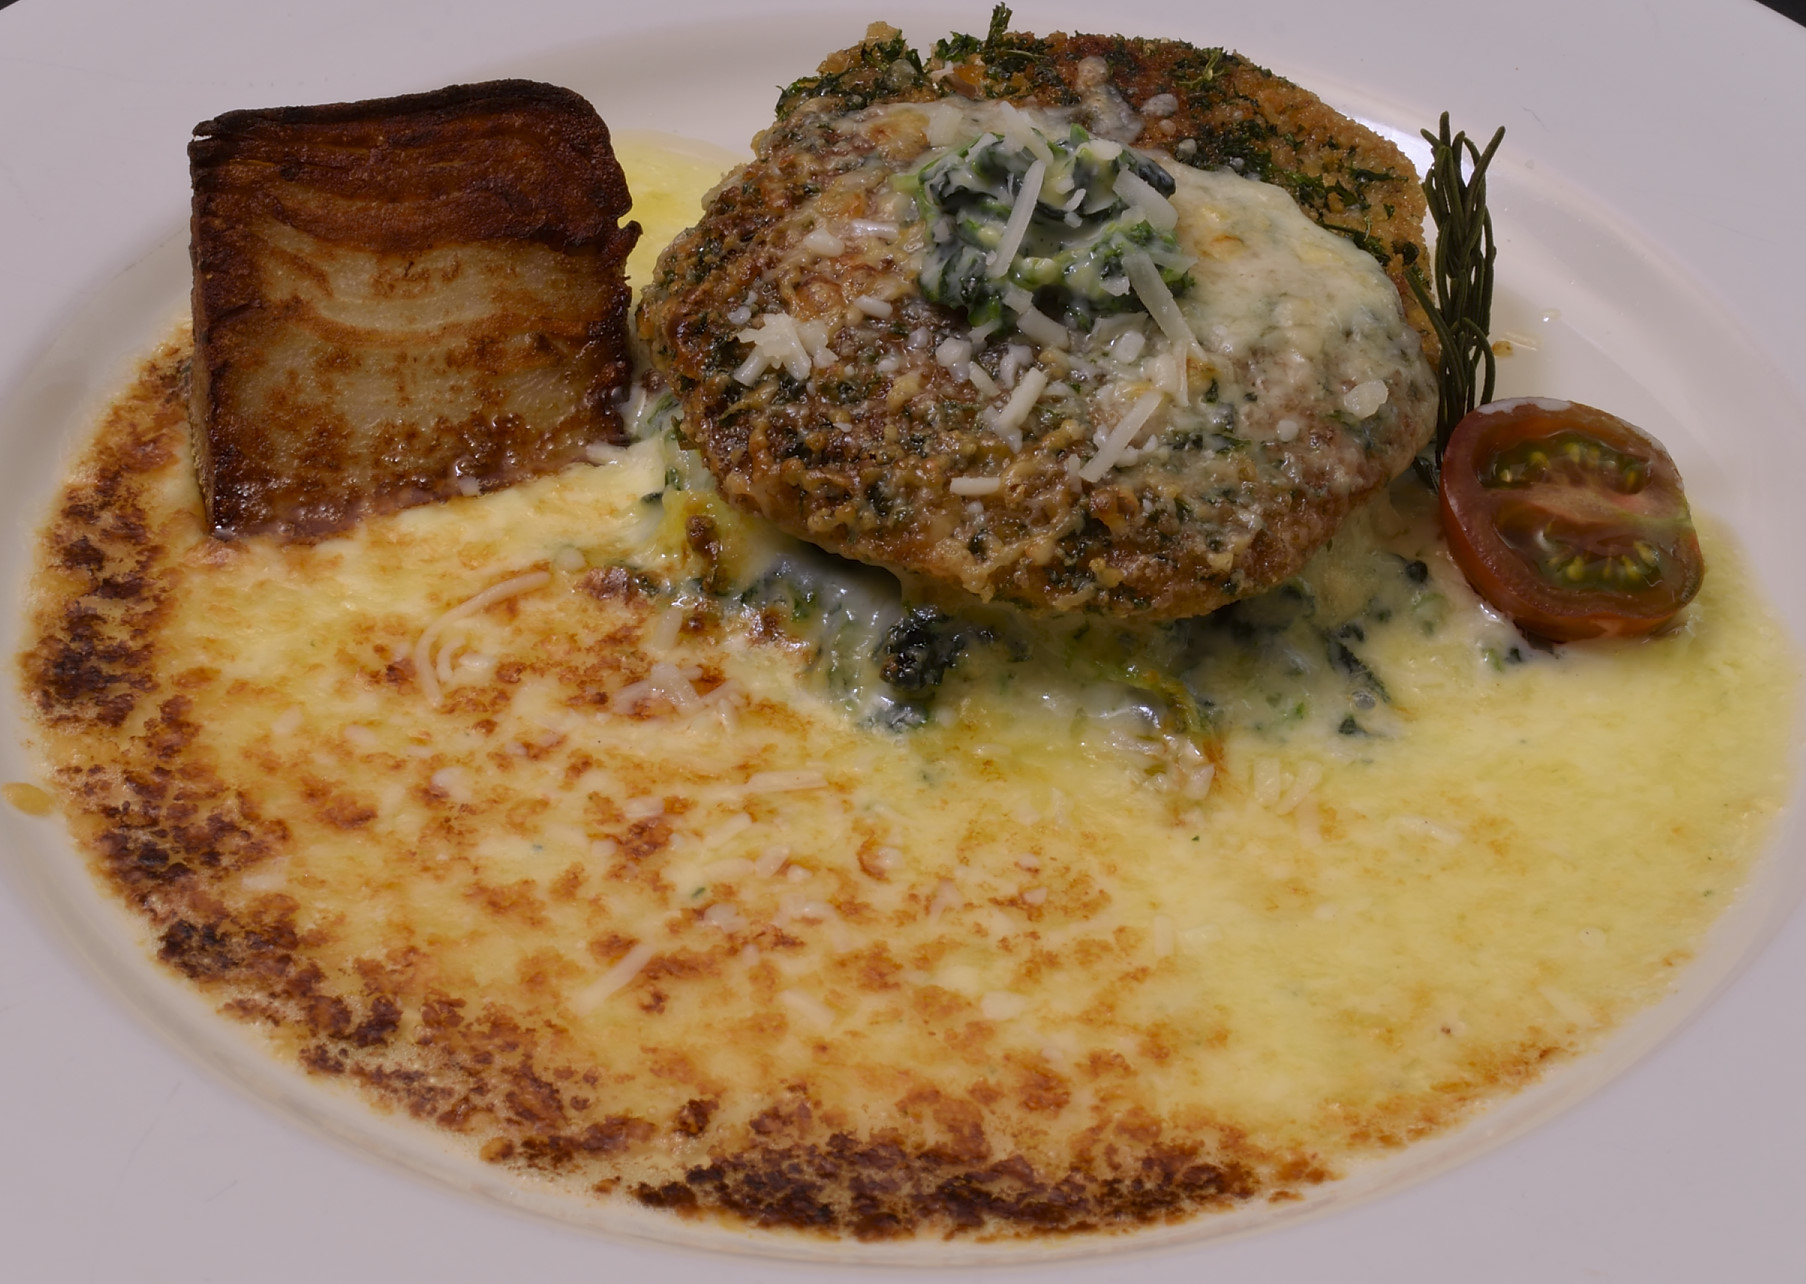
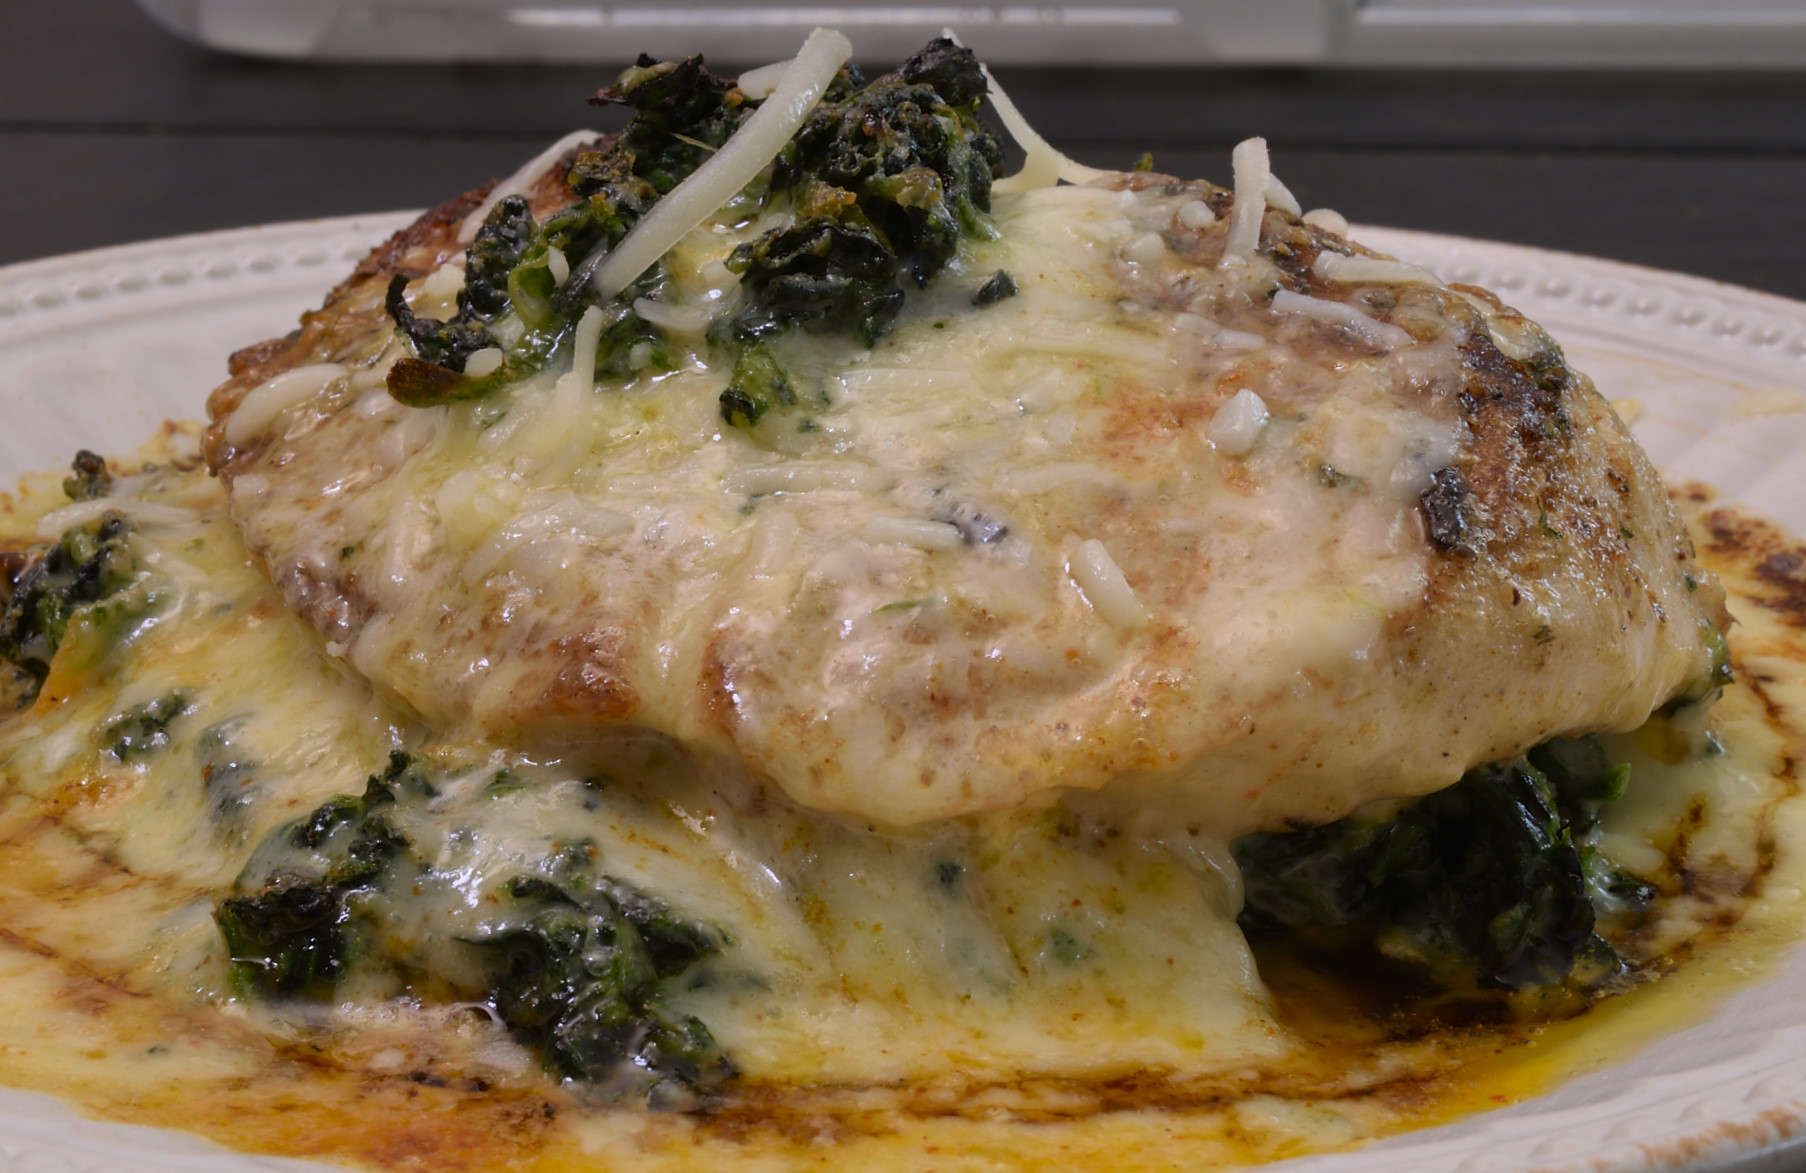
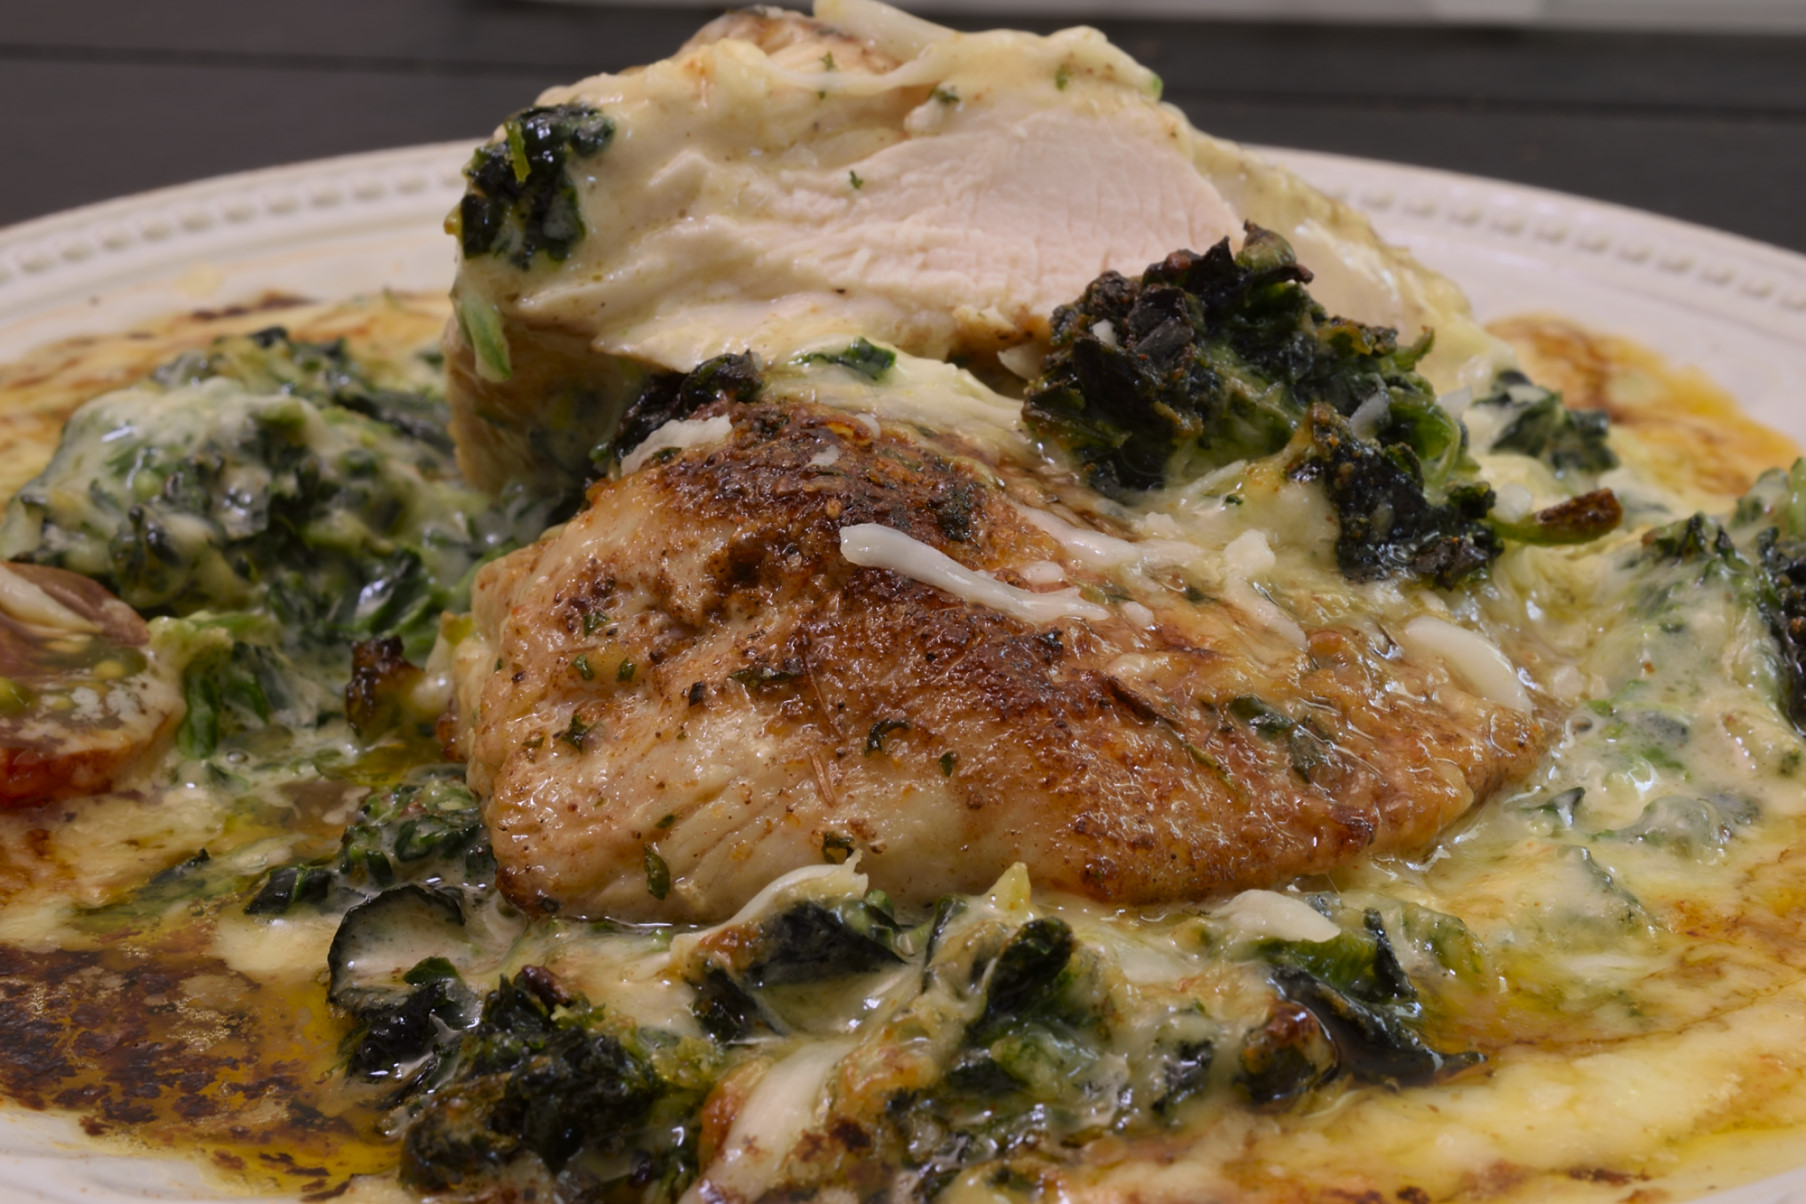
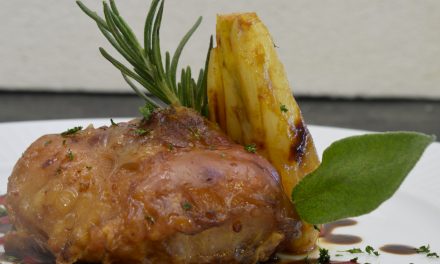
The rest is a snap. After making the sauce, heat up the spinach in the microwave for just a few seconds–that’s right, you heard me. As soon as the spinach hits a hot pan, it starts going black. Mix enough of the sauce with the spinach to make the consistency you want. Use a fork to make sure the spinach threads come apart. Set that aside. Cut a slice of the chicken breast on an angle to approximate a disk. Season it with salt and pepper or your favorite rub to be named later (discussed in part 1).
Moisten the chicken with a little egg white and a light coating of crumbs (below).
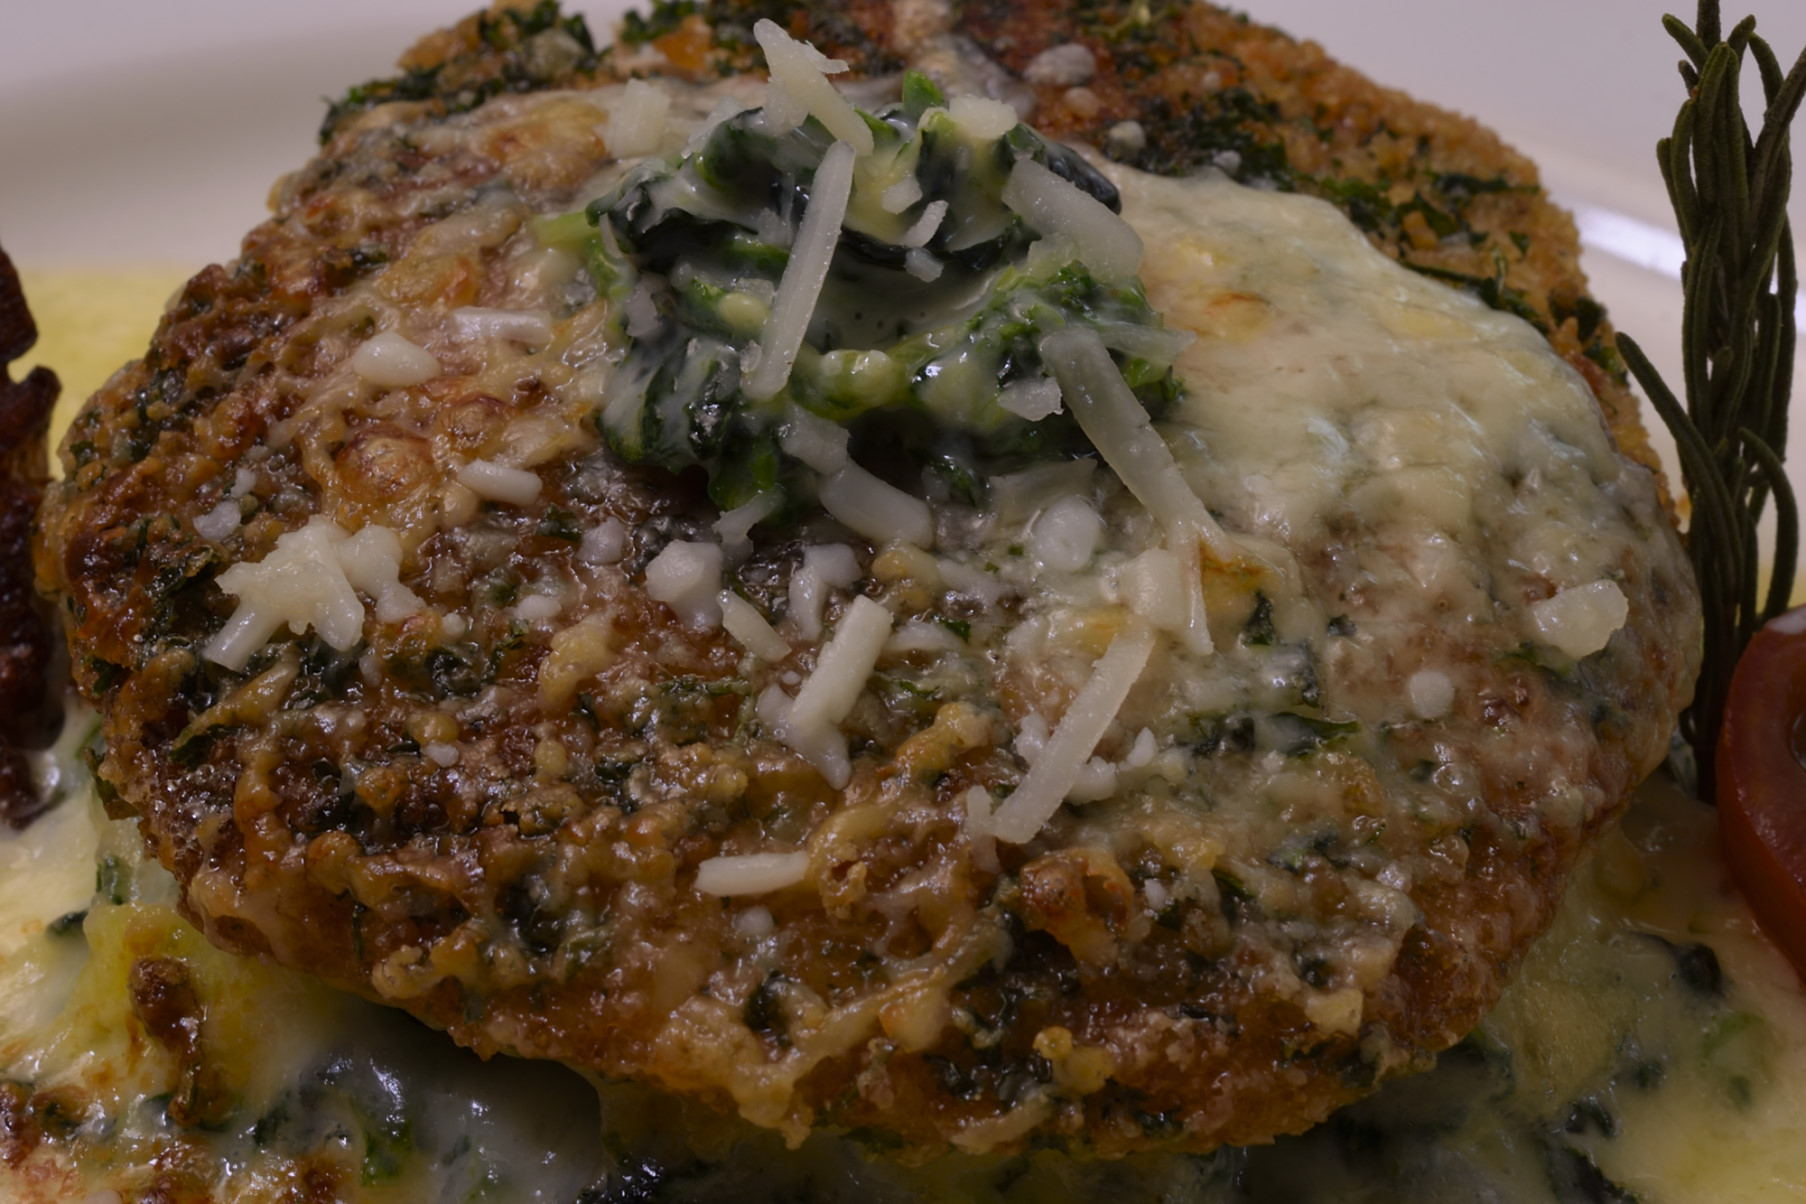
or just sprinkle seasoning (below). Sear/saute the chicken breast in a skillet. Arrange a little creamed spinach on the center of the plate, put the chicken on top, drizzle sauce to your preference, sprinkle with grated Asiago or Parmesan or Pecorino Romano, and use the broiler function in your oven to create the browning effect. When it’s done, sprinkle a bit more cheese. Garnish, don’t garnish, just stay inside.
Norm King
