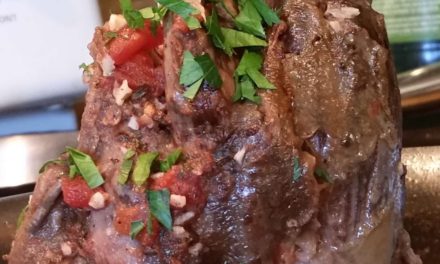
Enormous Oregon Lamb
This entire rack of Oregon lamb weighed just a little over 3lb/1.4k. Considerably larger than the imported versions from New Zealand/Australia, Oregon lamb is developed using different breeds, different feed, and different ages. It is also seemingly expensive–$12/lb wholesale. That means one rack, eight ribs, costs almost $40. In most cases, it should serve at least three people, up to five.
In a restaurant, your order of Oregon lamb will probably cost you between $25 and $60. This is because restaurants do not just buy food, cook it and sell it. They pay rent, electricity, gas, labor, advertising, etc. People forget that, and articles on the web shriek “RESTAURANTS TRIPLE THE PRICE OF FOOD!” Chefs MUST at least triple the cost of an item in order to keep the doors of the restaurant open. Independent restaurant owners are usually devoted, but rarely wealthy–most restaurants are month to month, just like us. This is just one more reason to develop the skill to make it yourself!
Special Equipment requirements:
Kitchenaid type mixer and/or food processor
Manual pasta rolling machine
Pastry brush
Channel or chamber vacuum machine, vacuum bags
Sous vide processing gear–Immersion circulator, Lipavi containers and racks, etc.
Ingredients:
Rack of Oregon Lamb, Whole, one each, approximately 3lb/1.5K.
S+P, to taste.
Fresh Spinach, 2oz/60g
Feta Cheese, drained, 2oz/60g
Phyllo Dough
Flour, 4 oz (by weight)/120 g.
Salt, a pinch.
Vinegar, a few drops.
Lemon juice, a few drops.
Olive oil, a few drops.
Water (hot) 2 oz.
Butter, melted, 2 oz/60 ml.
Eggplant Relish/Caponata Agrodolce
Eggplant, whole, 1.5lb/700g
Garlic, one head, chopped coarsely.
EVOO, 1 oz/30ml.
Onion, chopped, 2oz/60g.
Grape tomatoes, 8 each.
Kalamata olives, seeds removed, 8 each.
Capers, drained, 1oz/30g.
Sugar, 1 tablespoon/12g.
Balsamic vinegar, 1 oz/25ml.
Salt, a pinch.
Demi-glace, a few drops (optional). I make my own, but Knorr makes a pretty good powdered version for everyday use.
Procedure:
Vacuum seal the entire lamb rack and sous vide process @
128Fx8hours.
Shock in ice water until the lamb achieves 70F/21C–approximately one half hour. Refrigerate at 40F/4C until the day of use. In the current state, the lamb will keep refrigerated for at least a week.
Prepare the lamb
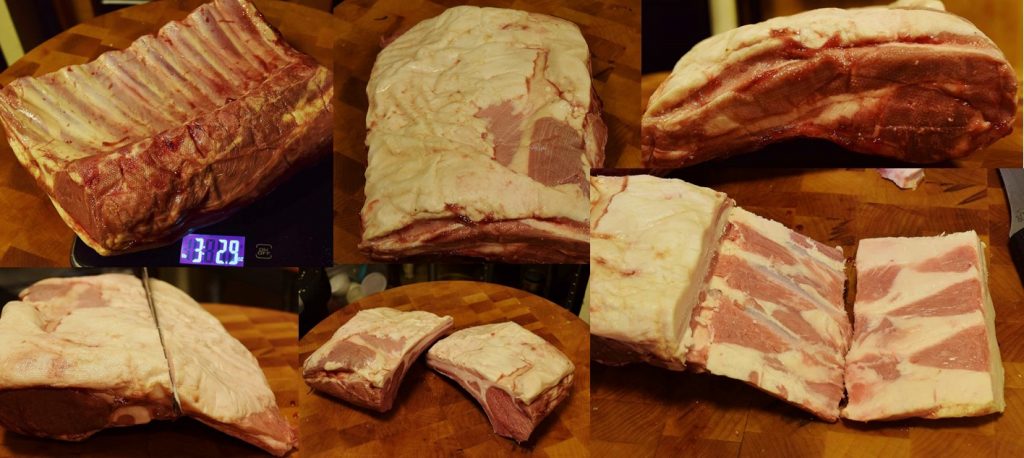
After processing and weighing, I aligned and marked the starting cut to “French” the bones (bottom left slide)–just beyond that little tail piece. Cut the rack in half, and carefully scrape the fat layer off of the rib bones–if it is removed in one piece, the end result will look neater…you can see how all the bones are “naked” on the top…
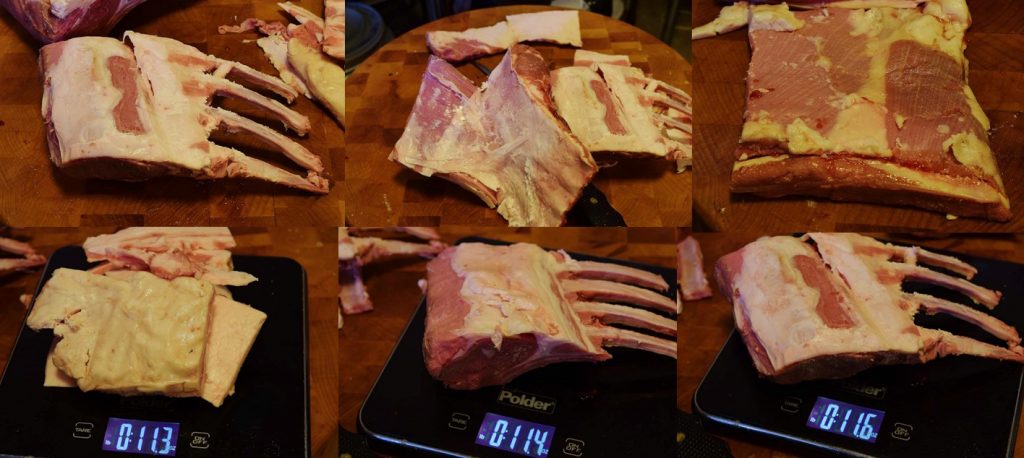
Run a sharp boning knife between the rib bones, again removing the little “riblet” area in one piece if possible. Remove the shoulder blade flap from the top of both pieces. If you insert your thumb between the meat and the flap, it peels off. It can be left on, but I prefer to apply it to other purposes. We have about 12 oz/300 g total fat waste, bottom left. I was fortunate–both half racks came out almost exactly the same size, both with four bones.
Measure out kosher salt to 1 tablespoon per pound of meat so the meat gets the correct amount. Add whatever other seasonings you like: I use ground black pepper, dried parsley and a little garlic powder; press it into the lamb.
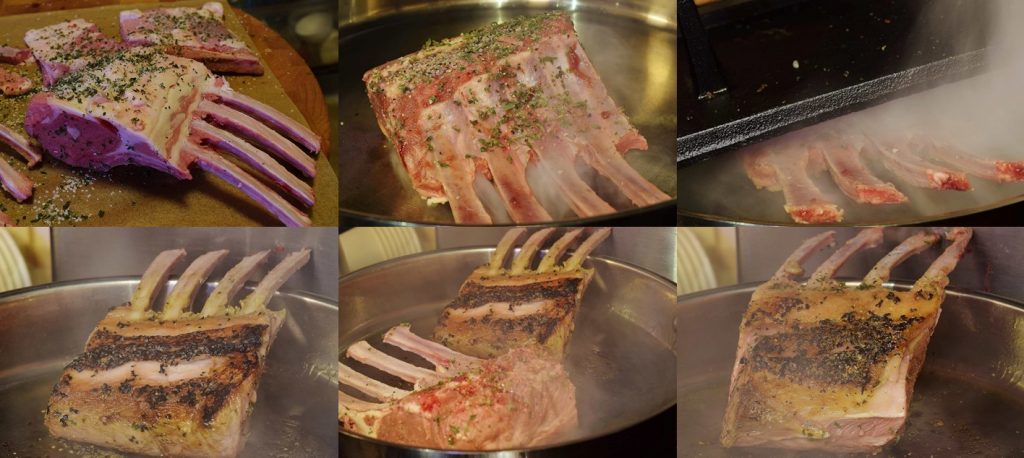
Heat a large, flat bottomed saute pan to
225F/110C
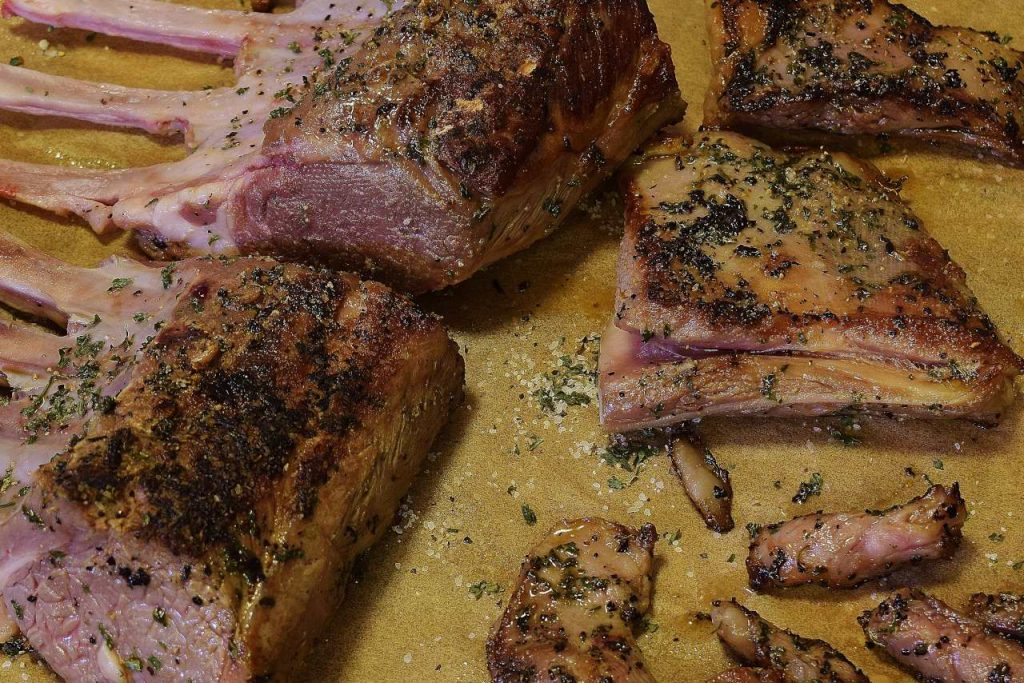
Brown the lamb on all surfaces (except the bones), but do not allow it to cook–this process should only take 3-4 minutes. In the top right slide, you can see I used a steak weight to hold the curved side of the rack flat against the pan.
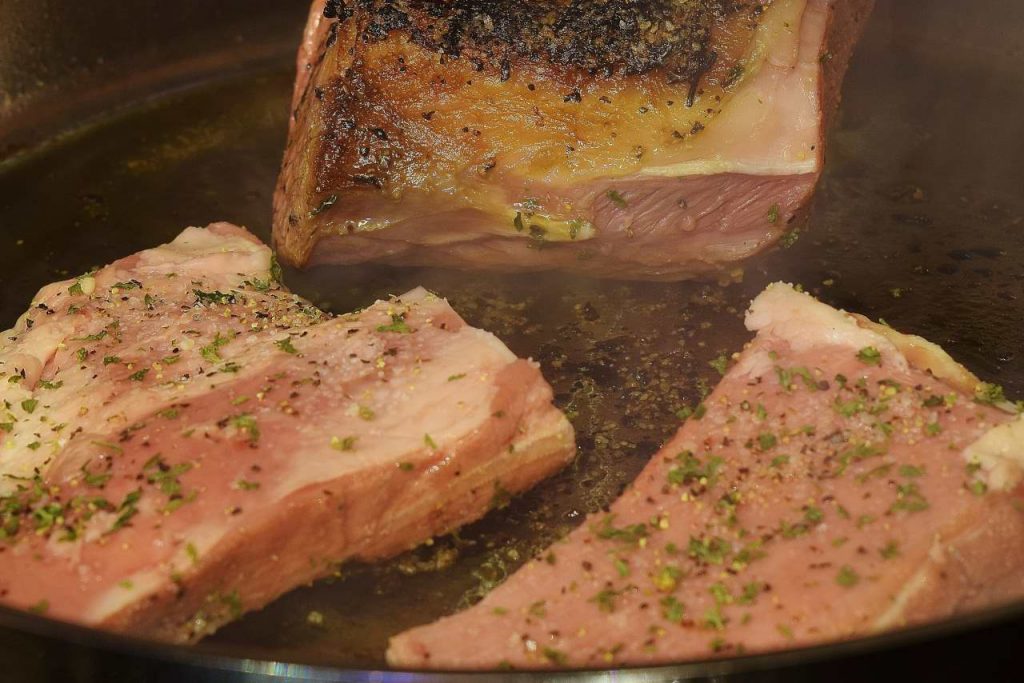
Lamb fat burns very easily, so I use a little lower temperature than I would for beef or even chicken.
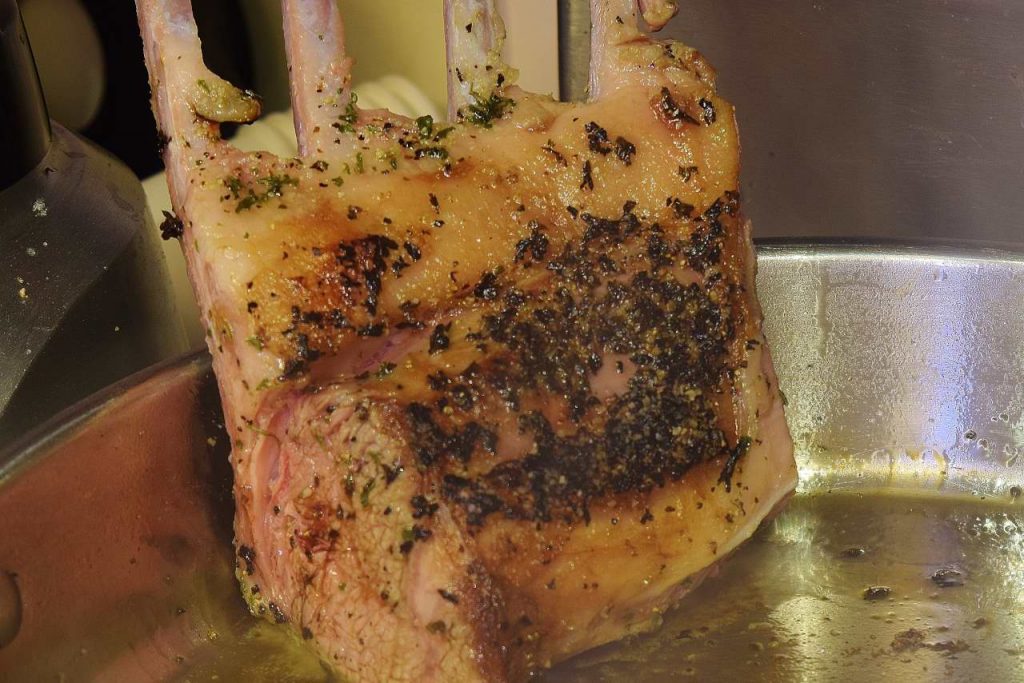
After browning, refrigerate the lamb.
Spinach Feta filling
Most people steam the spinach before cooling and draining it. I prefer to spread the raw spinach out on a paper towel, sprinkle with a pinch of salt, wrap in the paper towel and vacuum seal in an appropriate bag. Wait at least one hour, or as long as overnight. This will cause the spinach to “weep and wilt,” precluding the necessity to cook it. It also preserves its color. Remove the spinach from the bag, discard the paper towel and use another paper towel to squeeze out as much water from the spinach as possible.
Combine the spinach with the cheese and puree in a food processor. Feta is a little salty, so I do not add any additional seasoning. Set aside.
Phyllo dough
Combine the flour, salt, vinegar, lemon juice, olive oil in a food processor or Kitchenaid type mixer with the paddle. Mix these ingredients while you bring the 2 oz water to a boil. Add the water to the mixer or processor but do not expect the dough to form a ball. After one minute, turn off the device and turn out the mixture. Form it into a ball with your hands, cover in plastic, and allow to rest while you
Make the Eggplant Relish
Cut the eggplant lengthwise into quarters. Score the flesh but leave the skin intact. Heat a large, flat bottomed skilled to
225F/110C
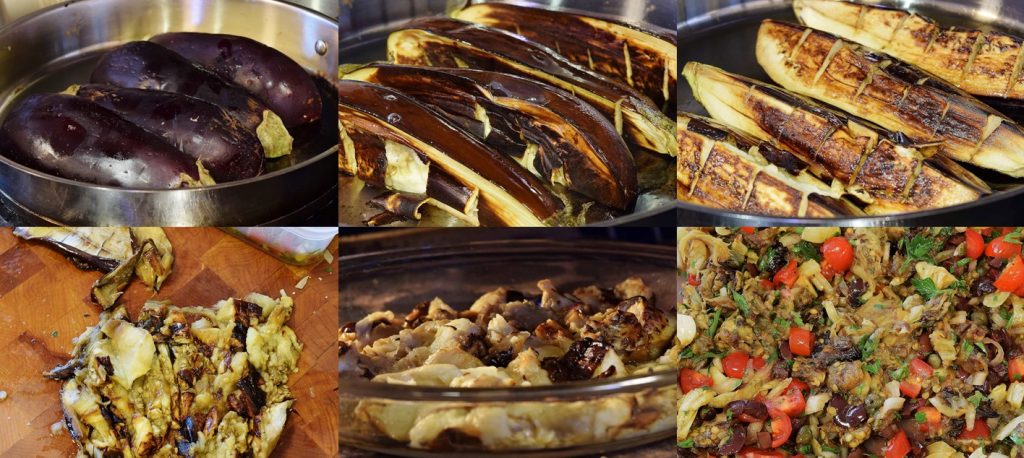
Many people will insist that they like eggplant, but I have noticed that almost nobody actually eats it. It is hard to like, the texture is strange and, honestly, the flavor is meh. However, with the Italian sweet and sour agrodolce treatment, the spicy flavors will obscure the sensation of this cousin of the tomato. You don’t really notice it; then, you can still say you love eggplant.
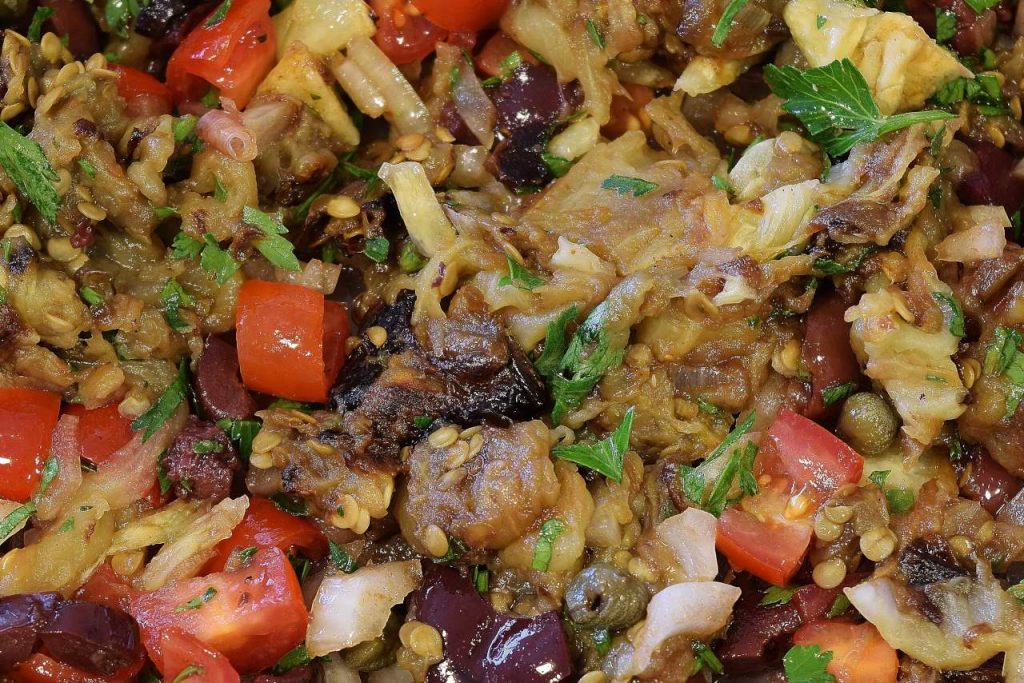
Drizzle a few drops of olive oil in the pan and spread it around with a paper towel. Toast/brown the eggplants on each flesh side for approximately five minutes, and then, turn skin side down and turn off the heat. Wait five minutes for the eggplant to finish cooking and to cool somewhat. Remove the eggplant from the pan and add the garlic and the rest of the EVOO. Simmer until softened, but do not brown. Put the garlic in a bowl or other mixing container. Scrape the eggplant from the skin and spread out in a pie pan, etc. Use the oven’s broiler function to continue browning and drying the eggplant–this is an effort to moderate the texture of eggplant that many people find unpleasant. Allow five minutes.
Wrap the eggplant in a clean towel, seal and vacuum. Again, this removes excess water. Unwrap, chop coarsely, and add to the mixing container. Chop the onions, tomatoes, and olives coarsely as shown. Add to the mixture, along with the capers, sugar, balsamic vinegar and a small pinch of salt. Refrigerate.
Roll out the dough.
Divide the dough into 8 equal portions–approximately 1 oz each. Use the pasta roller to form the dough into sheets–run a slightly flattened piece through the widest setting, rotate the dough 90 degrees, go to the next setting and run the dough through. Continue refining the setting and rotating the dough–this will eventually make the dough thinner, longer, and wider. Dust again with flour after running through “5”, and continue running through “9.” Dust with flour as needed. As you finish each strip, dust lightly and lay it on parchment or butcher paper, and cover with the paper as shown.
Stuff
Take one of the racks and cut it in half, so it features two bones. Set aside.
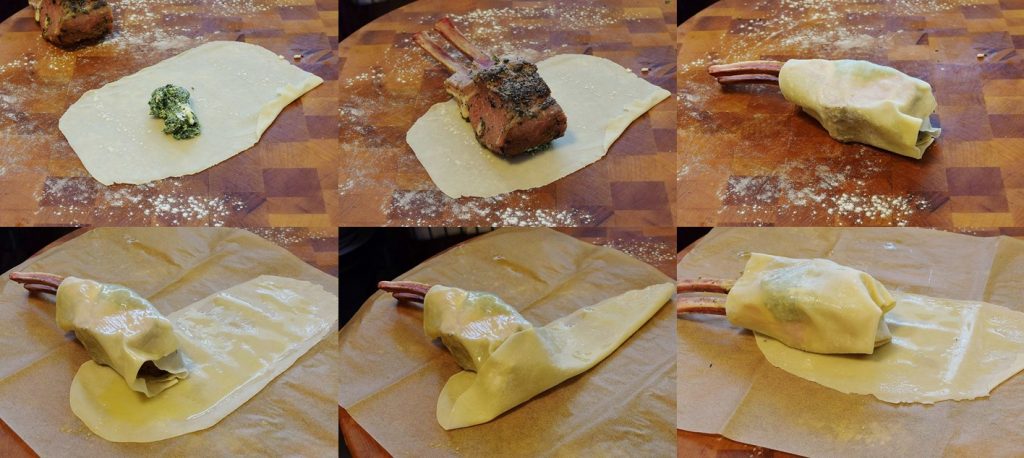
Take one sheet of the dough and lay it on the dusted board. Place about half of the filling as shown below, and roll the rack up as shown in the first three slides. Lay out another sheet of the dough on parchment or butcher paper and use a pastry brush to paint with butter. Place the rack as shown in the first two lower slides, so you can fold the end of the pastry over it when you roll it up–this secures the filling.
Paint another sheet, and roll the lamb up in it lengthwise as shown in the bottom right slide above. We are covering all the bases! How many sheets you use depends on your preference, but I recommend using at least three sheets. For this demonstration we used six, because, well, I had a lot of dough!
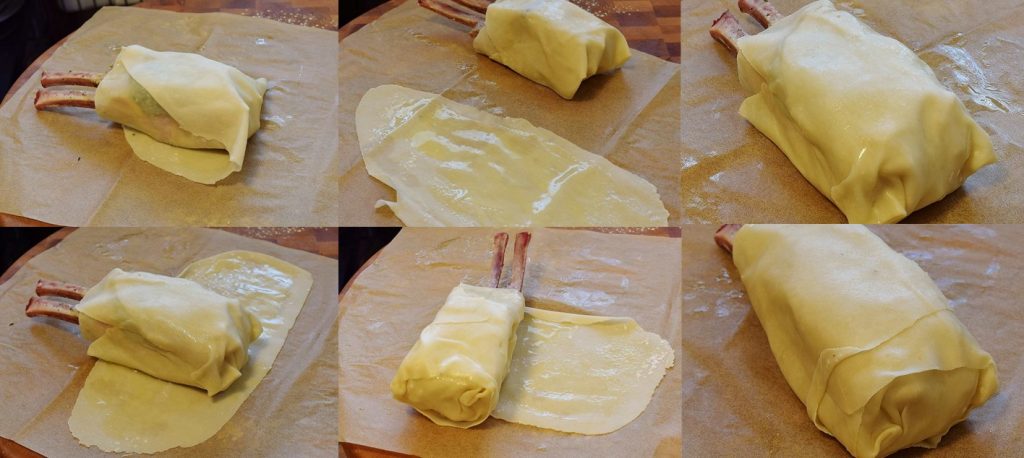
Continue buttering the sheets and rolling the rack in different directions as shown–use your best judgment as to which faces are more/less secure, but do not worry about leaks–we do not need or even want a perfect seal. If the seal is air tight the package will inflate and burst. When completed, paint the outer surface with butter. This prevents the dough from cracking while it rests in the refrigerator.
Heat enough oil in a large sauce pot to submerge the package–approximately 1 quart/1 liter. If you are judicious, the oil will remain clean to be saved and used again. It can and should be refrigerated–this retards rancidity. Monitor the oil’s temperature until it achieves:
325F/165C.
Meanwhile, preheat your oven to
350F/176C
When the oil is hot, poke a few holes in the dough with a fork or skewer, and carefully lower into the oil with a slotted spoon–do not drop it in, or you may get the “cannonball” effect.
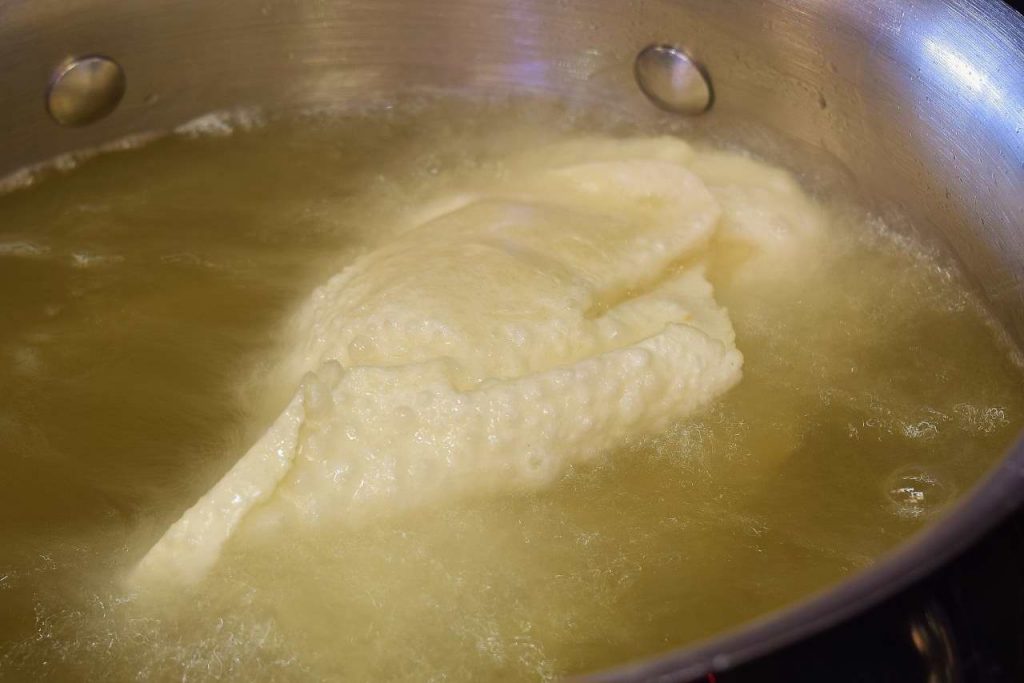
The package will sink at first, so just watch it and gently turn it over when it starts to brown on the bottom.
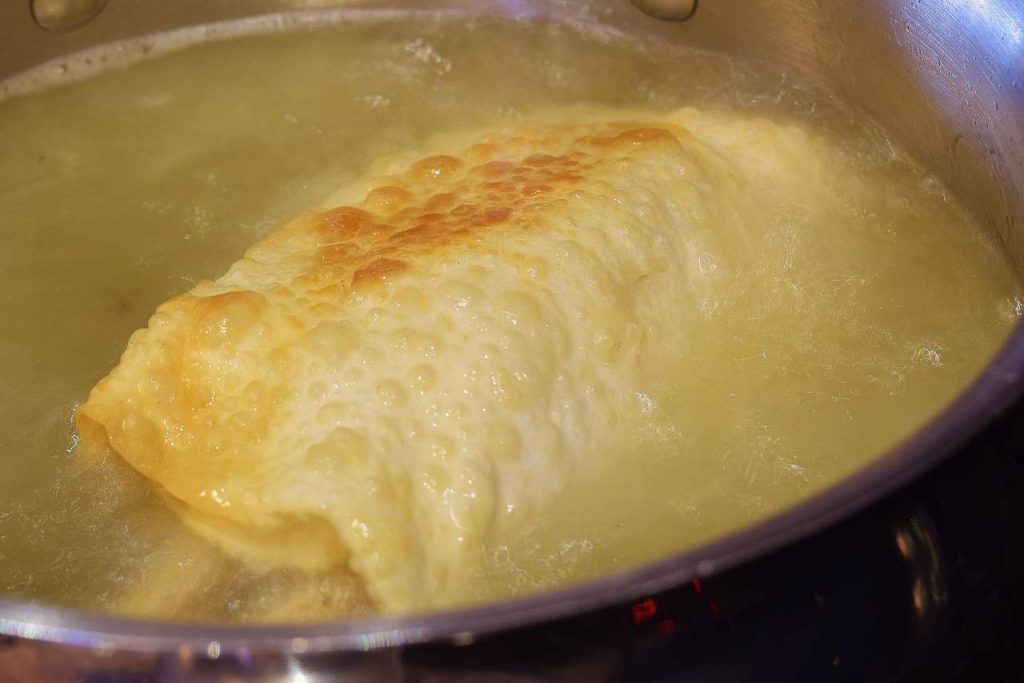
Continue frying until the package is golden brown.
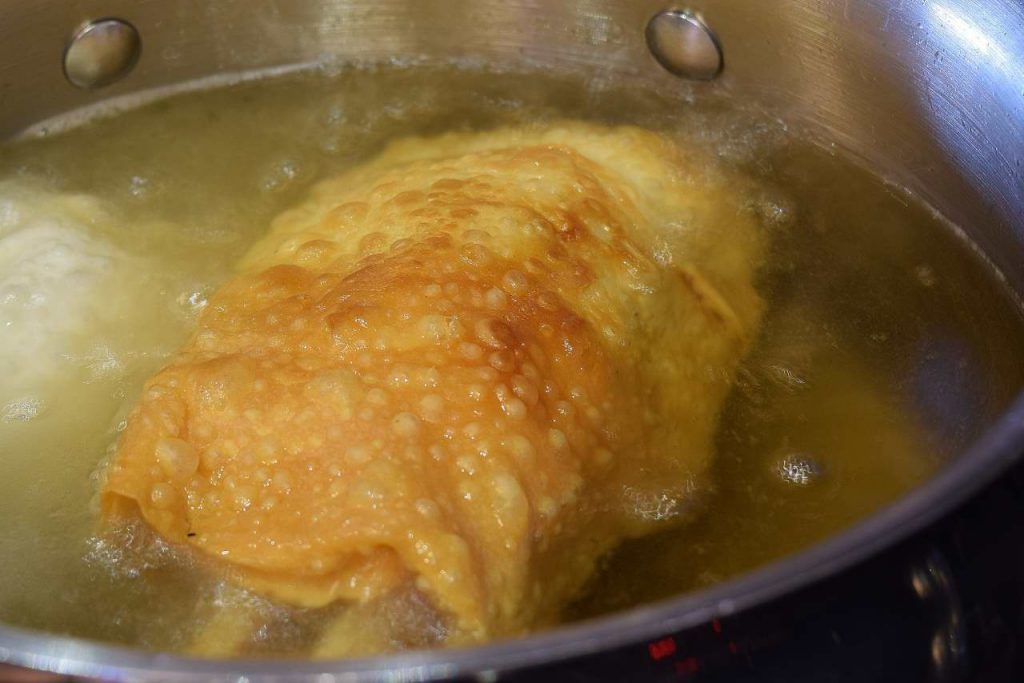
Even though it is evenly browned, the lamb itself is still about 70F/21C. Put the package in the oven and monitor with a probe thermometer until it achieves 130F/54C.
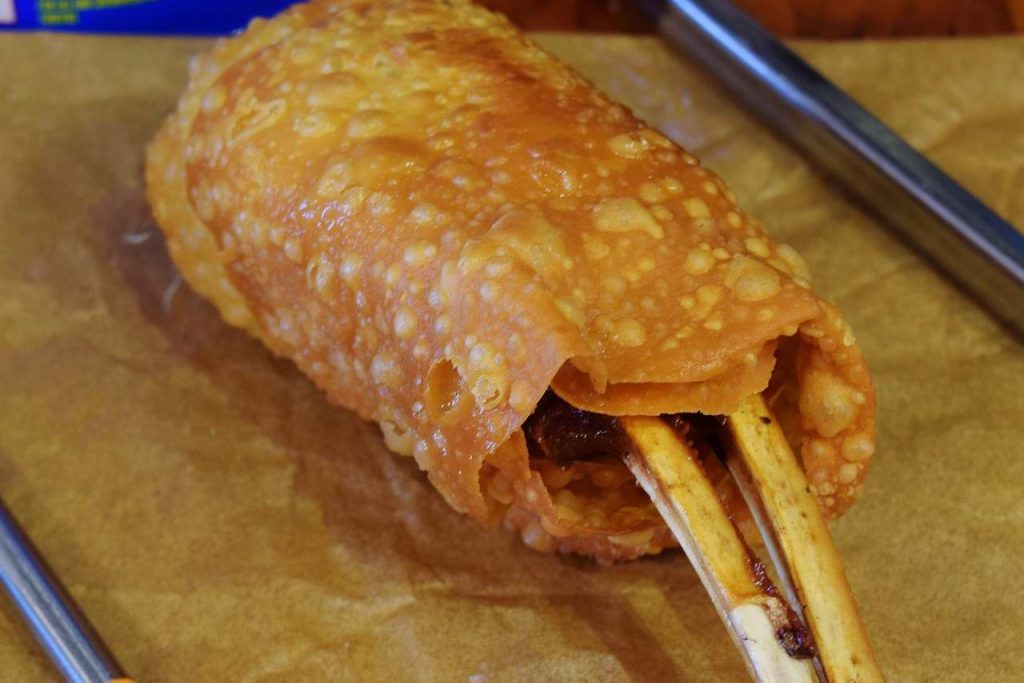
If you prefer your lamb well done, leave it in the oven until the internal temperature achieves 155F/65C, or you can torch it after you cut it. When you remove the lamb from the oven, let it sit while you arrange your plates. It is too hot to carve right now–it needs a few minutes on the counter.
Arrange some of the relish on the center of the plate, and drizzle with the brown sauce.
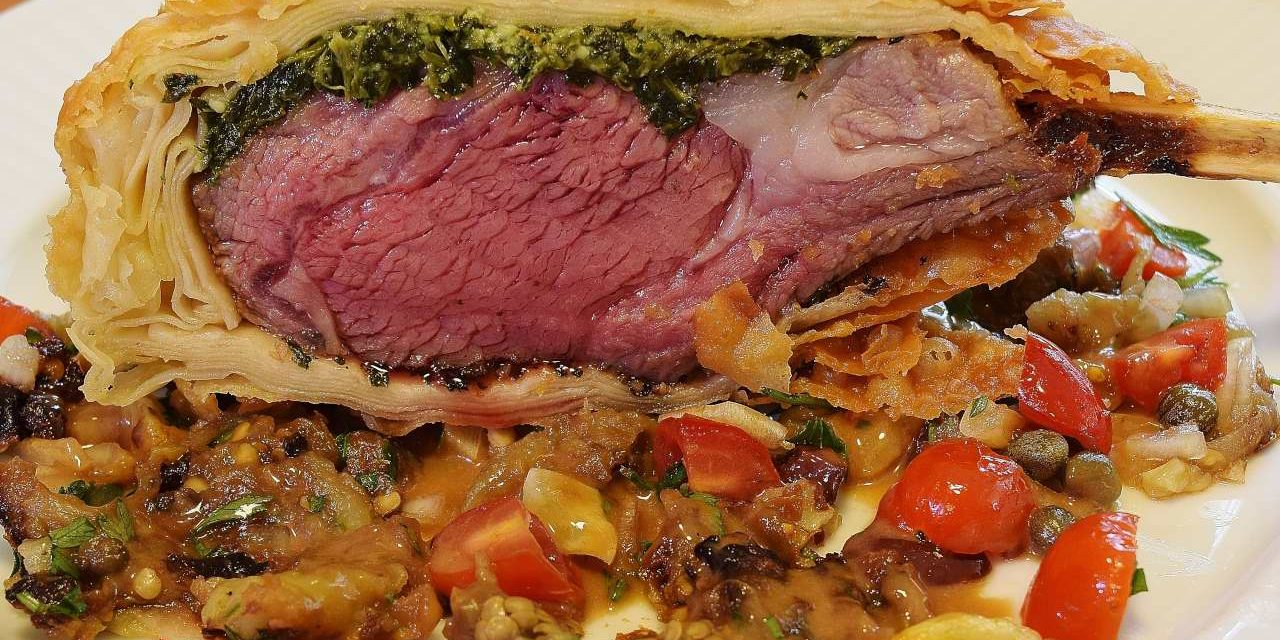
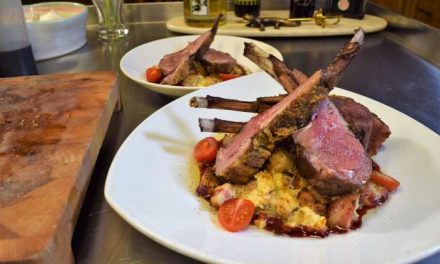
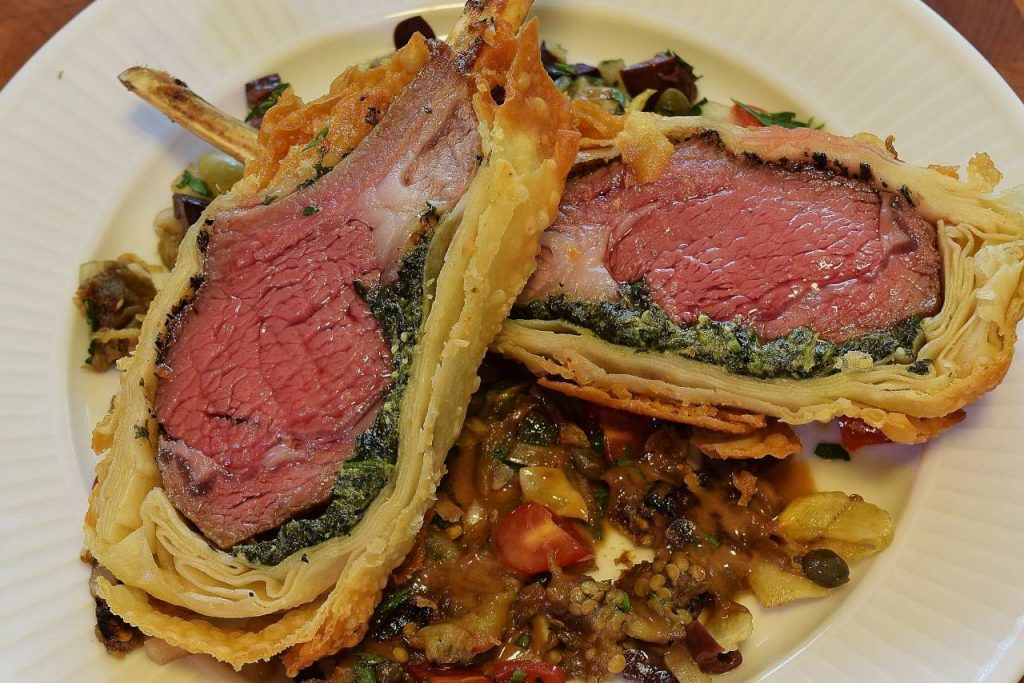
Because of the bulk of the stuffing and the dough, this amount is really enough to serve two. I show presentations using both one and two ribs per plate below. Holding the rack with the bones facing away from you, use a large slicer to remove the crust from the right side–this is optional, but makes the lamb a little easier to present. Then, shave the crust from the left side with the slicer, and cut in half, so it comes out like this:
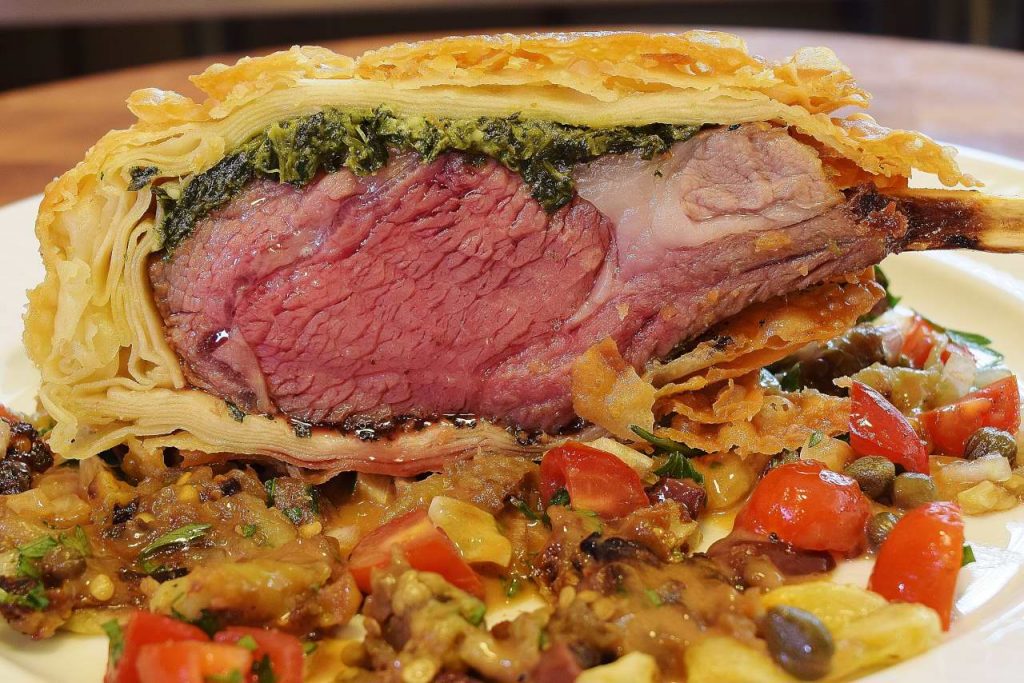
or this, for the big appetite. It’s really a lot!
Later that same day
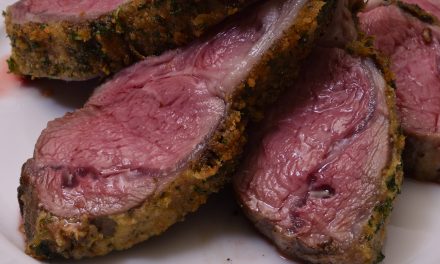
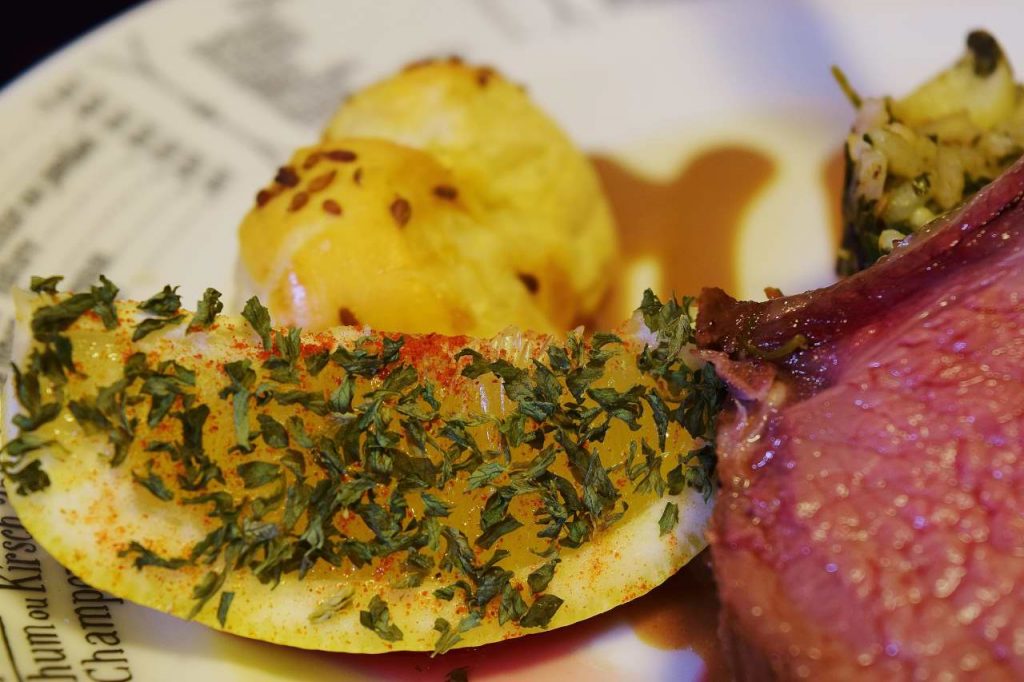
There are only two of us, so there was plenty of lamb for another meal. I painted the remaining rack with Dijon mustard and sprinkled with bread crumbs mixed with dried parsley and garlic powder. I matched some cooked rice with what remained of the relish. I drizzled the plate with the brown sauce, and garnished the plate with fresh lemon, an excellent flavor counterpoint for the eggplant. There is also a small puff pastry rissole for shape. After roasting the lamb until it achieved
130F/55C
I removed it from the oven and let it rest for a moment. I should have let it rest a little longer–you can see that the lamb appears a little overly done near the crust–this is because it did not have enough time to “bleed through” after being removed from the oven. It was late, we were hungry. I carved it and presented it. She seemed to like it–medium well done is her preference.
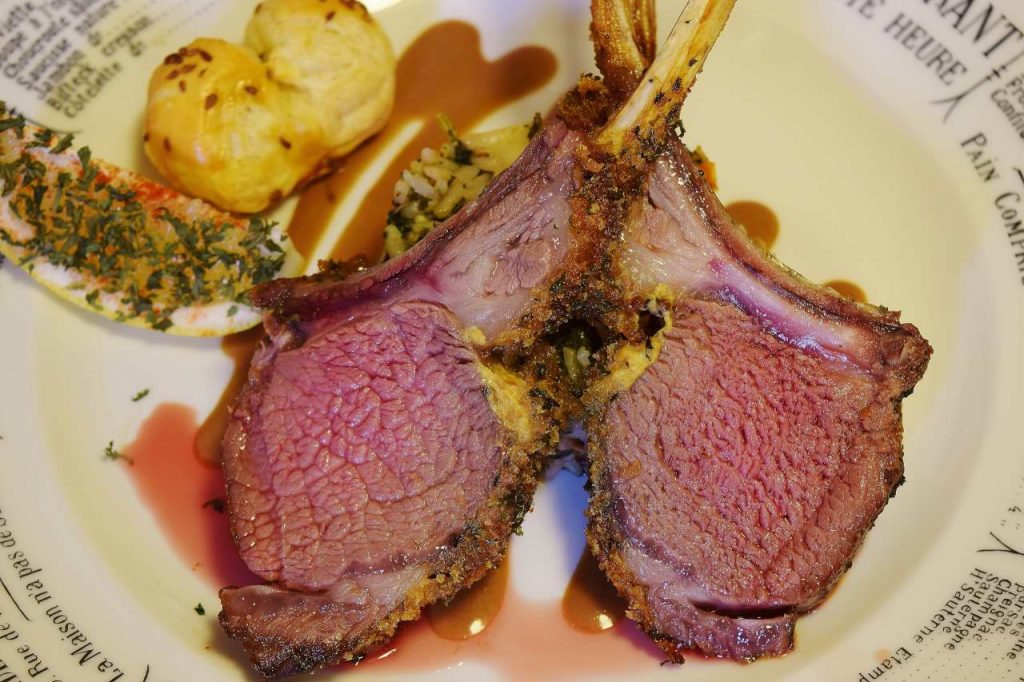
The weeping of the pink juices is also the result of not letting the roast rest quite long enough after roasting, please excuse my syntax. Still, for all its simplicity, the crust really brings a lot to this dish.
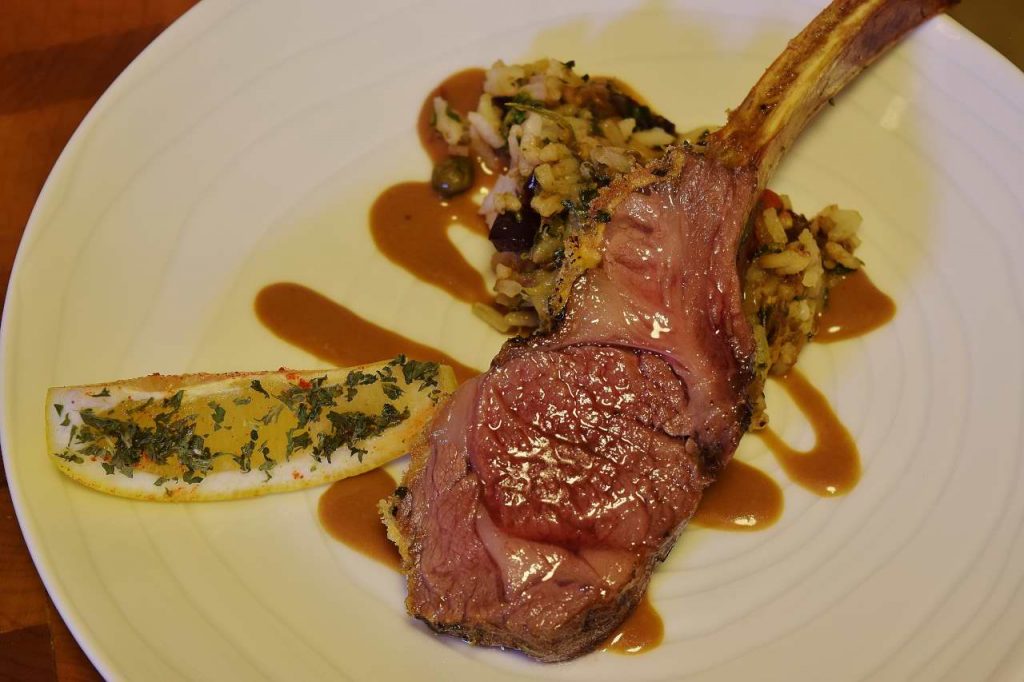
The rice was good too. I folded a little bit of spinach and Feta into it as an afterthought.
Stay posted for more features!

