It all starts with Espagnole–the sauce, not the language.
This is a very important sub-group of sauces commonly incorporated into many recipes. Typically made from beef bones (and veal bones, long ago now), Espagnole/demi-glace/brown sauces add flavor and color to poultry, lamb, pork, and even seafood dishes. There are convenient versions that can be purchased if the raw ingredients are not on hand. Poultry and pork bones can be used as well with good results. Lamb bones have a dominant flavor/aroma that can overwhelm the flavor of other proteins so they are not usually suitable for stocks and sauces.

Utilization
Bone, marrow, connective tissue and well developed muscle provide concentrated flavor in stocks and sauces. But one should not buy scrap–one should MAKE scrap. I plead guilty to keeping some Knorr around in its various forms for when I run out or just don’t have the time to make it.
Sous vide is not essential to make a good Espagnole/demi. But application of the technology to the simmering stage does have its benefits. There is less mess and little or no risk of scorching or over-reducing. Once you’re in the tank, you can pretty much set it and forget it. This is good, because this sauce should really be allowed at least 12 hours to fully develop its flavor and color. 183 F/84 C is the perfect temperature for extracting the flavor of the solid ingredients and for breaking down the collagen and connective tissue. Impatience and anxiety causes cooks to OVER boil this sauce, damaging the end product. It’s not laundry, as one of my Swiss mentors used to exclaim.
Ingredients:
- Beef, chicken, pork bones, meat, trim, at least 2 lbs/900 g.
- Celery, 4 stalks–use the outer ones that aren’t good for anything else. That’s how these sauces originated!
- Carrots, 2-3 each, peel on.
- Onions, 2 each–peels and all.
- Tomato PASTE, one 12 oz. can.
- Red wine, 12 oz (optional).
- Water, 2 quarts/2 L.
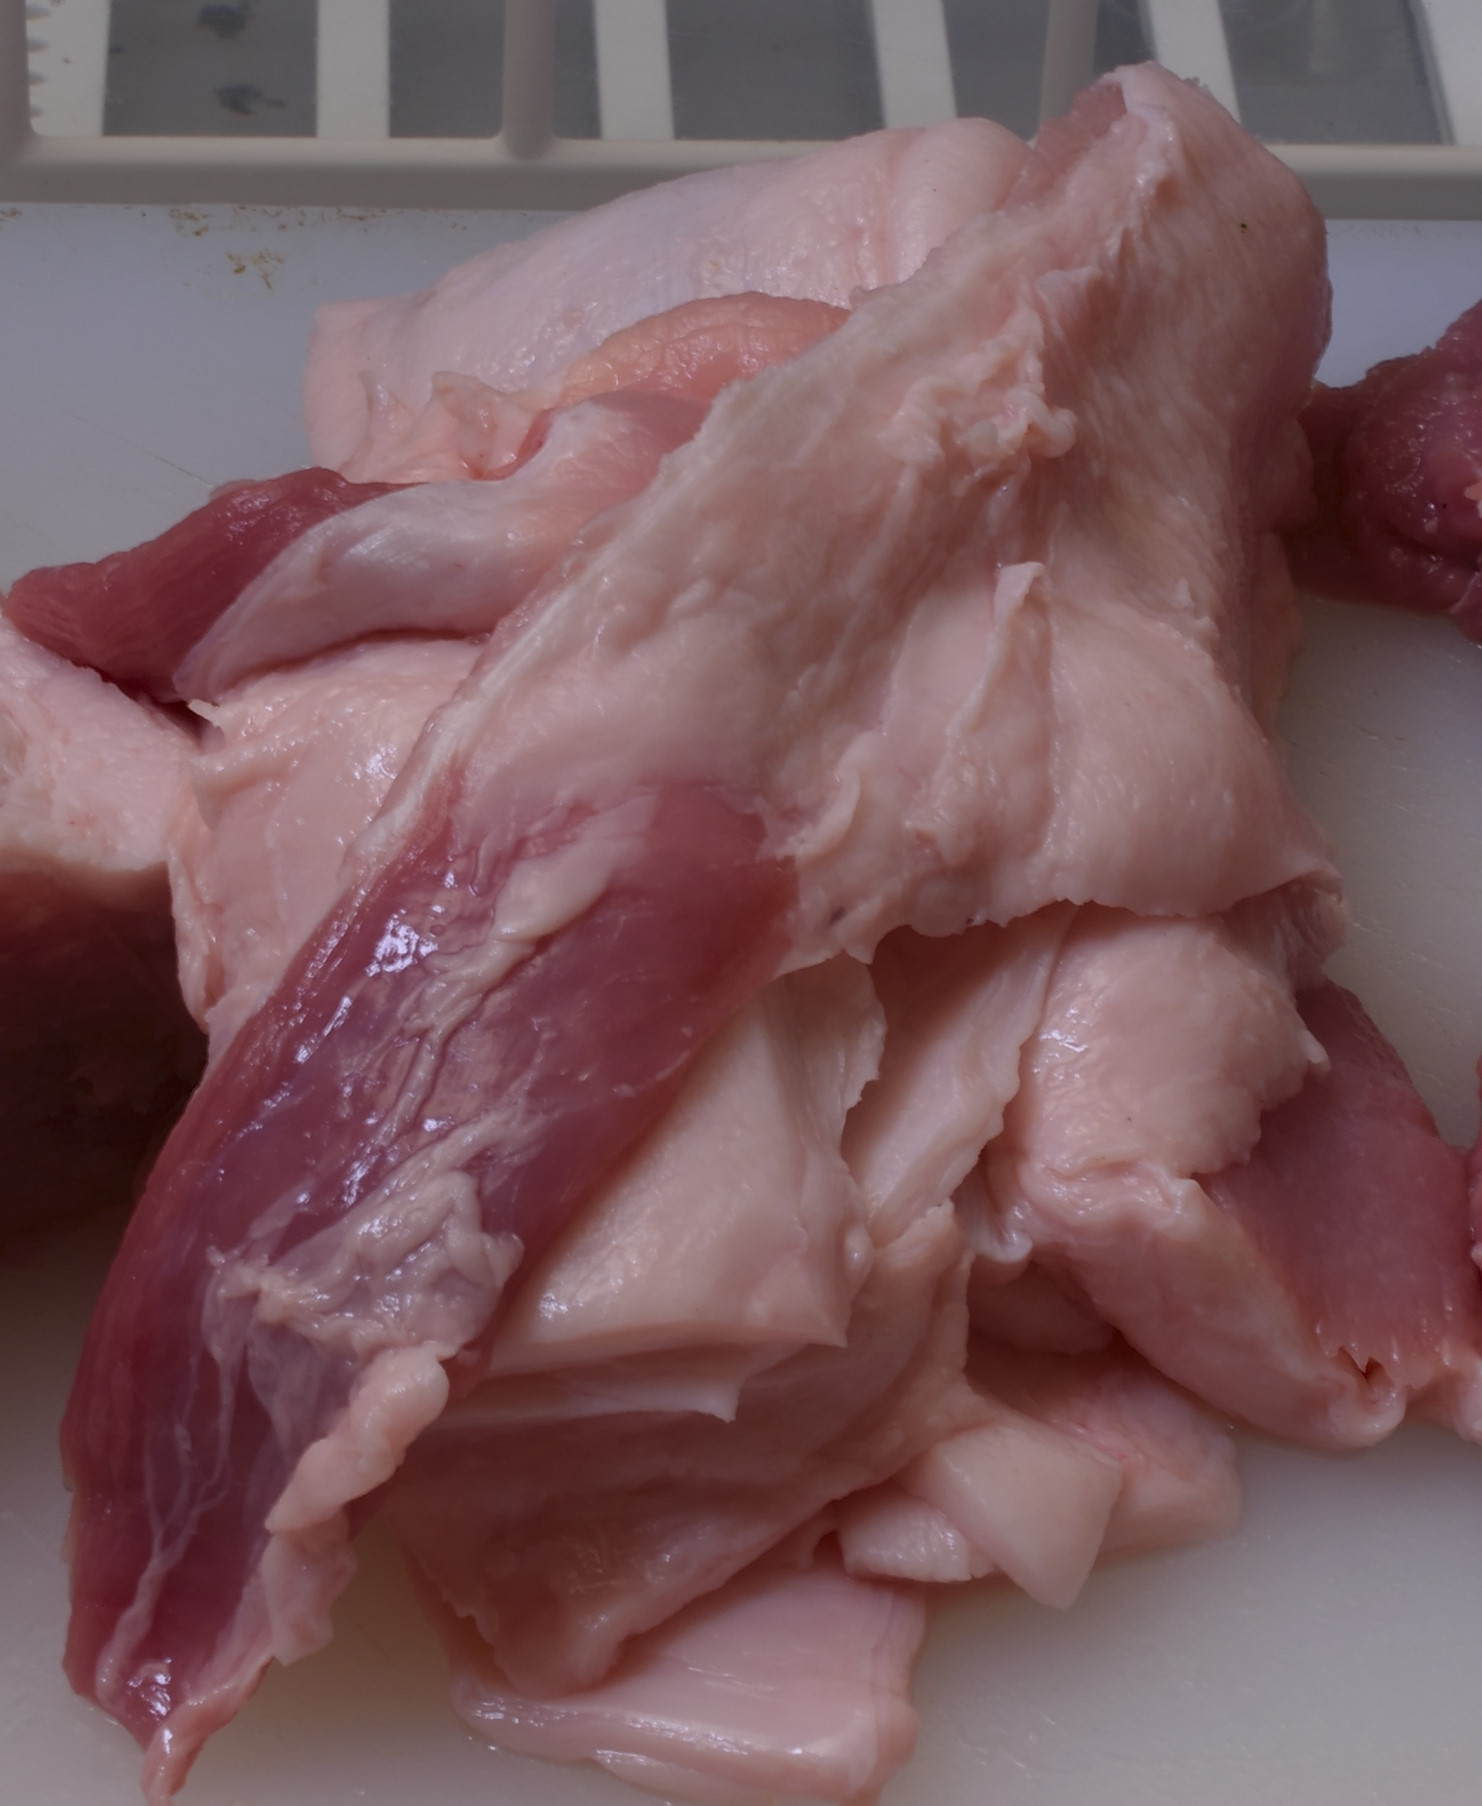
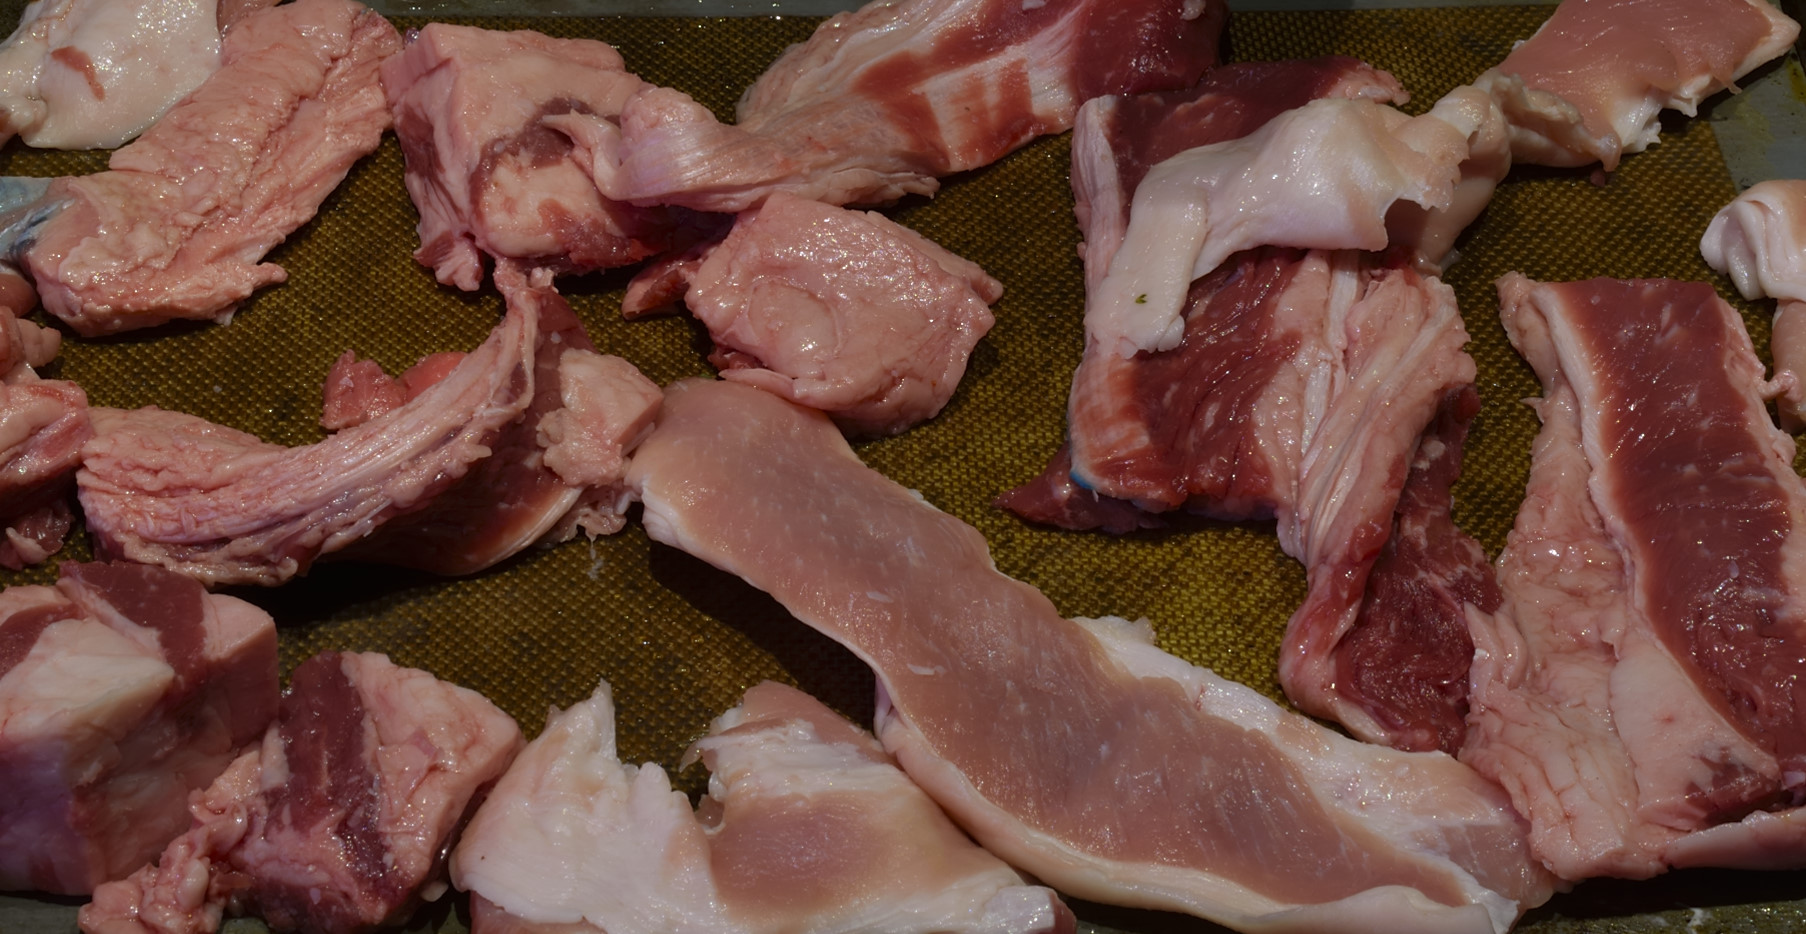
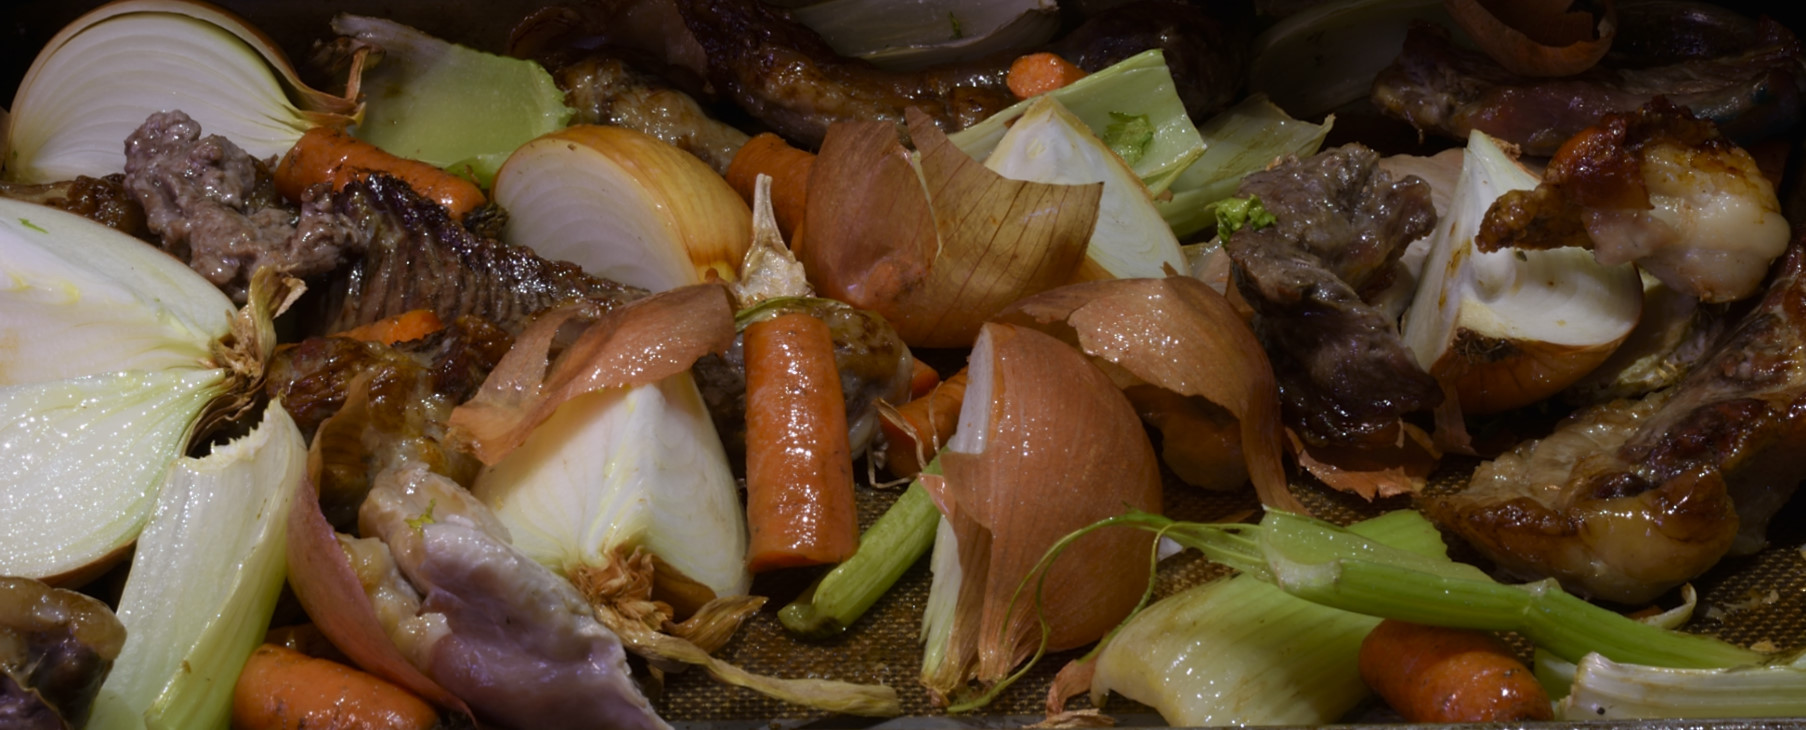
Gather your trim
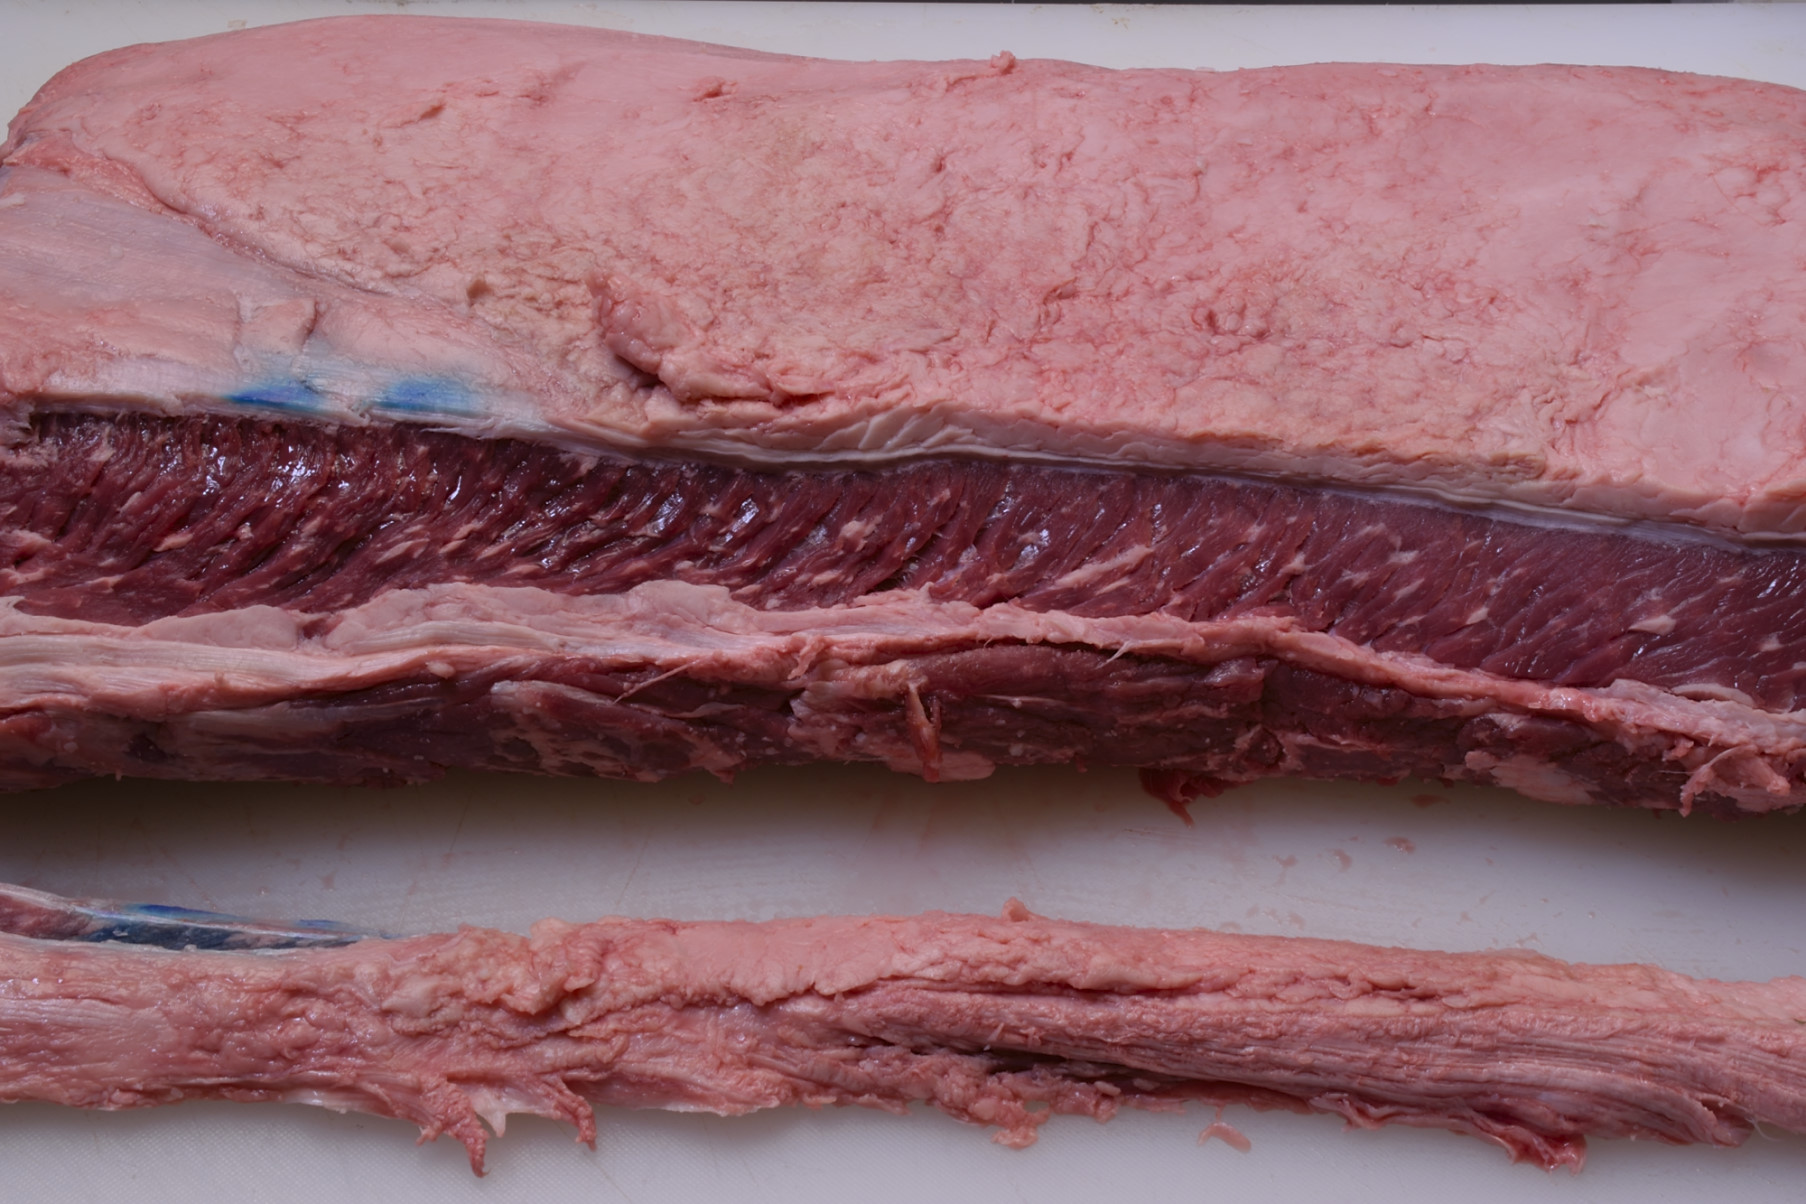
Big box stores and now even chain markets offer sub-primal cuts like beef strip loins (pictured below) and others. Some of the trim is good for homemade ground beef but there is still always a little bit that is too fatty or gristly. For those of us that have bravely ventured into the world of amateur butchering, this is an opportunity to utilize what markets either discard or sell back to tallow companies and the like.
Sous Vide: Preparing a Whole Pork Loin for Sous Vide Processing–2020
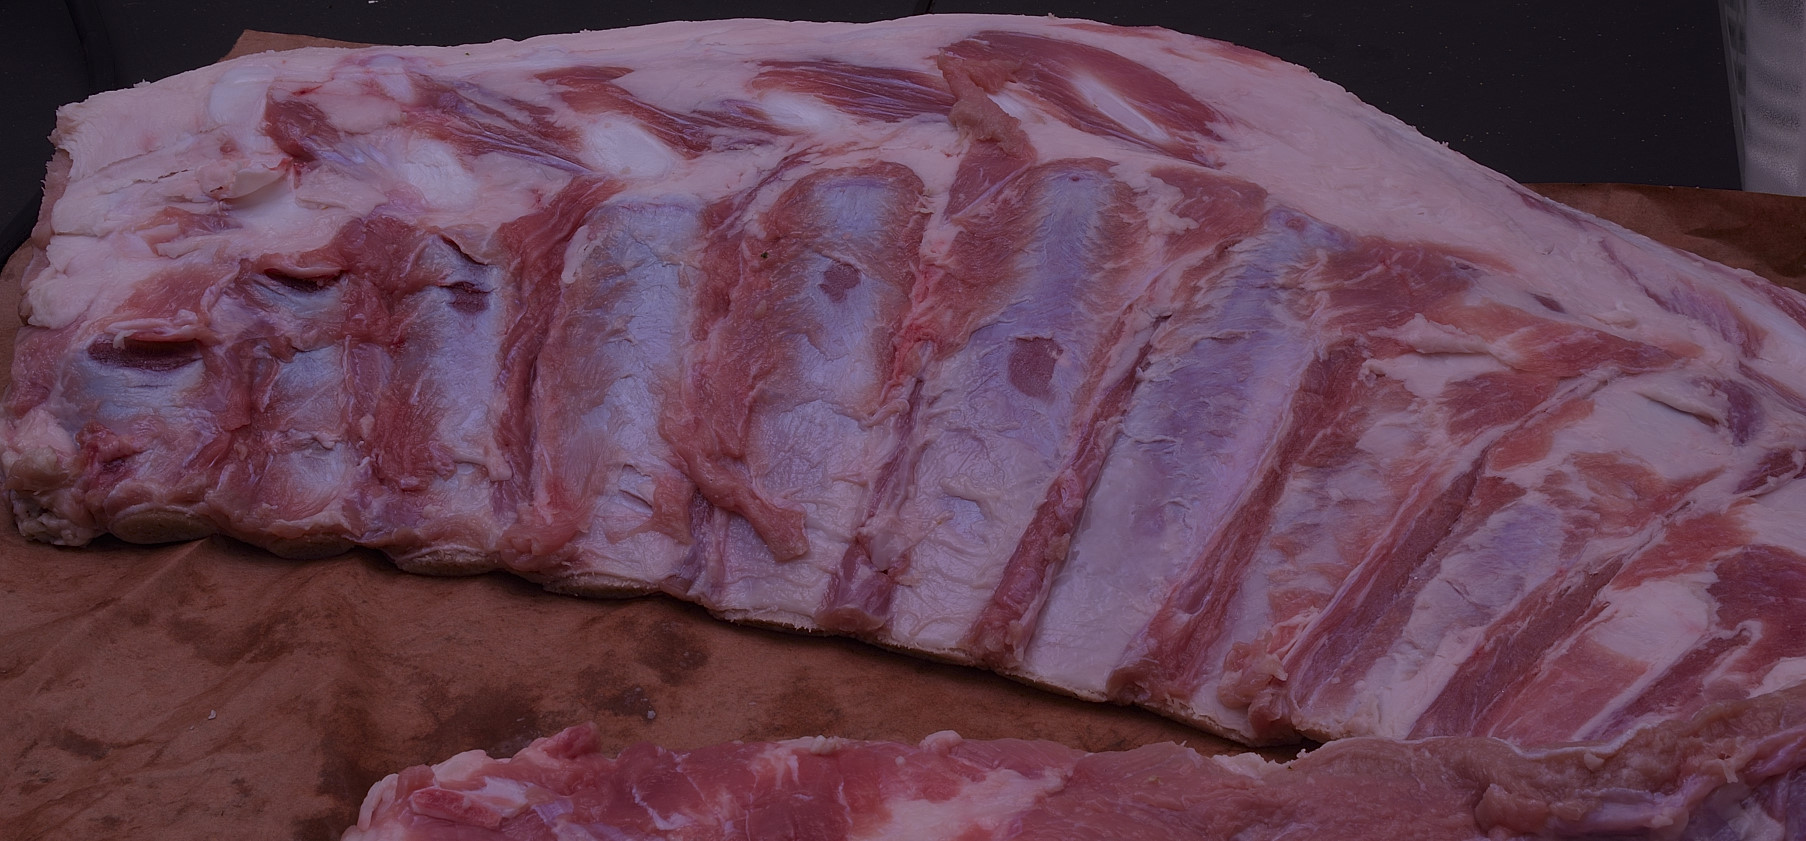
Above: bones removed from a veal breast, which is the anatomical equivalent to a bone-in beef brisket. This is a luxury that I afford myself sometimes.
Make it hot
Preheat your oven to 350 F/176 C.
Spread the meat/trim/scrap out to roast–I used a silicone baking sheet this time, very handy, no stick.
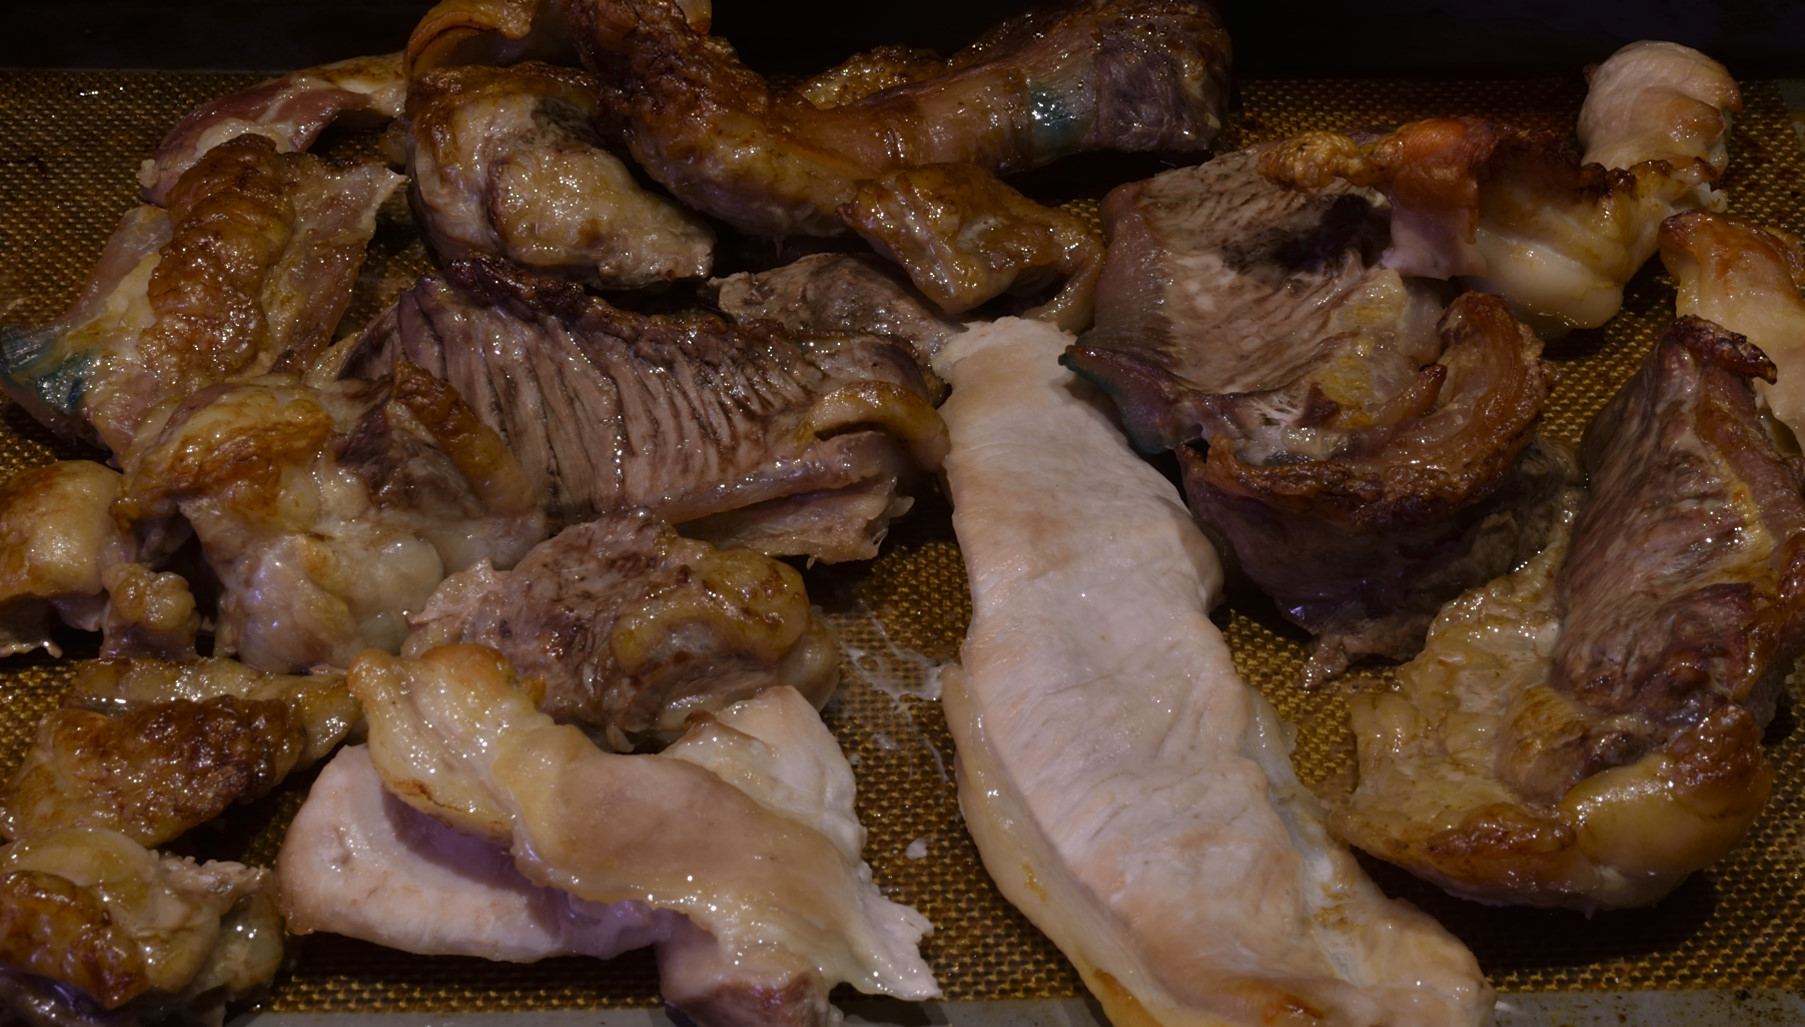
Roast for at least one hour until the meat is fully brown. Adding other ingredients slows the browning process so the browner the better as it were. It would take a LONG time to burn at this temperature.
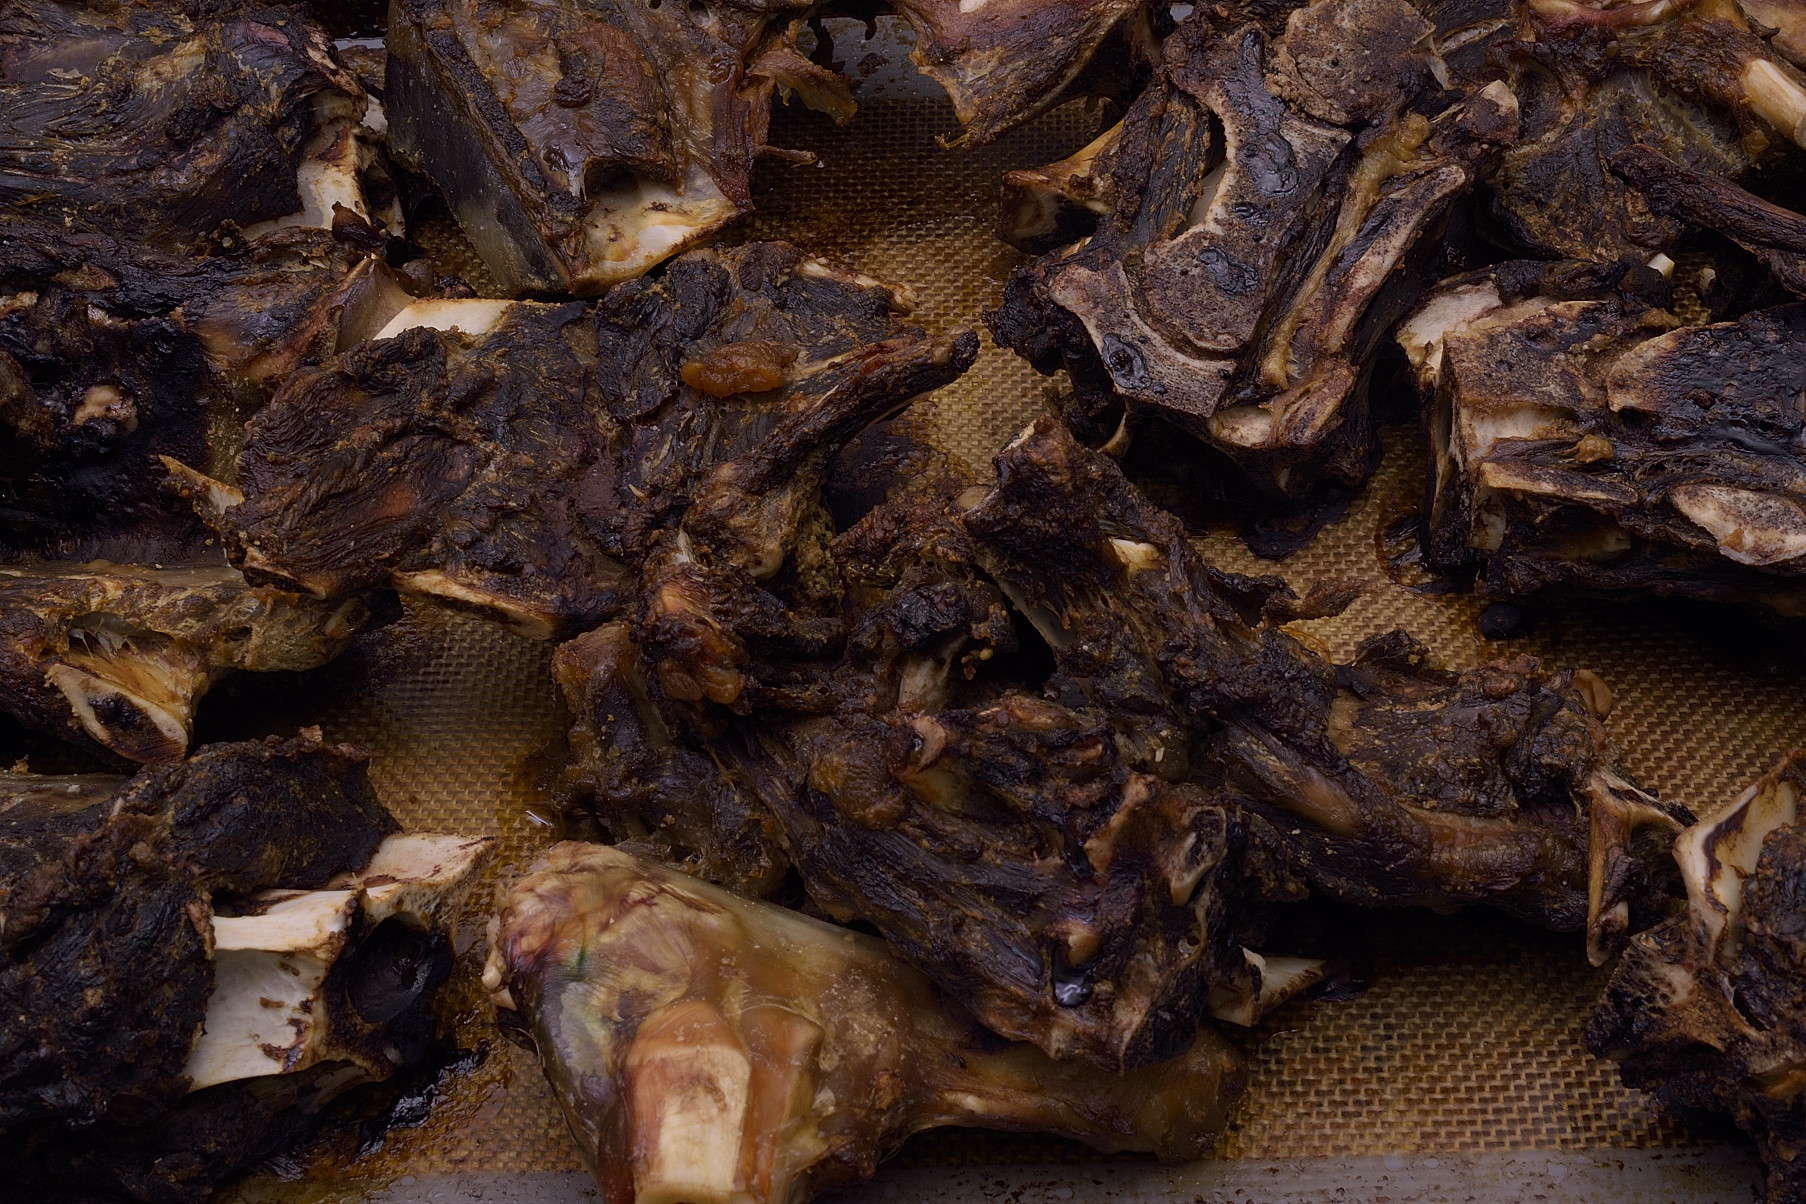
I was fortunate to come across some venison bones, perfectly suitable. Same procedure, allow a couple of hours to get fully roasted out.
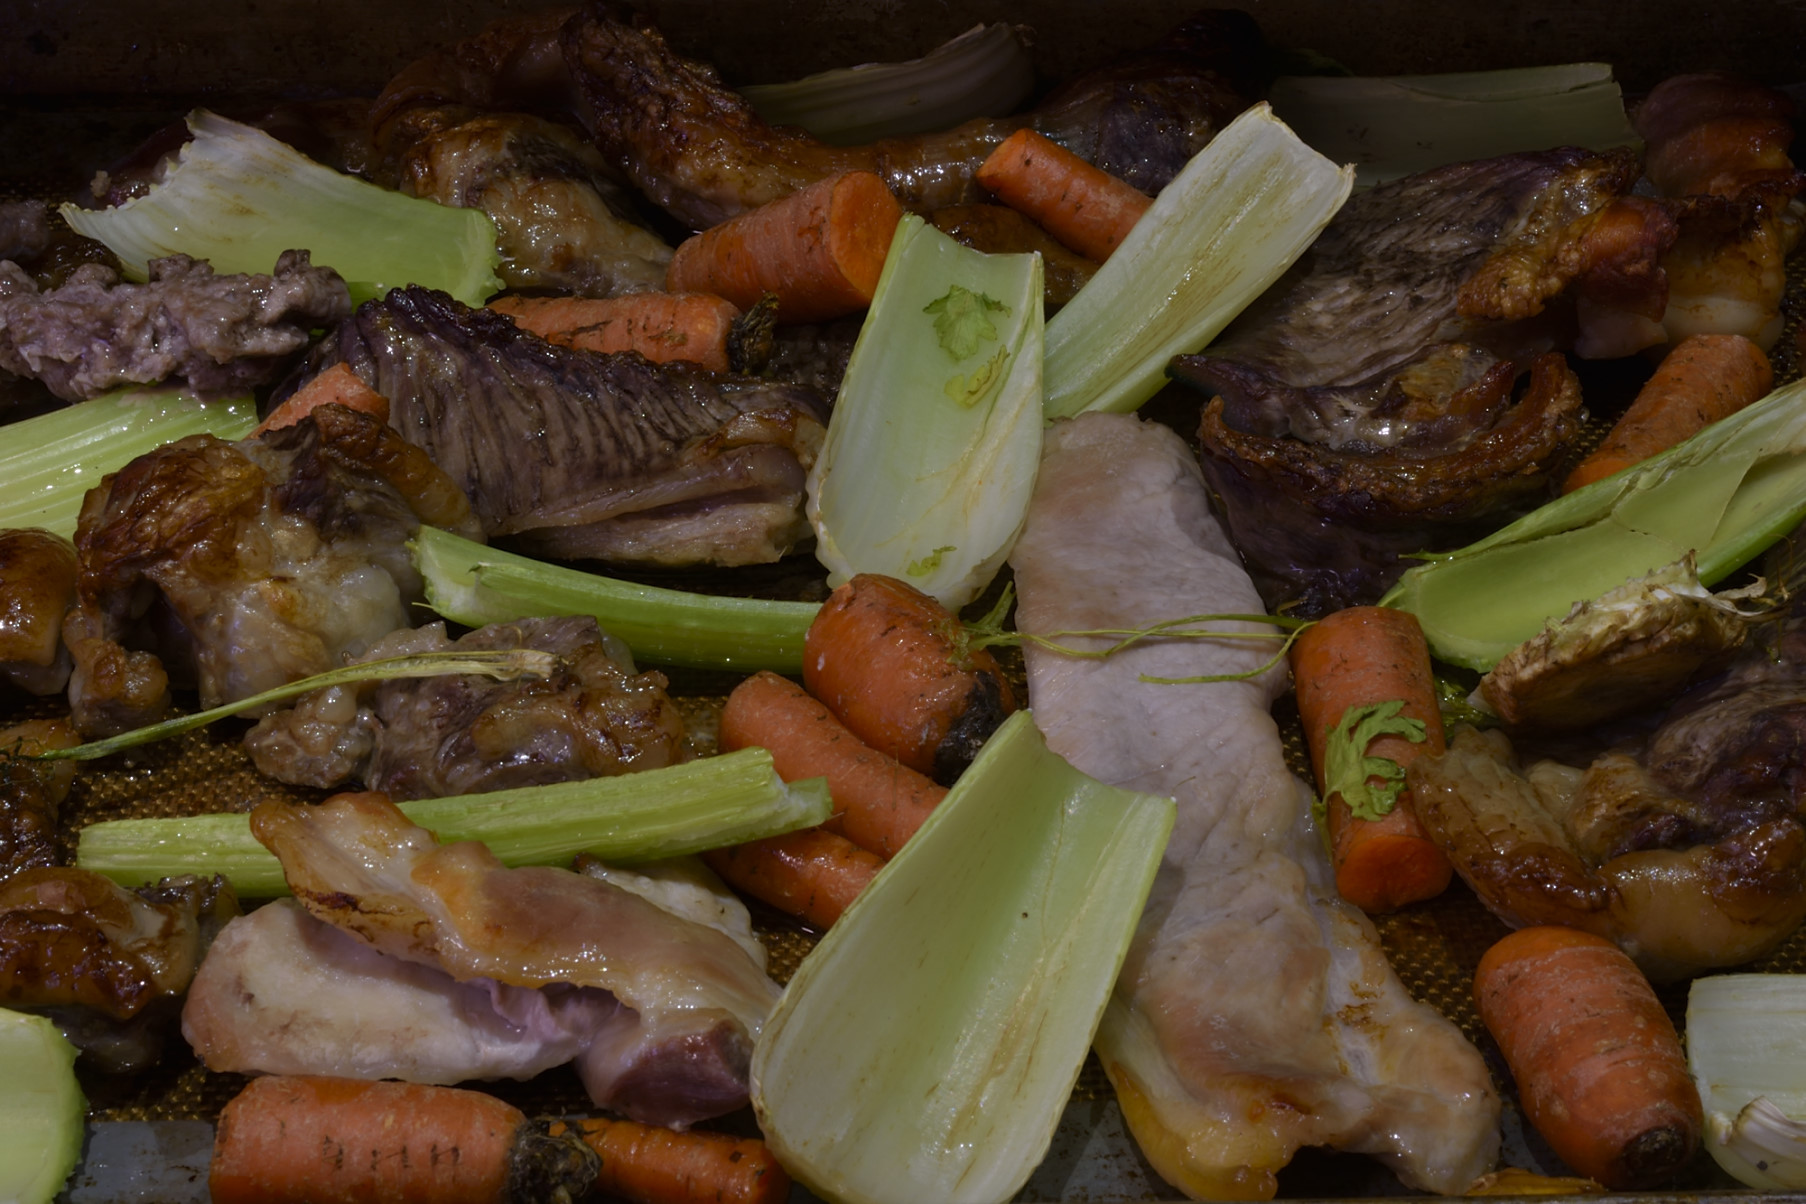
Mirepoix is a thing
Add the celery and carrots (but not the onions) and roast for at least another half hour.

Add the coarsely cut onions. Roast for at least another half hour. Put away the stopwatch–use the color as your guide.
Not yet. The meat does not create the color–the vegetables do that. Another myth dispelled.
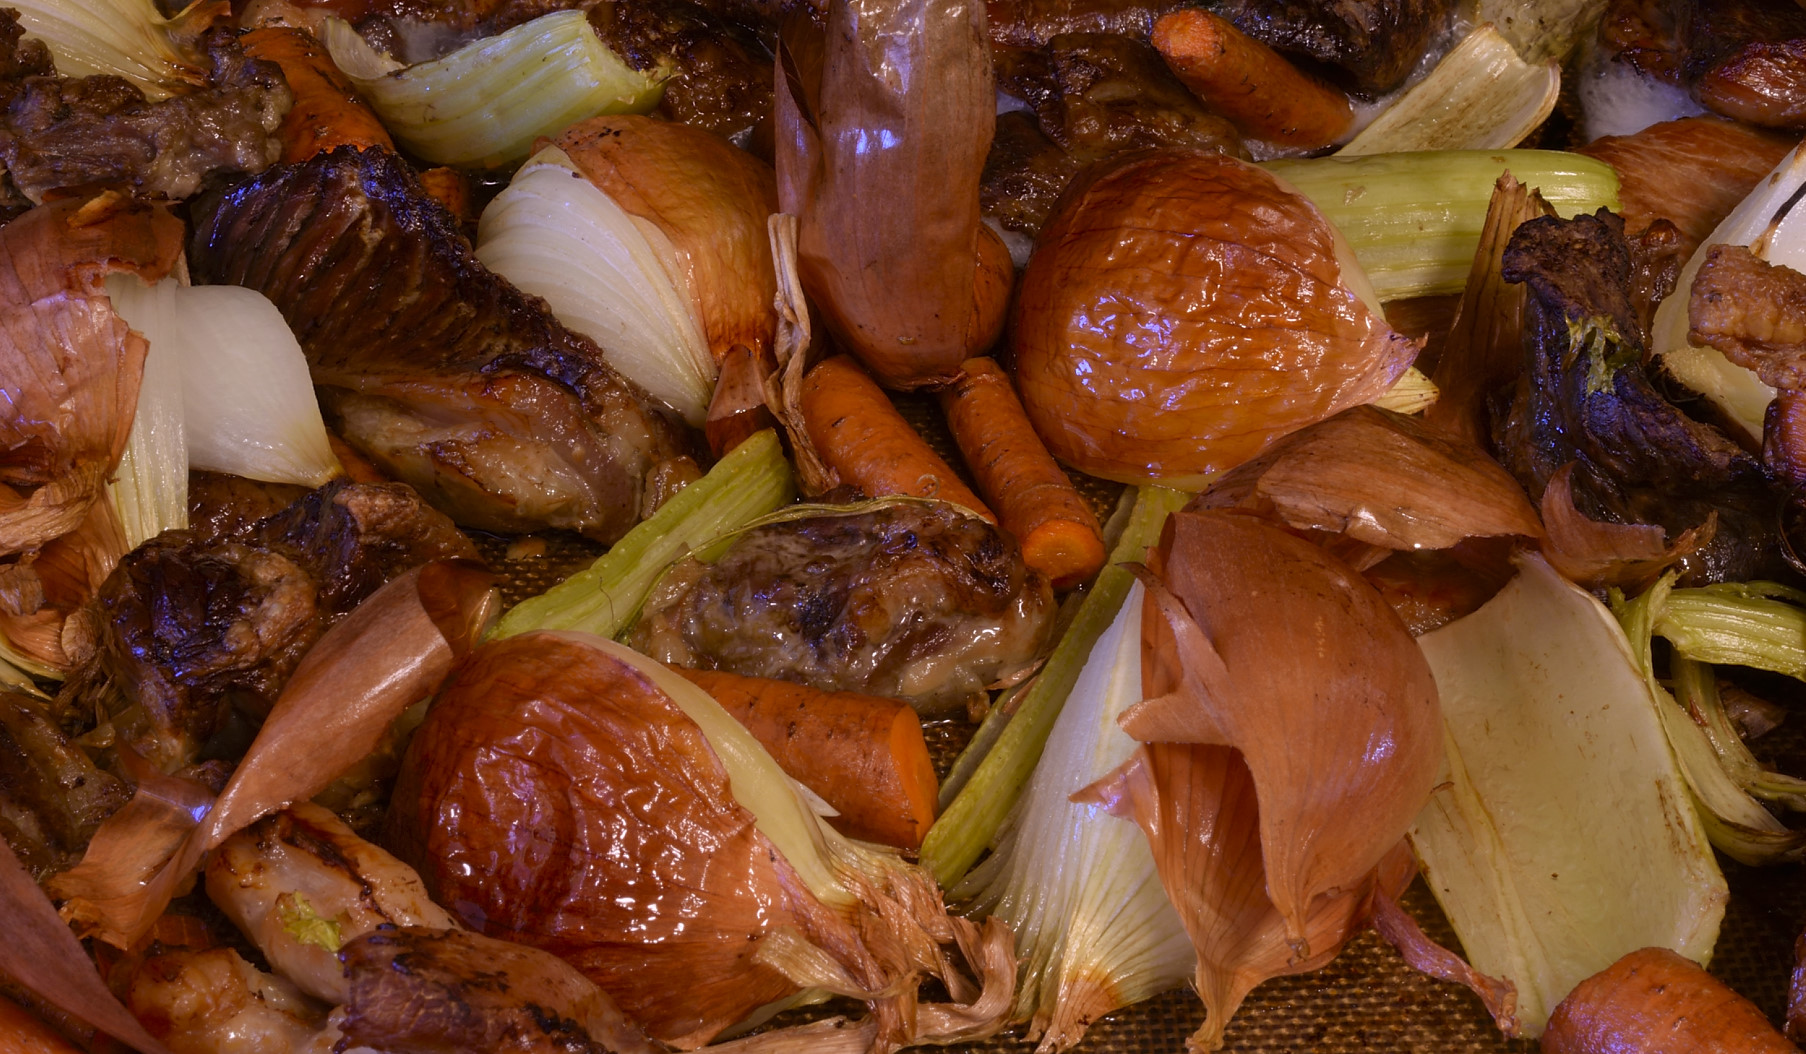
You can see the onions have browned. They should be at LEAST this dark. Patience, Grasshopper.
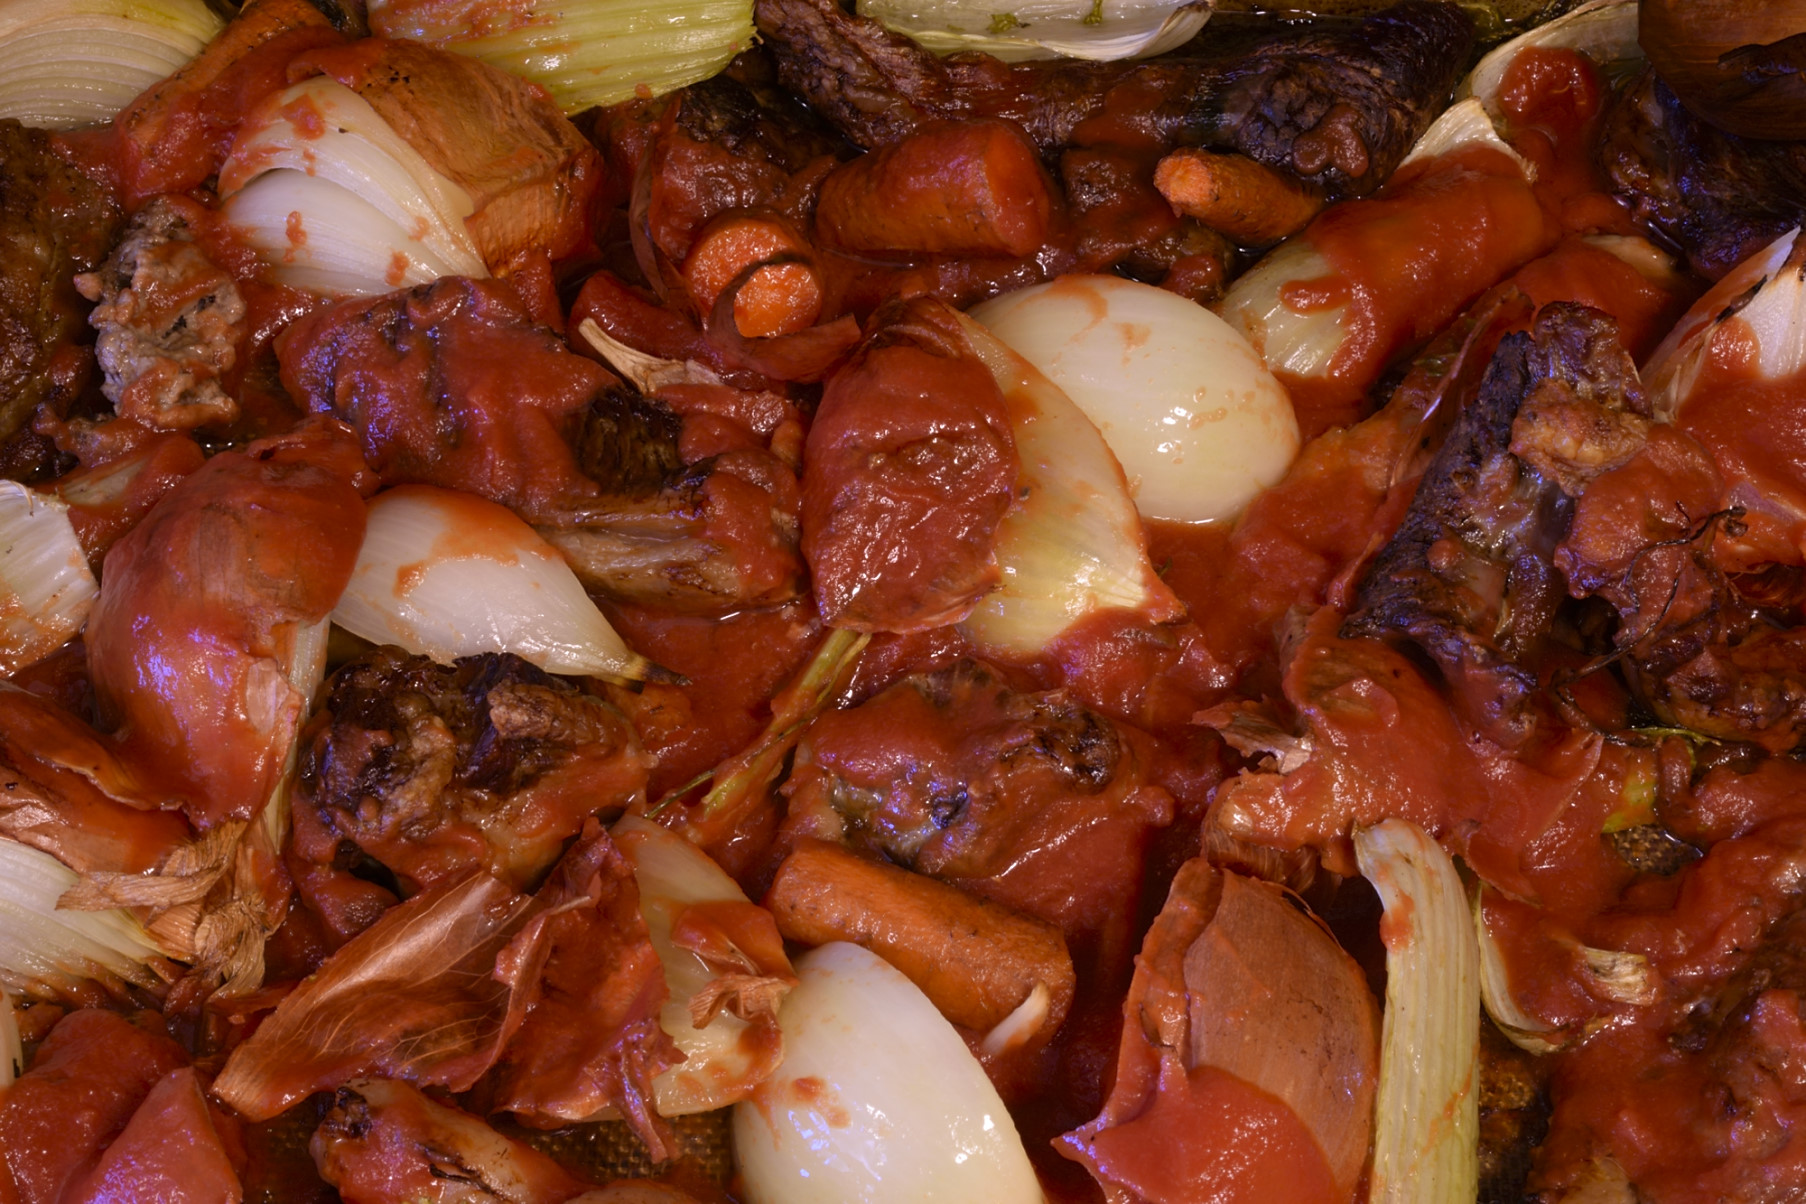
Add the tomato sauce and stir just enough to coat the vegetables.
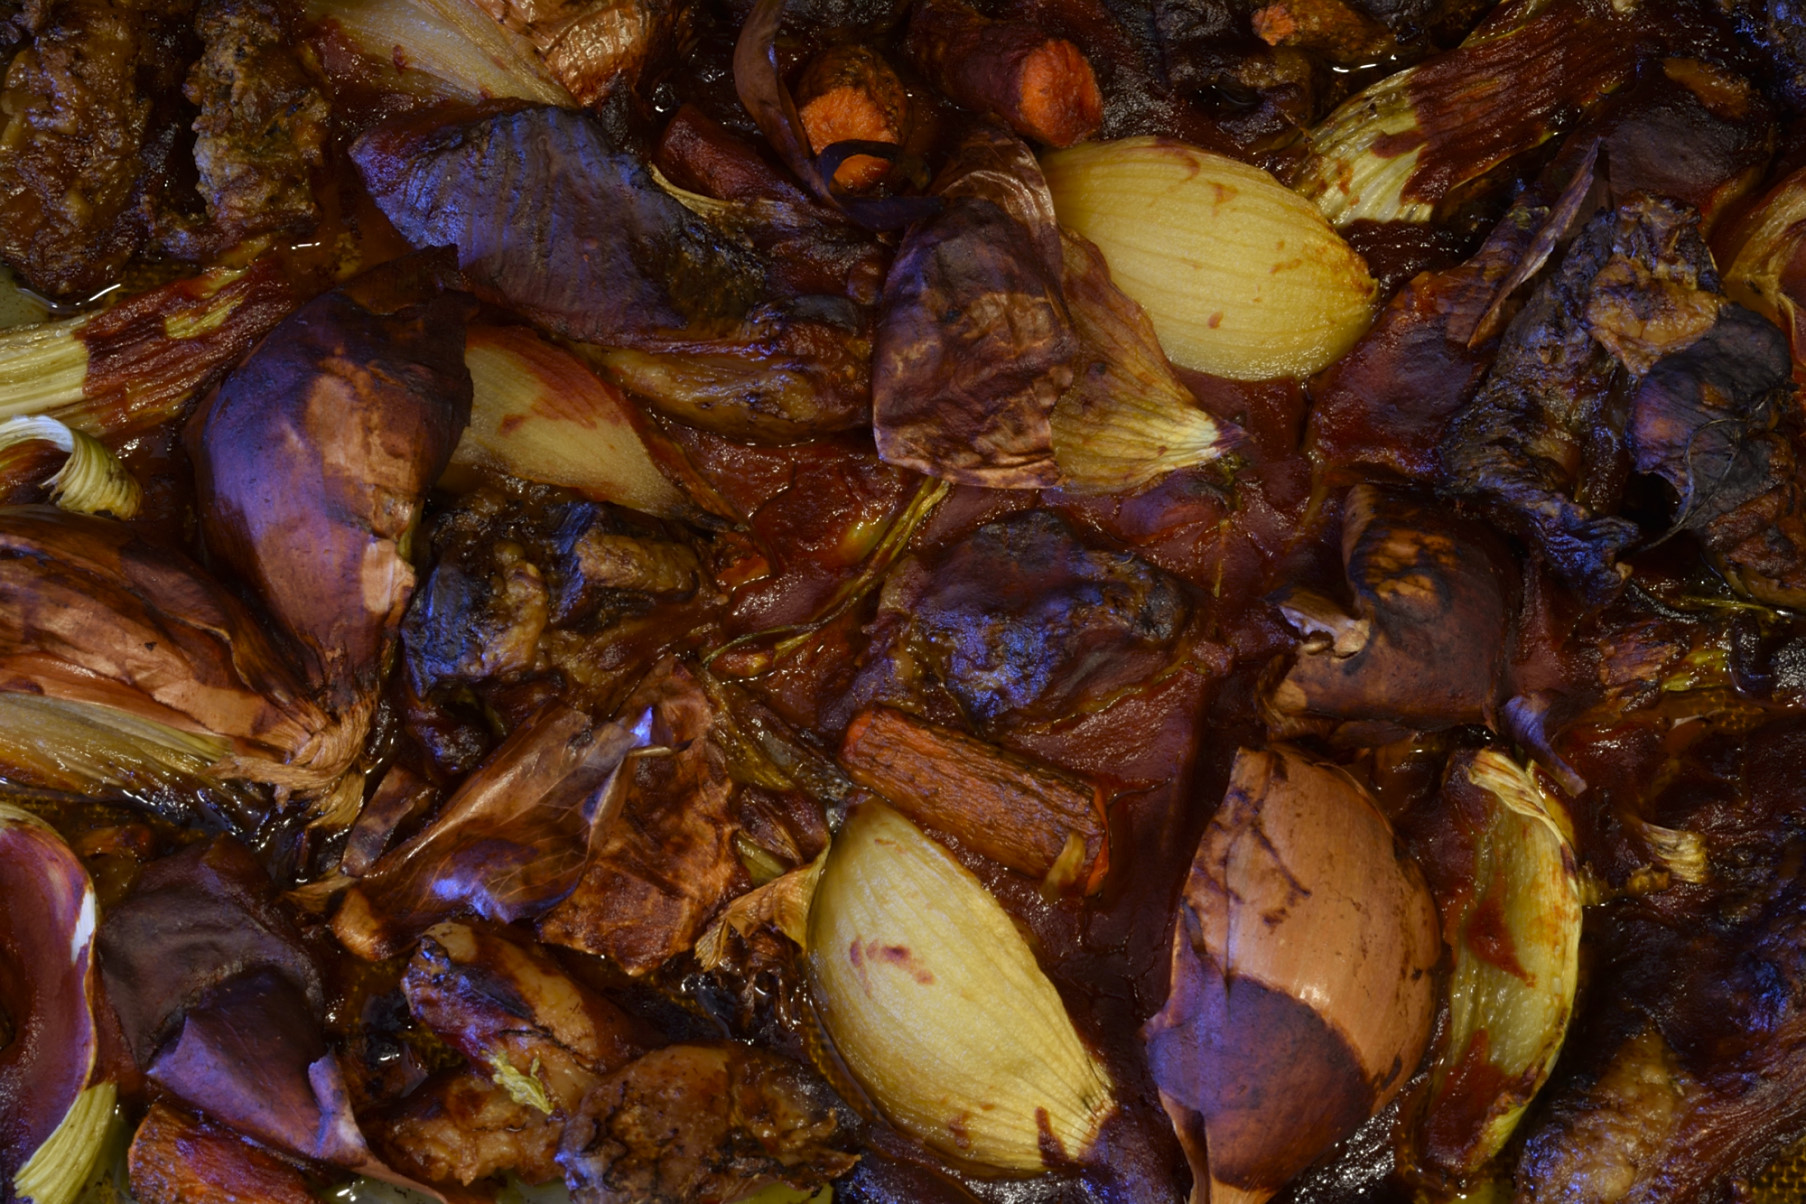
Roast until it looks like this. Again, a clock cannot measure the amount of caramelization and Maillard effect that has occurred. Only your eyes can do that. Wine really is not necessary but if you want to incorporate it now is the time to do it–make sure you continue roasting until the mixture looks like this again. Wine adds flavor. Wine is not intended to add volume.
Now we’re getting somewhere…
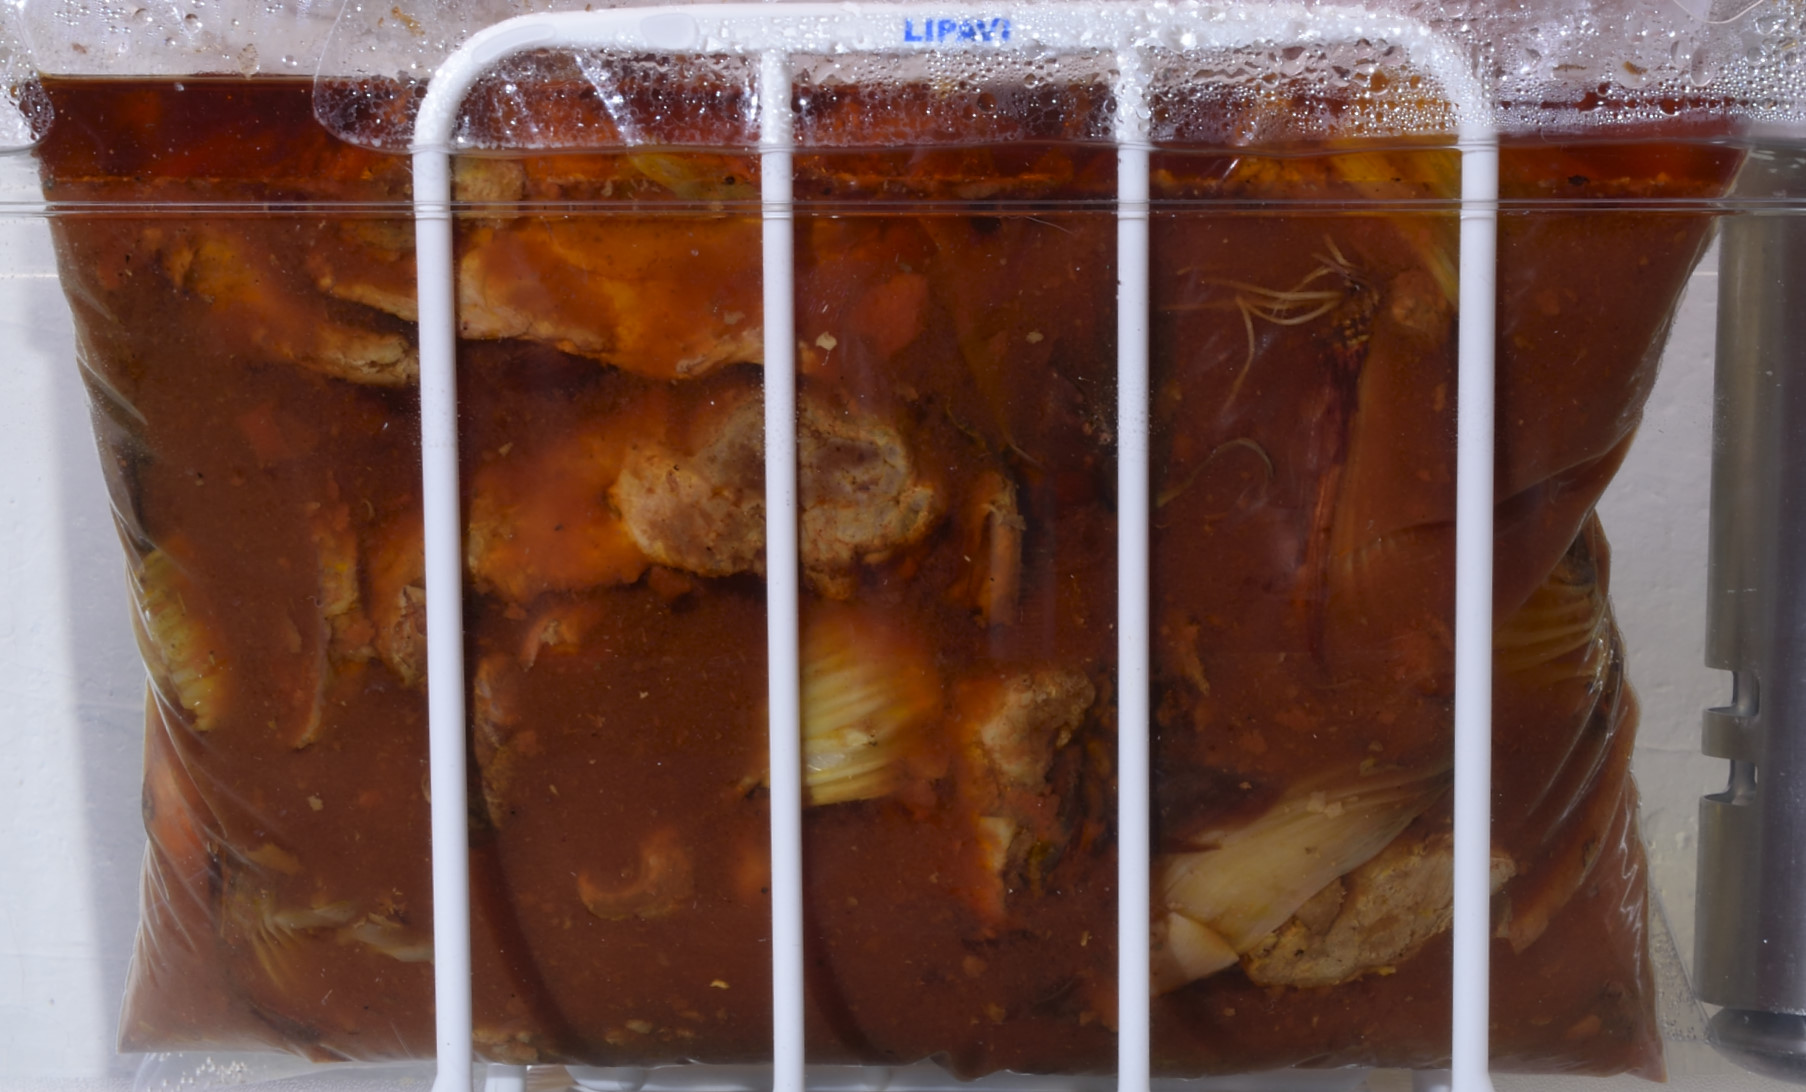
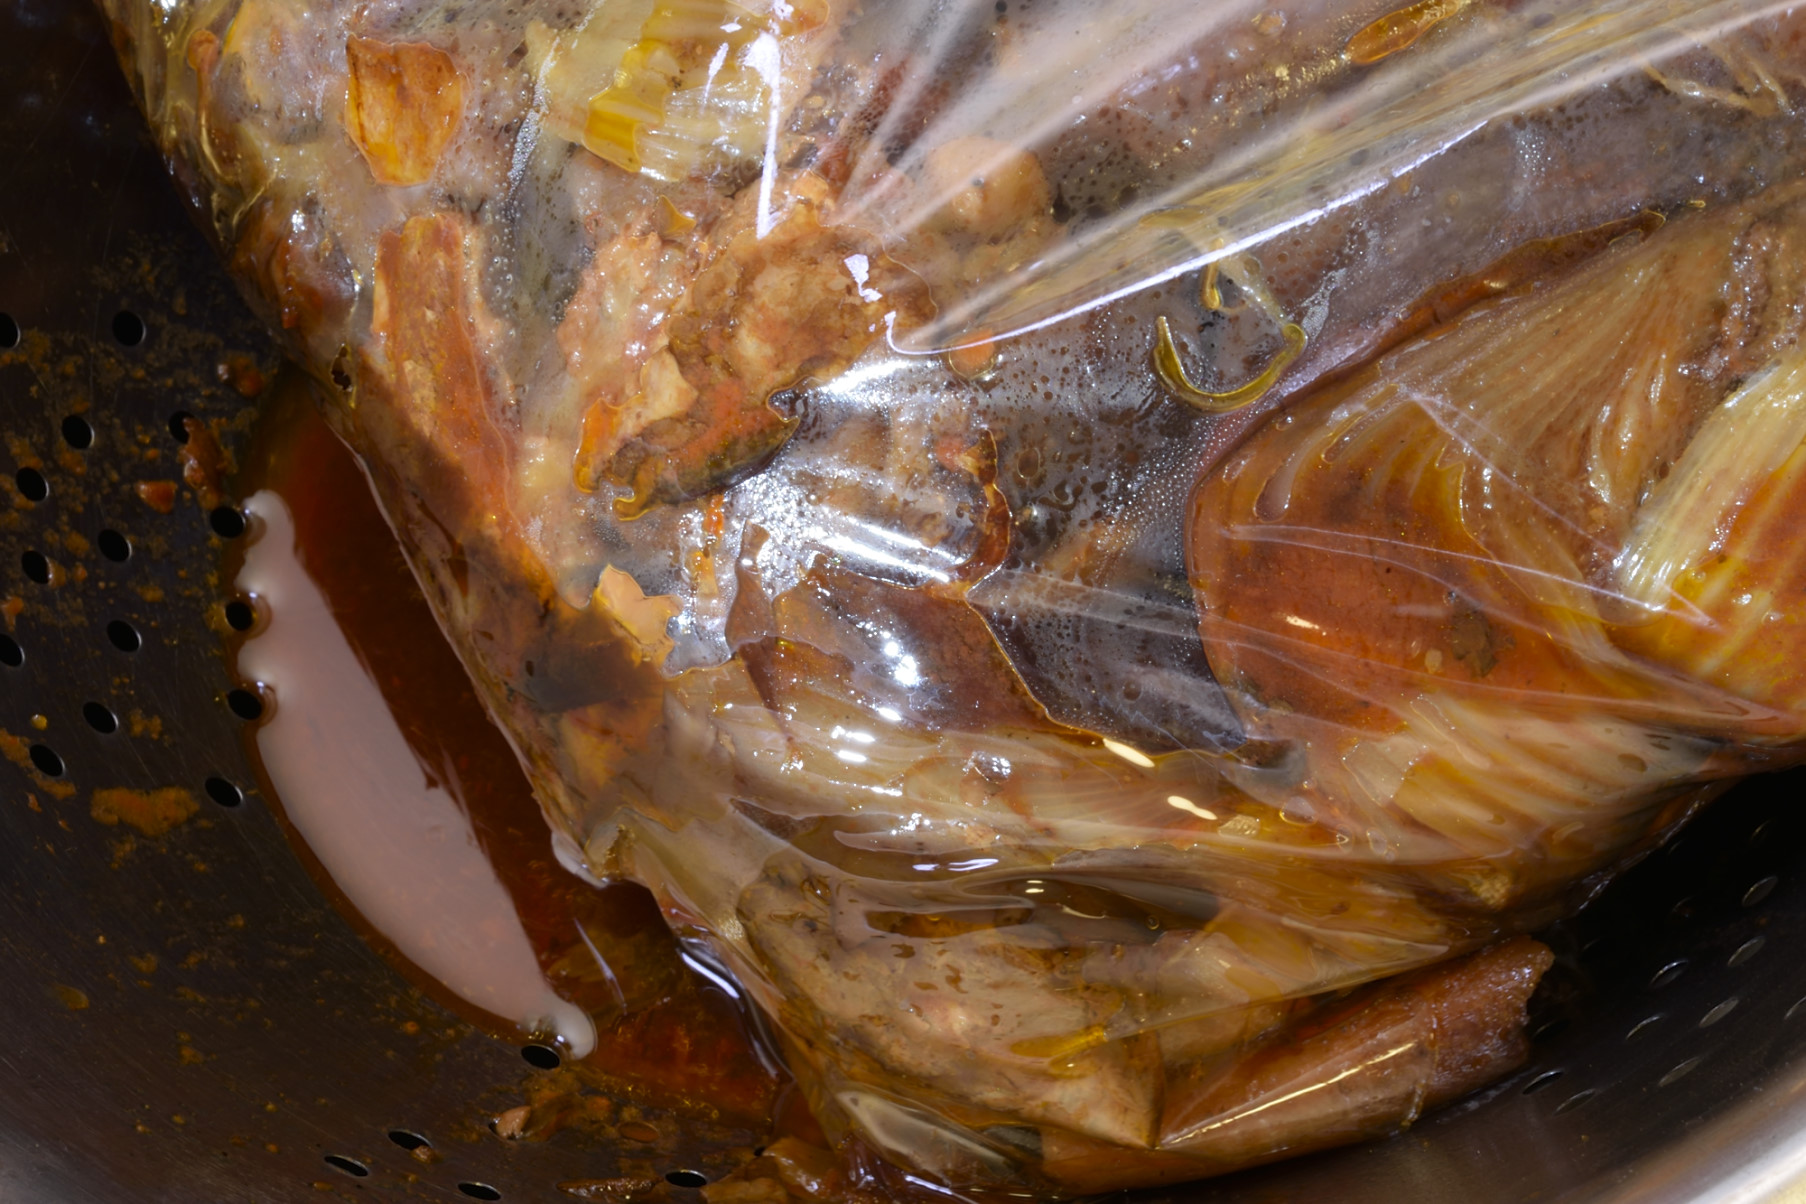
Stage the roasted mixture into a gallon bag and carefully add the 2 qts/2 L water. Grip the bag’s opening and and let the bag slowly sink in the tank. Drape the opening over the edge and use the lid to secure it. If you want herbs and a bouquet garni in there, now is the time to put them in. I usually don’t. Let it process for at LEAST 12 hours @183 F/84 C.
There should only be a small amount of evaporation during this cycle. This is another misconception about these types of sauces. Reduction should not be purposely initiated until AFTER all of the solid ingredients have been removed. The more the broth reduces, the thicker it gets. The thicker it gets, the more it sticks to the solid ingredients. When you discard the solid debris, all that flavor and liquid goes with it.
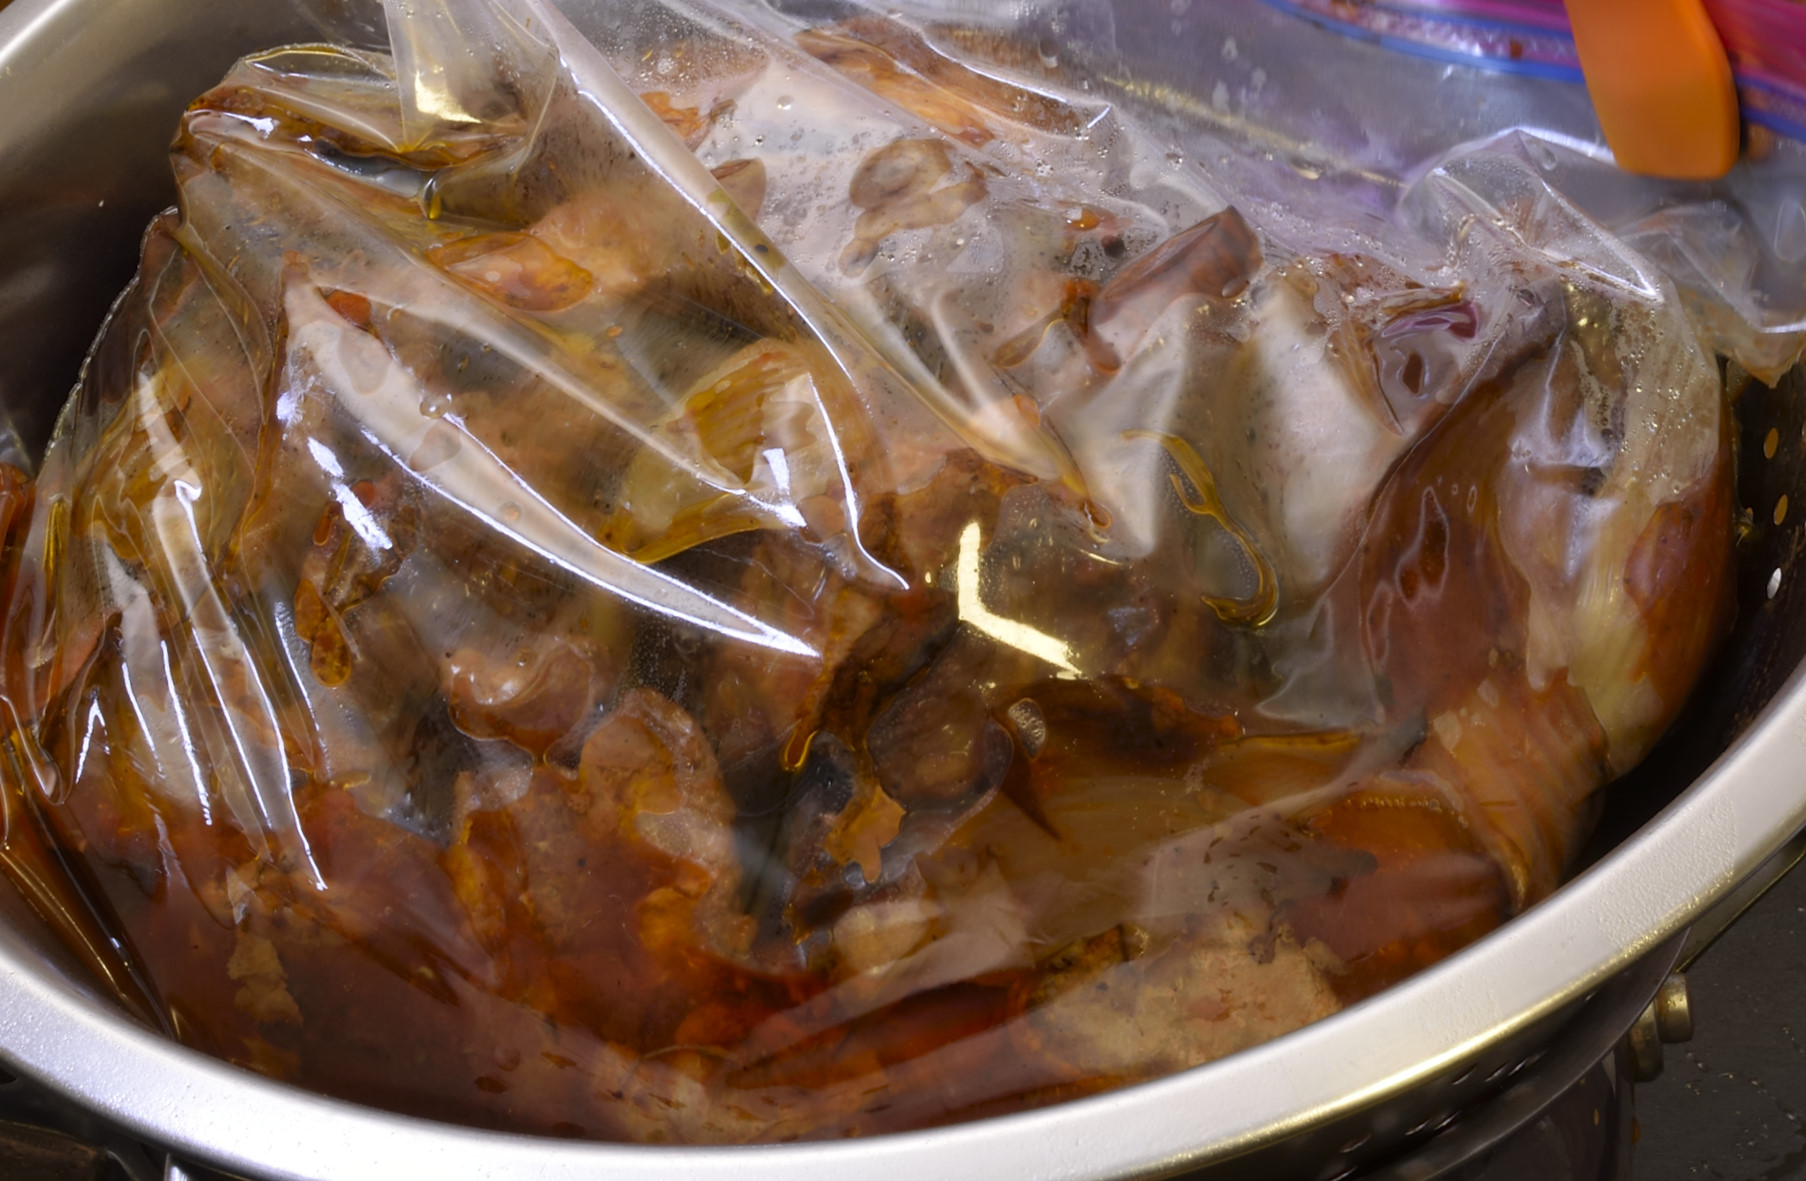
Do not attempt to pour out the contents of the bag.
This can be extremely messy and even dangerous!
Lift the bag out of the bath and lower it into a large colander (or strainer) with a pot under it.
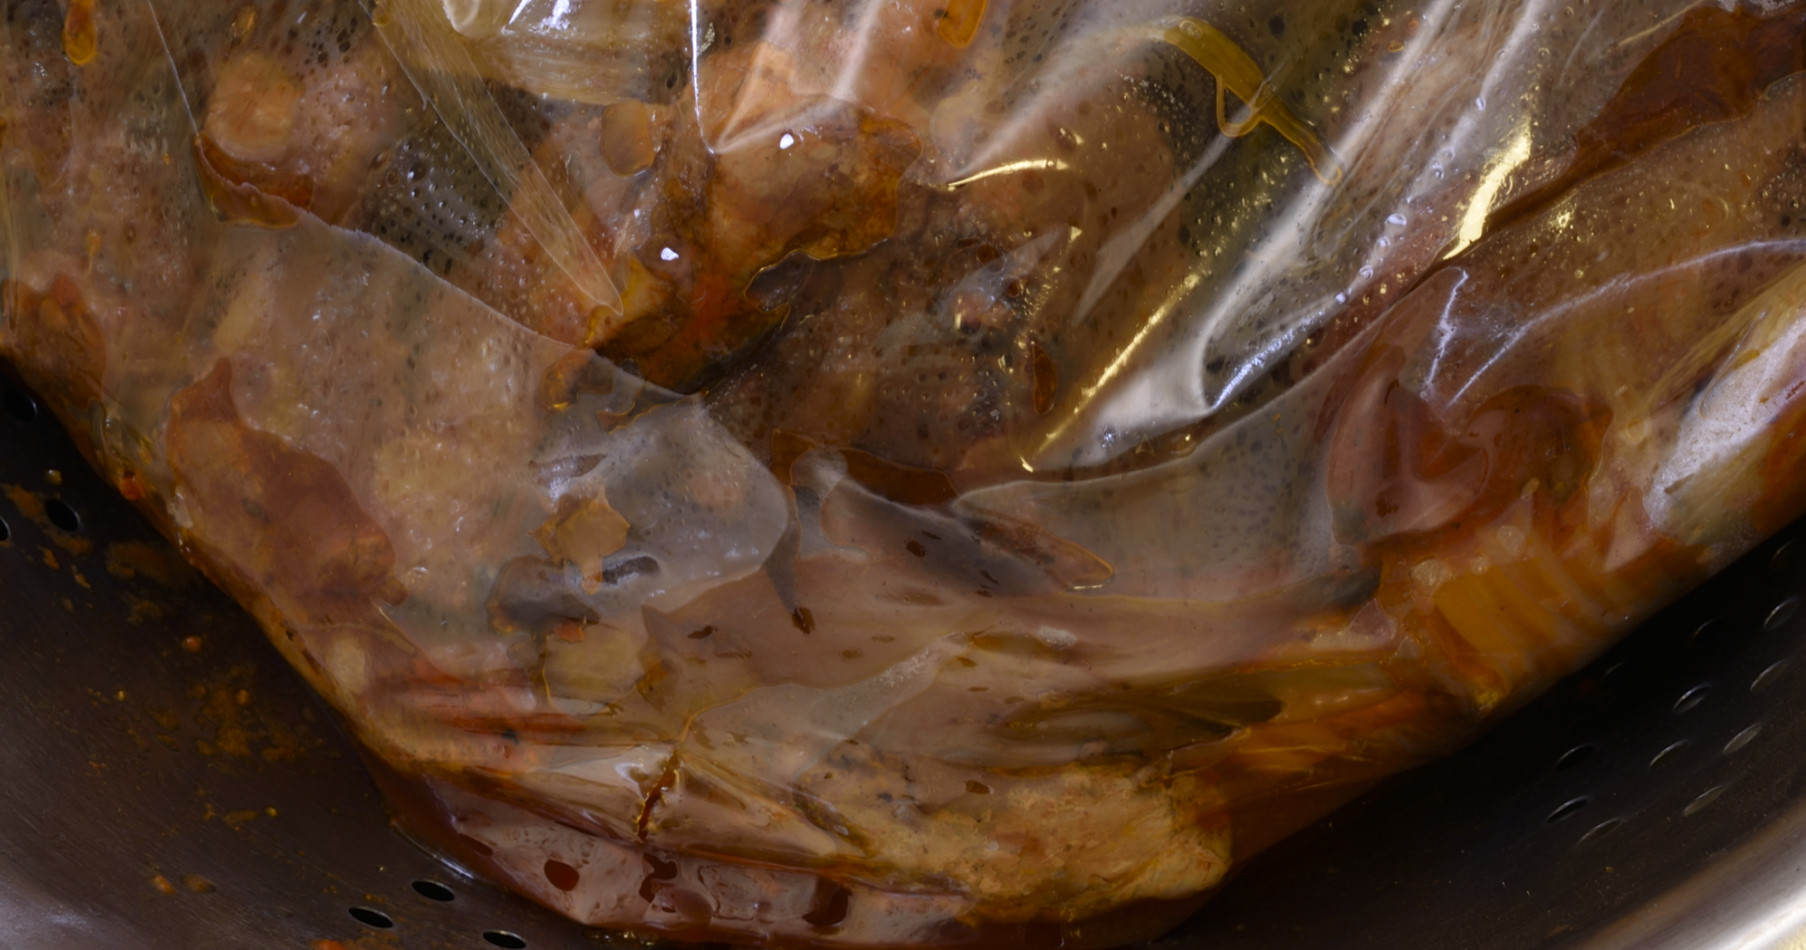
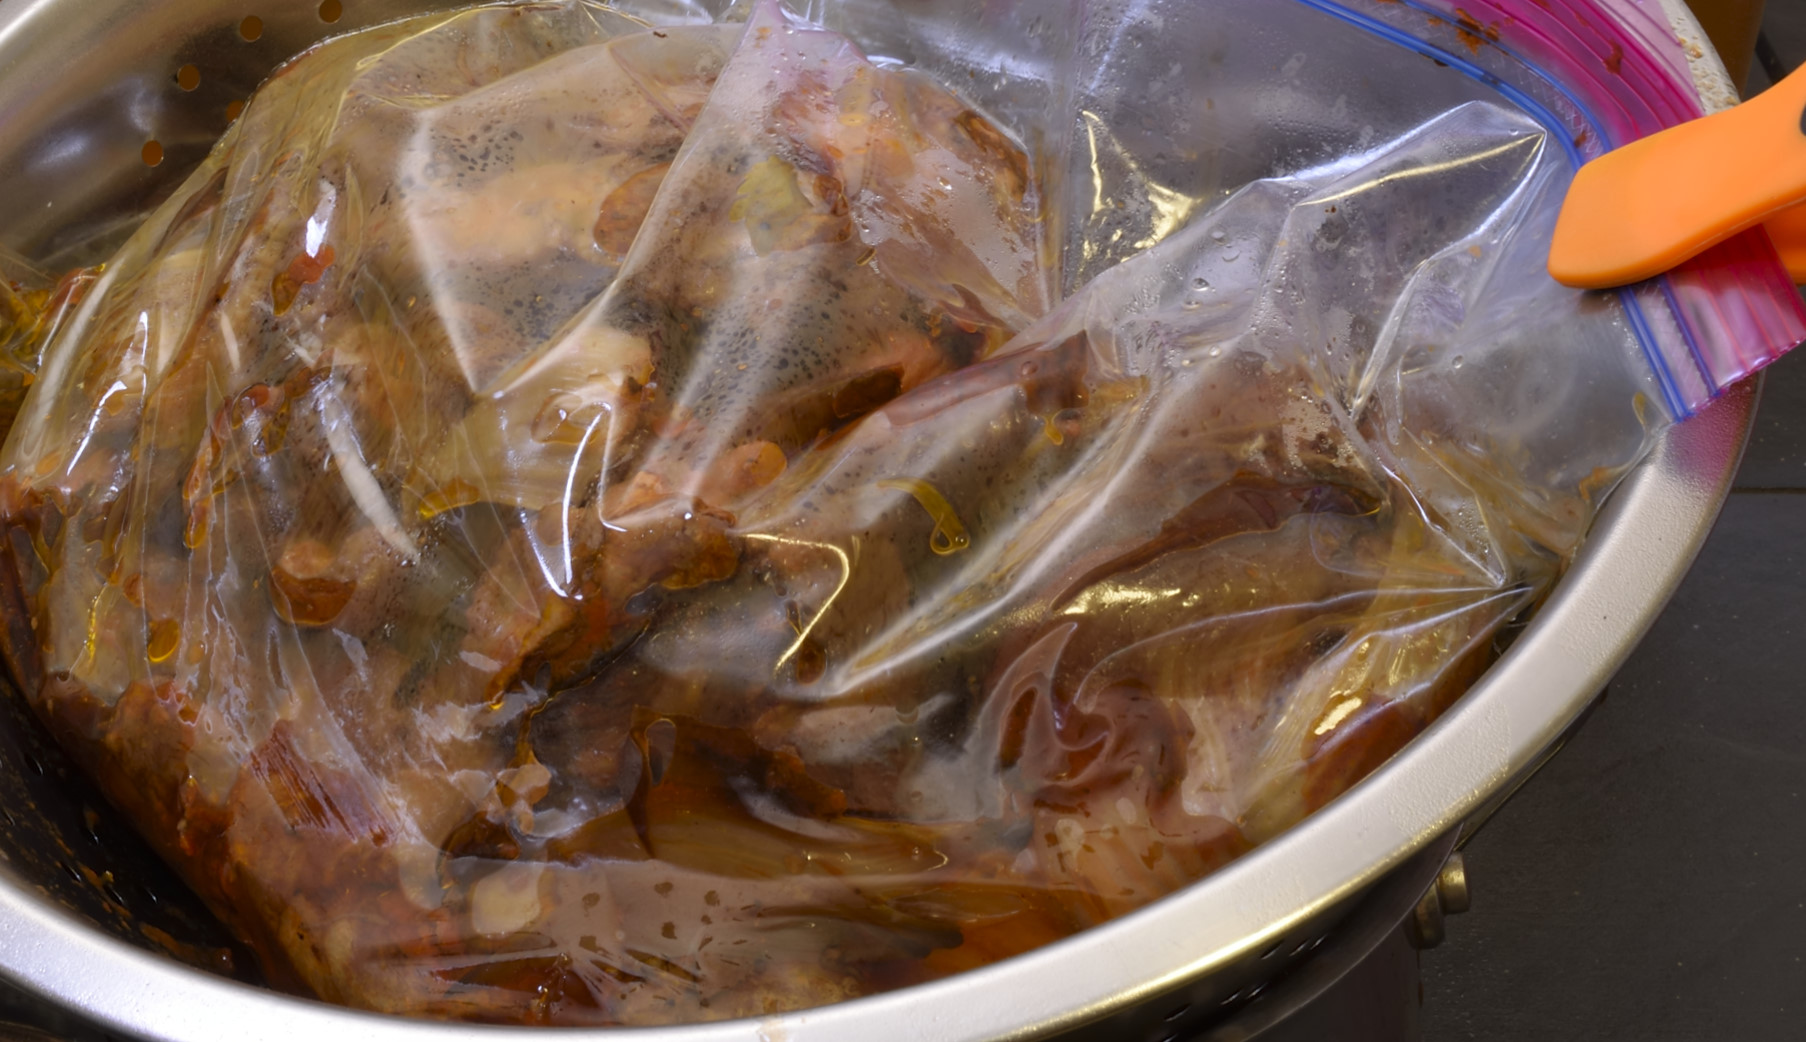
Use the point of a knife to cut a few small holes in the bottom of the bag.
Most of the thin broth will drain out.
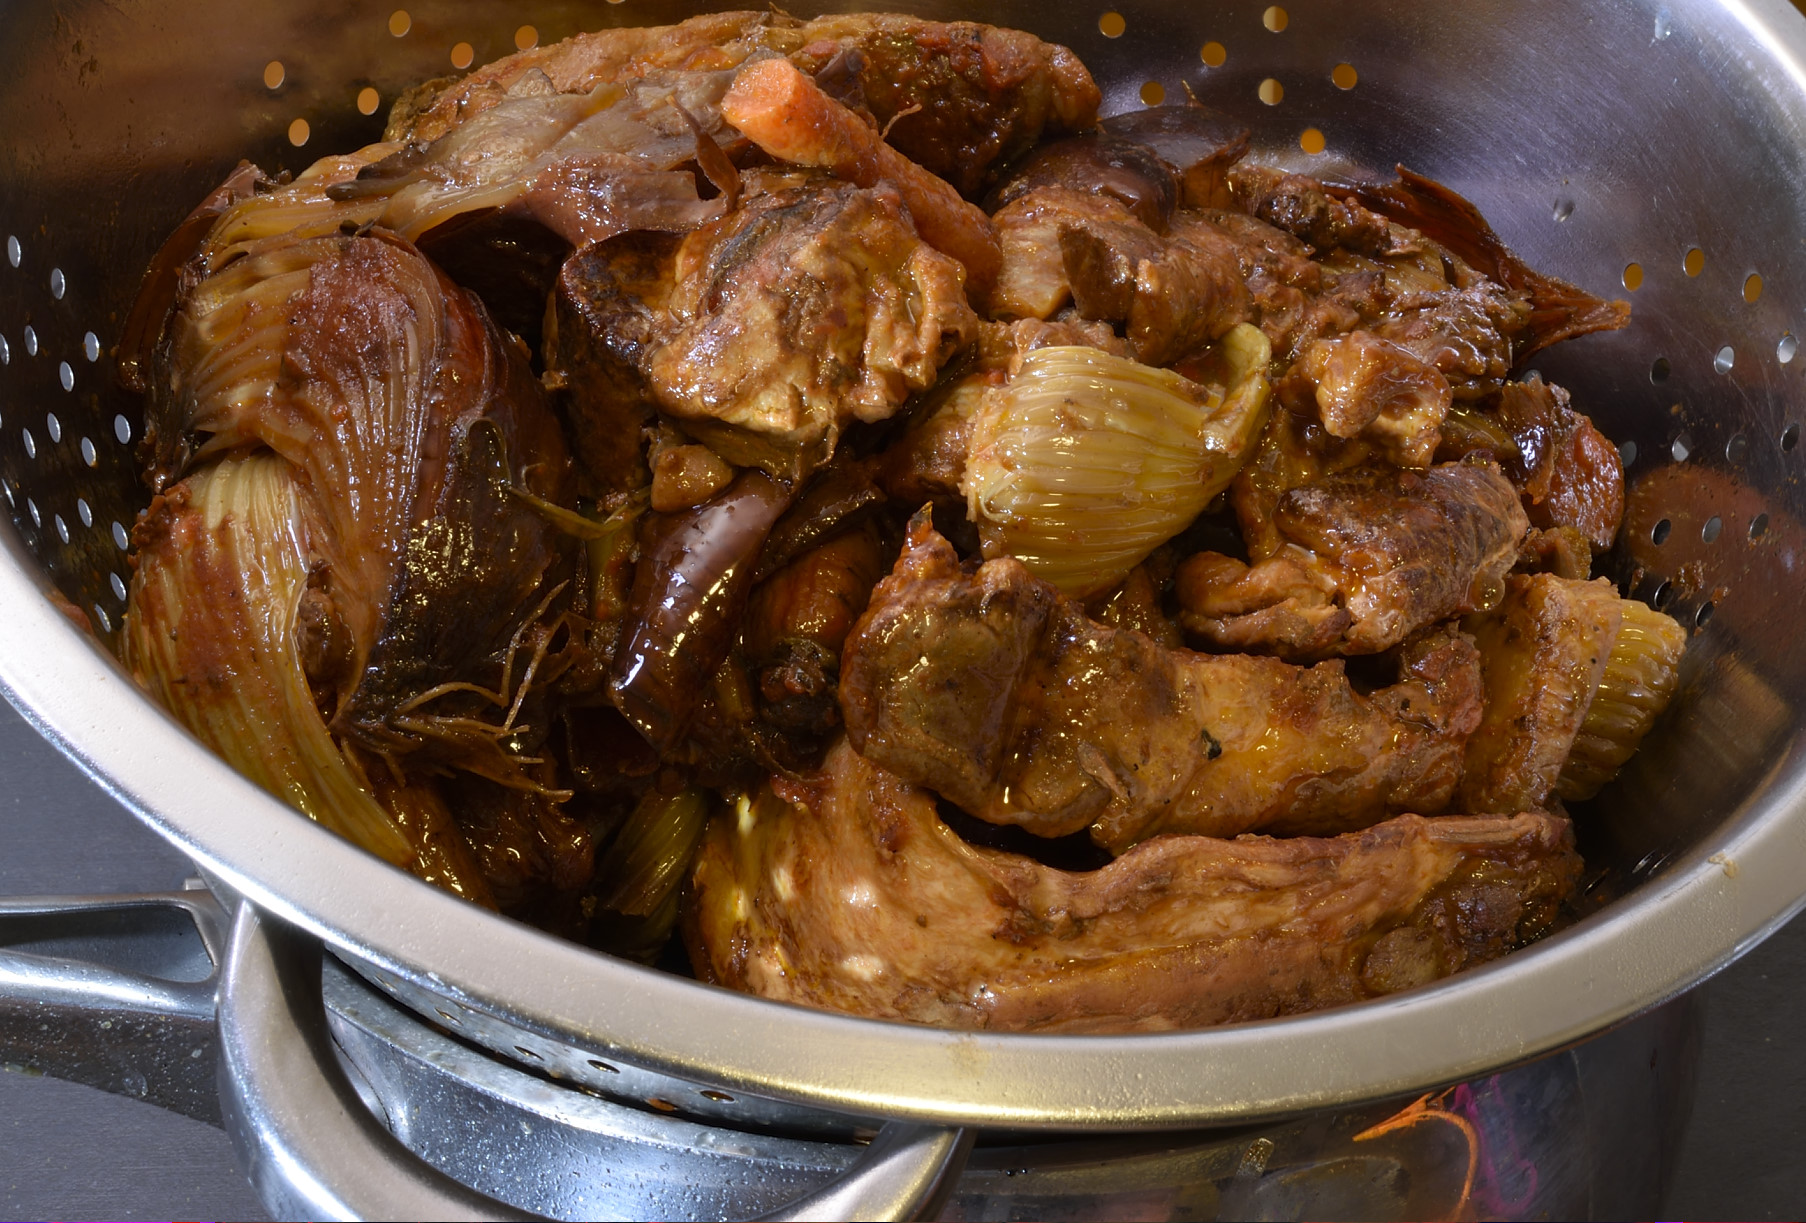
At this point you can safely upend the bag into the colander to get the rest of the liquid out of the solid contents of the bag. Clean the colander–you are going to need it again in a minute!
Clarification
Measure the stock. It will be somewhat less than 2 quarts/2 liters. If it is more than that, call me immediately–you just witnessed a miracle! In its current state, what we have here is a cloudy brown STOCK. It is not sauce yet. Bring the stock just to a boil and reduce the heat to a simmer. Rapidly boiling stocks create a fabulous aroma in the kitchen, but only because the flavor/aroma are escaping from the pot.
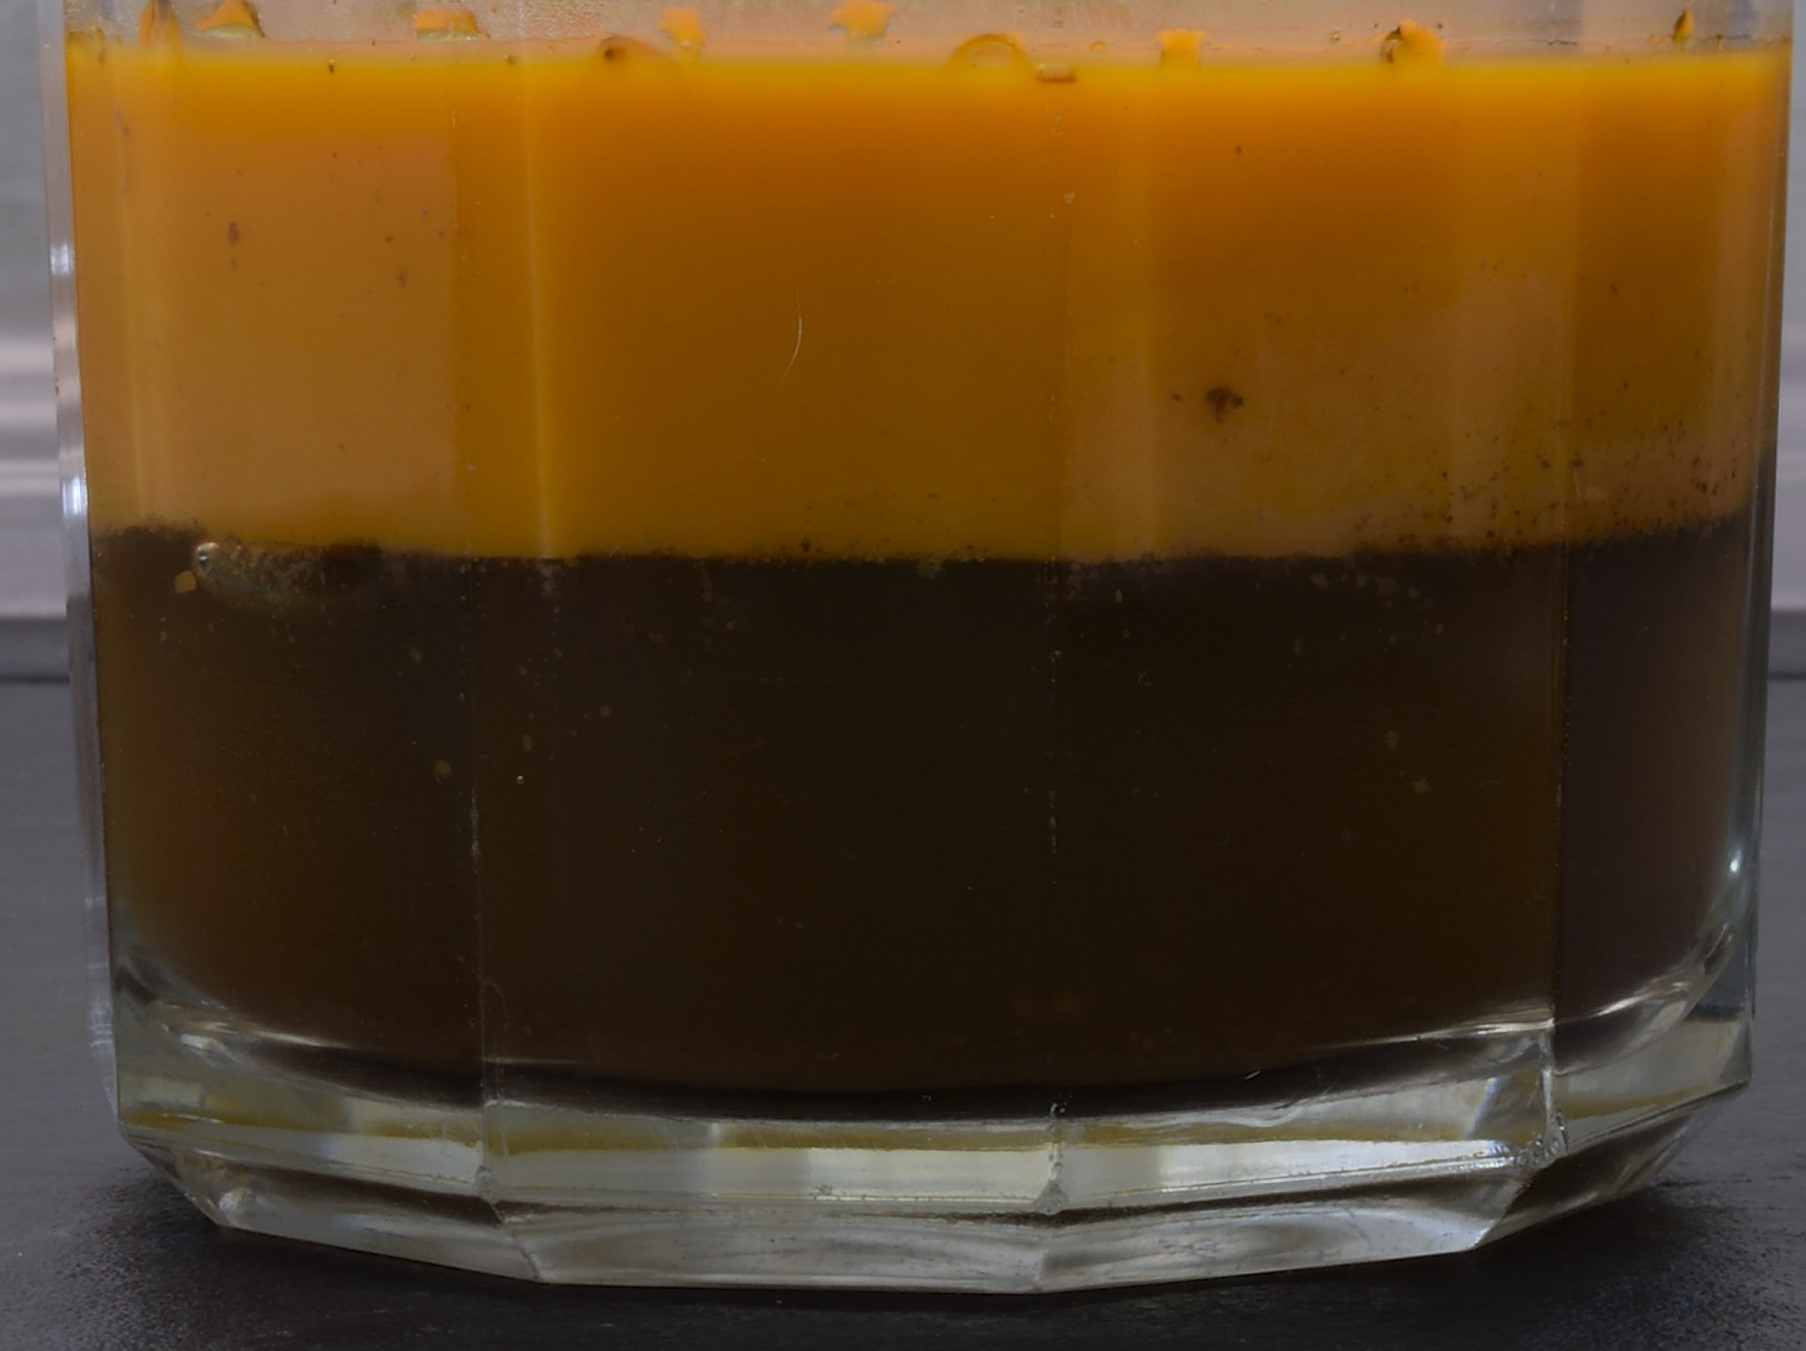
Use a ladle or flat spoon to skim any excess fat off of the top after the initial boil, but do not discard. Stage this liquid into a bowl or measuring cup and refrigerate. The fat will solidify and you will be surprised to see how much stock remains below it. Waste not, want not. Discard the fat, use the stock.
In a clean pot, scramble together 3 egg whites (3 oz/90 ml) with 0.5 cups/110 ml COLD water. Pour the hot stock over the egg whites (not the other way around). Return the pot with this mixture to a burner and put on medium high heat–do not walk away at this point. As the stock begins to come to a boil, you will see a “raft” begin to form on the top of the stock. This is the albumen protein in the egg whites attracting the other proteins in the stock that cause the cloudy appearance. DO NOT WHIP the stock. Reduce the heat to a bare simmer and allow the raft to continue forming for 15 minutes. Turn off the burner.
You can see how the stock has what appears to be darkened scrambled eggs scattered through it. This is the same effect that we describe in the article linked HERE.
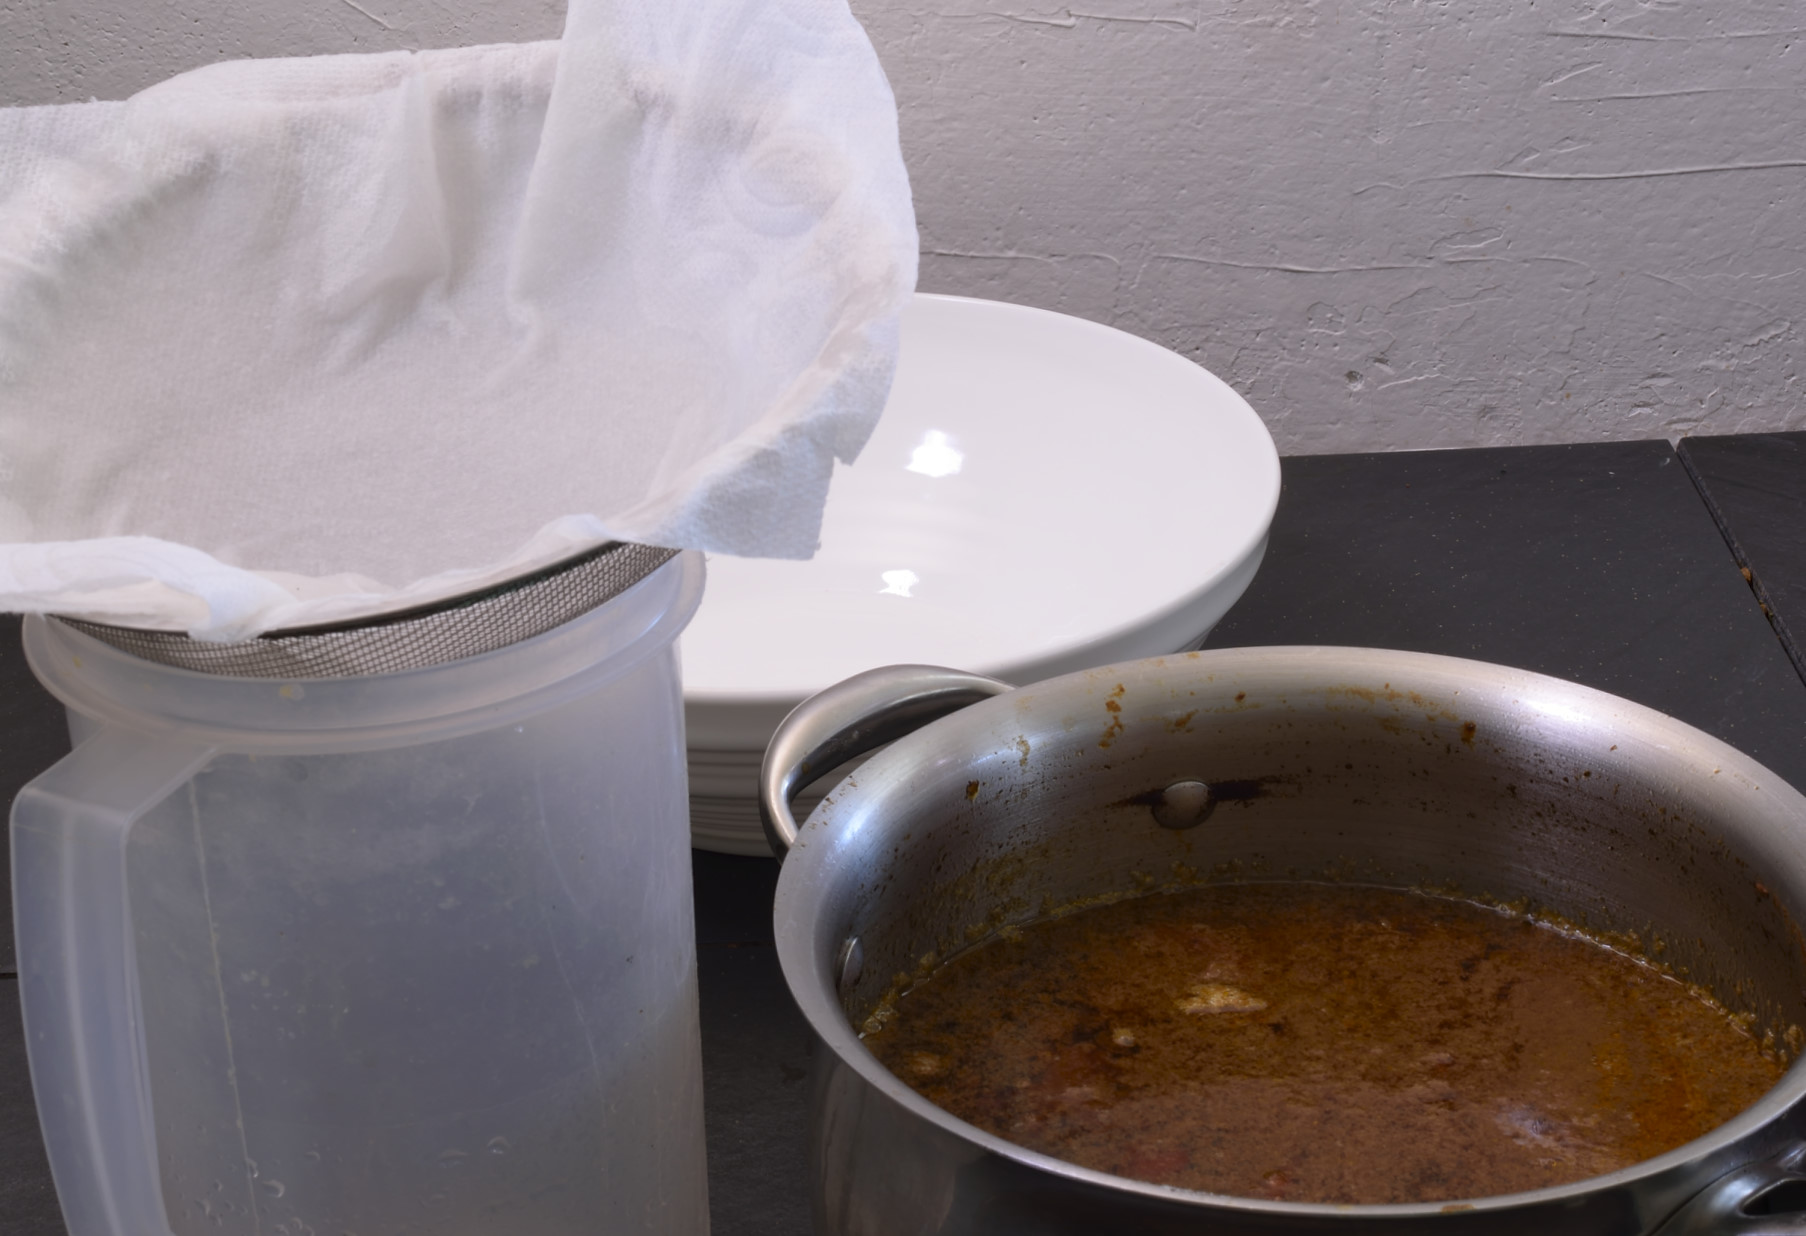
Set the colander or strainer over a large container and line with moistened paper towels (or cheesecloth). Why moistened? Moistening the paper towel prevents the flavorful stock from clinging to the fabric.
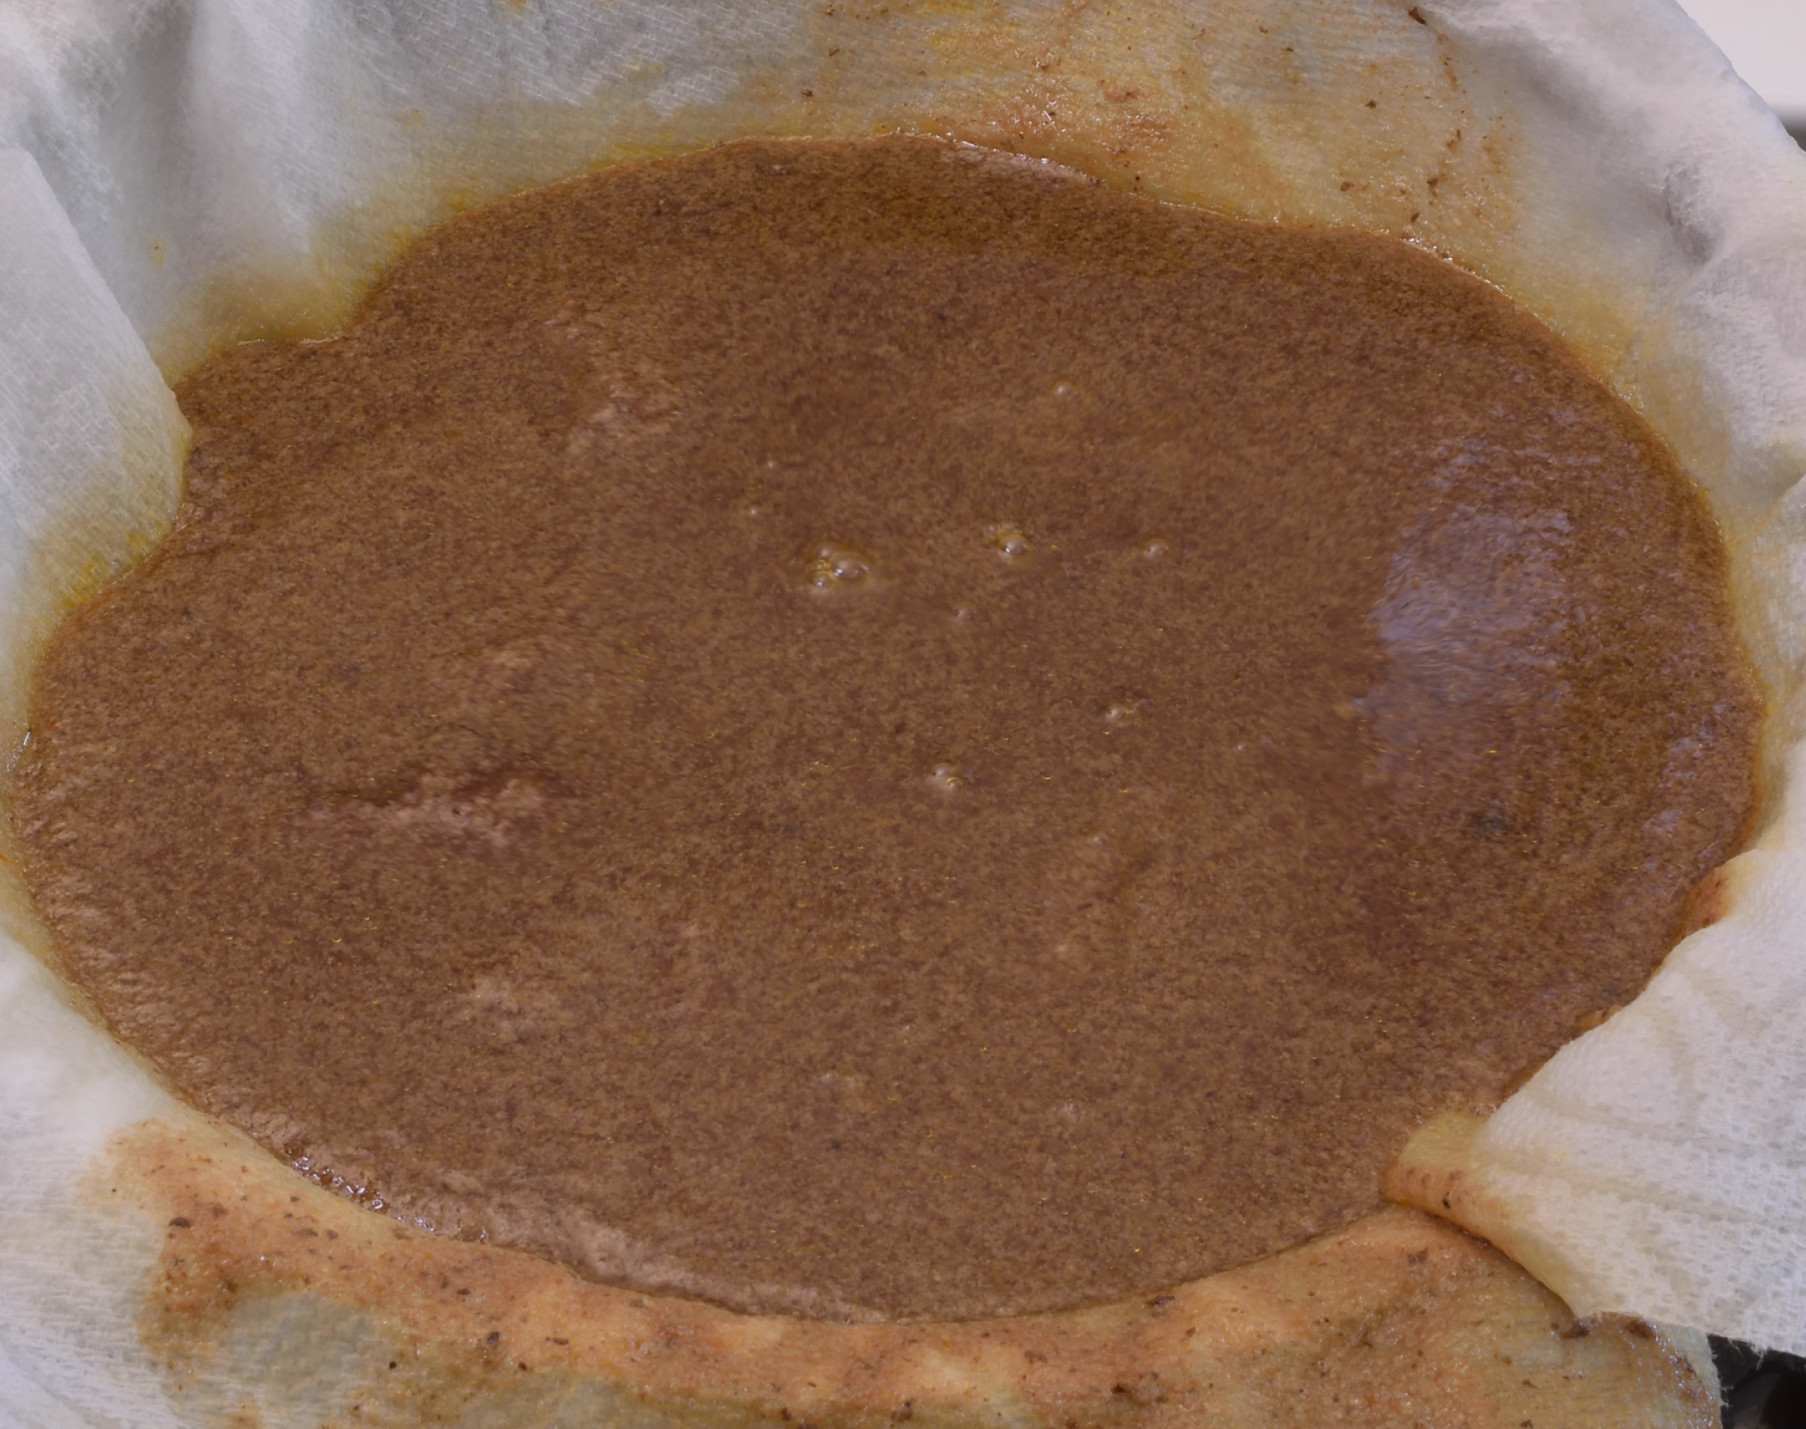
Slowly ladle the stock into the moistened paper towels–like so many other things, it takes time.
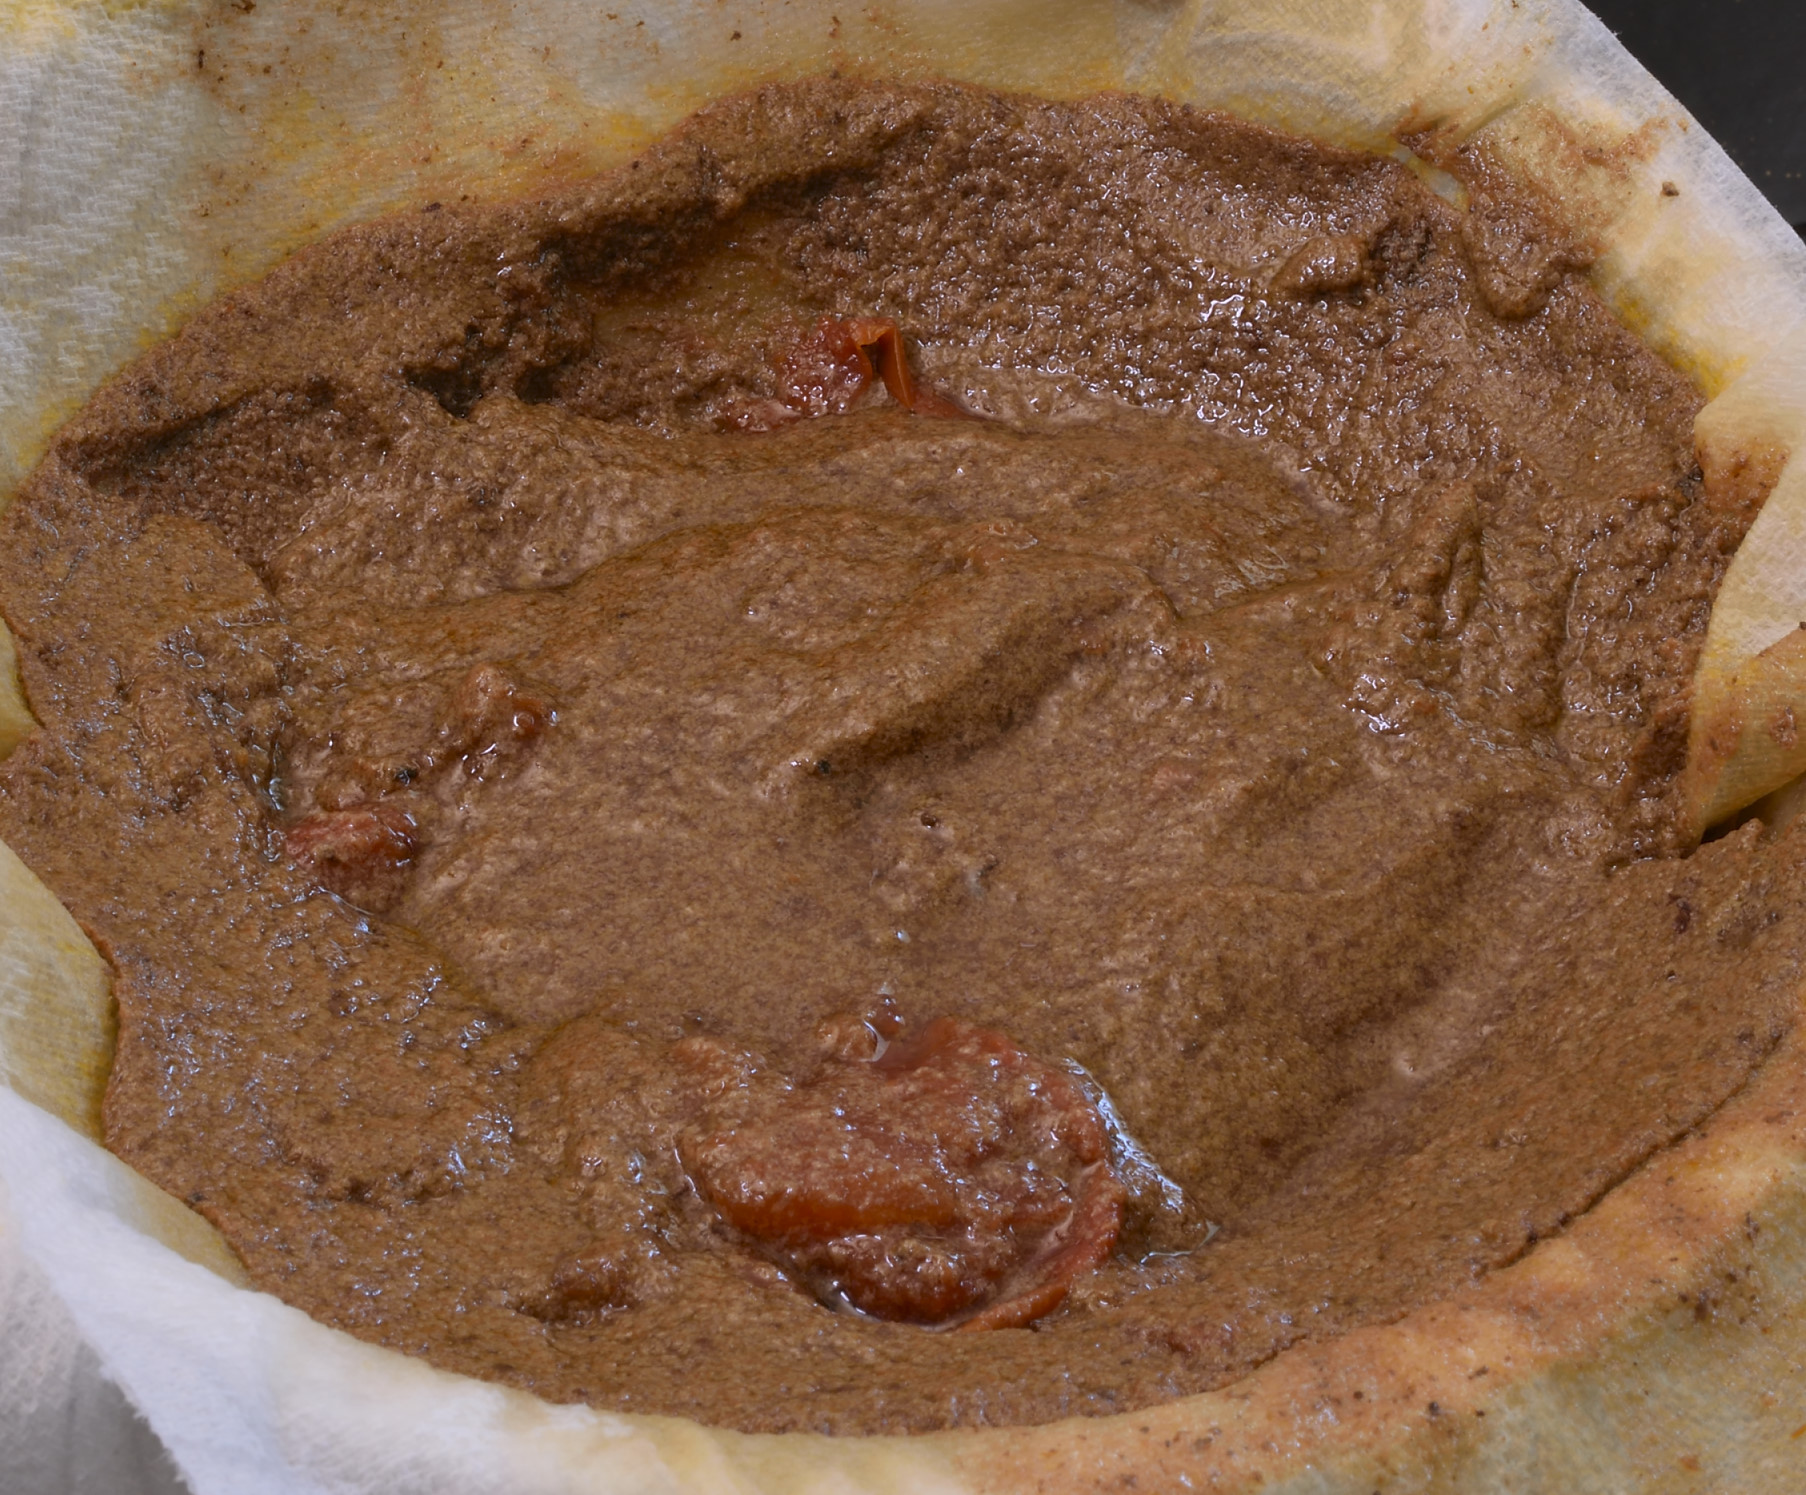
The moistened paper towels will catch all the debris and albumins in the stock.
![]()
And this is what you get.
Reduction
Continue reducing the stock to 1 quart. At this point the broth can be seasoned and thickened with roux to make what we colloquially refer to as “brown gravy.”
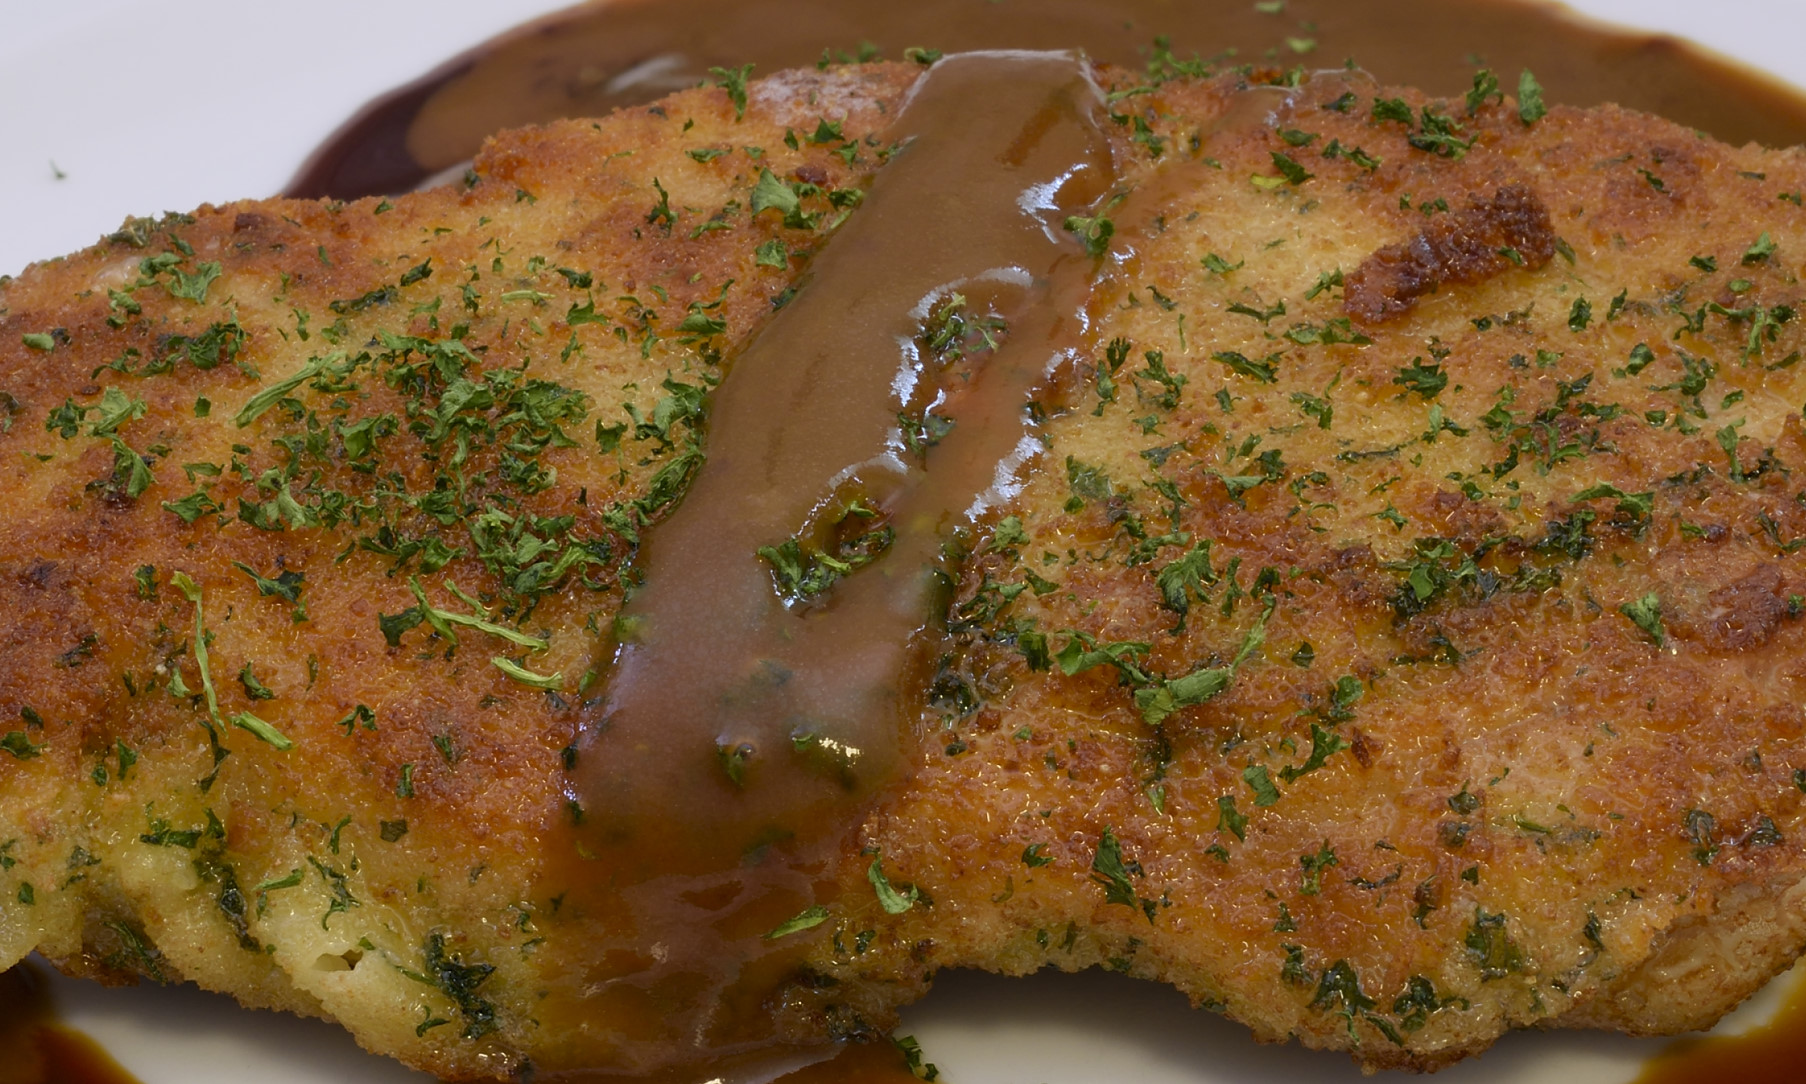
Above: Pork loin cutlet with the thickened gravy.
Great on mashed potatoes. Continuing to reduce the broth will further intensify the flavor and it’s totally up to you how far you take it. Salt should never be added until AFTER the reduction process has been completed. There is no fix for salty demi-glace.
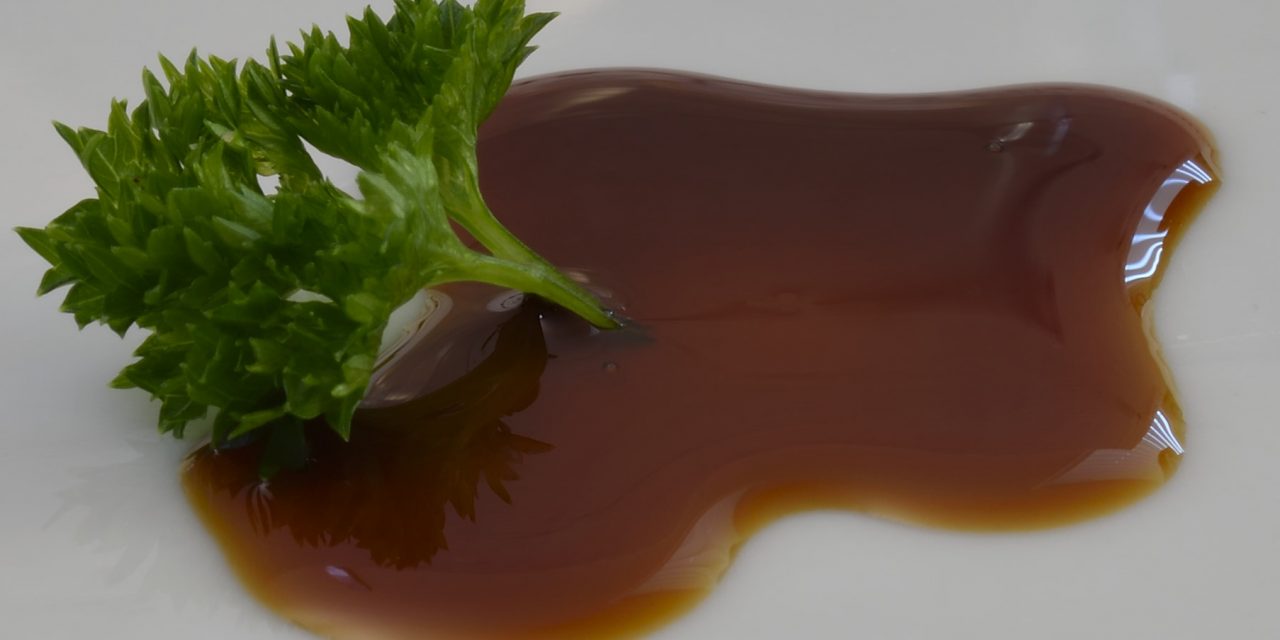
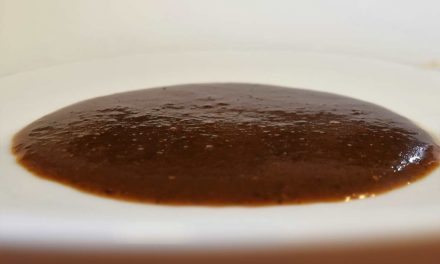
If you “fully reduce,” not to a certain volume (approximately one cup), but to that certain consistency where the liquid coats a spoon (or the bottom of the pan), which is really JUST before it scorches…
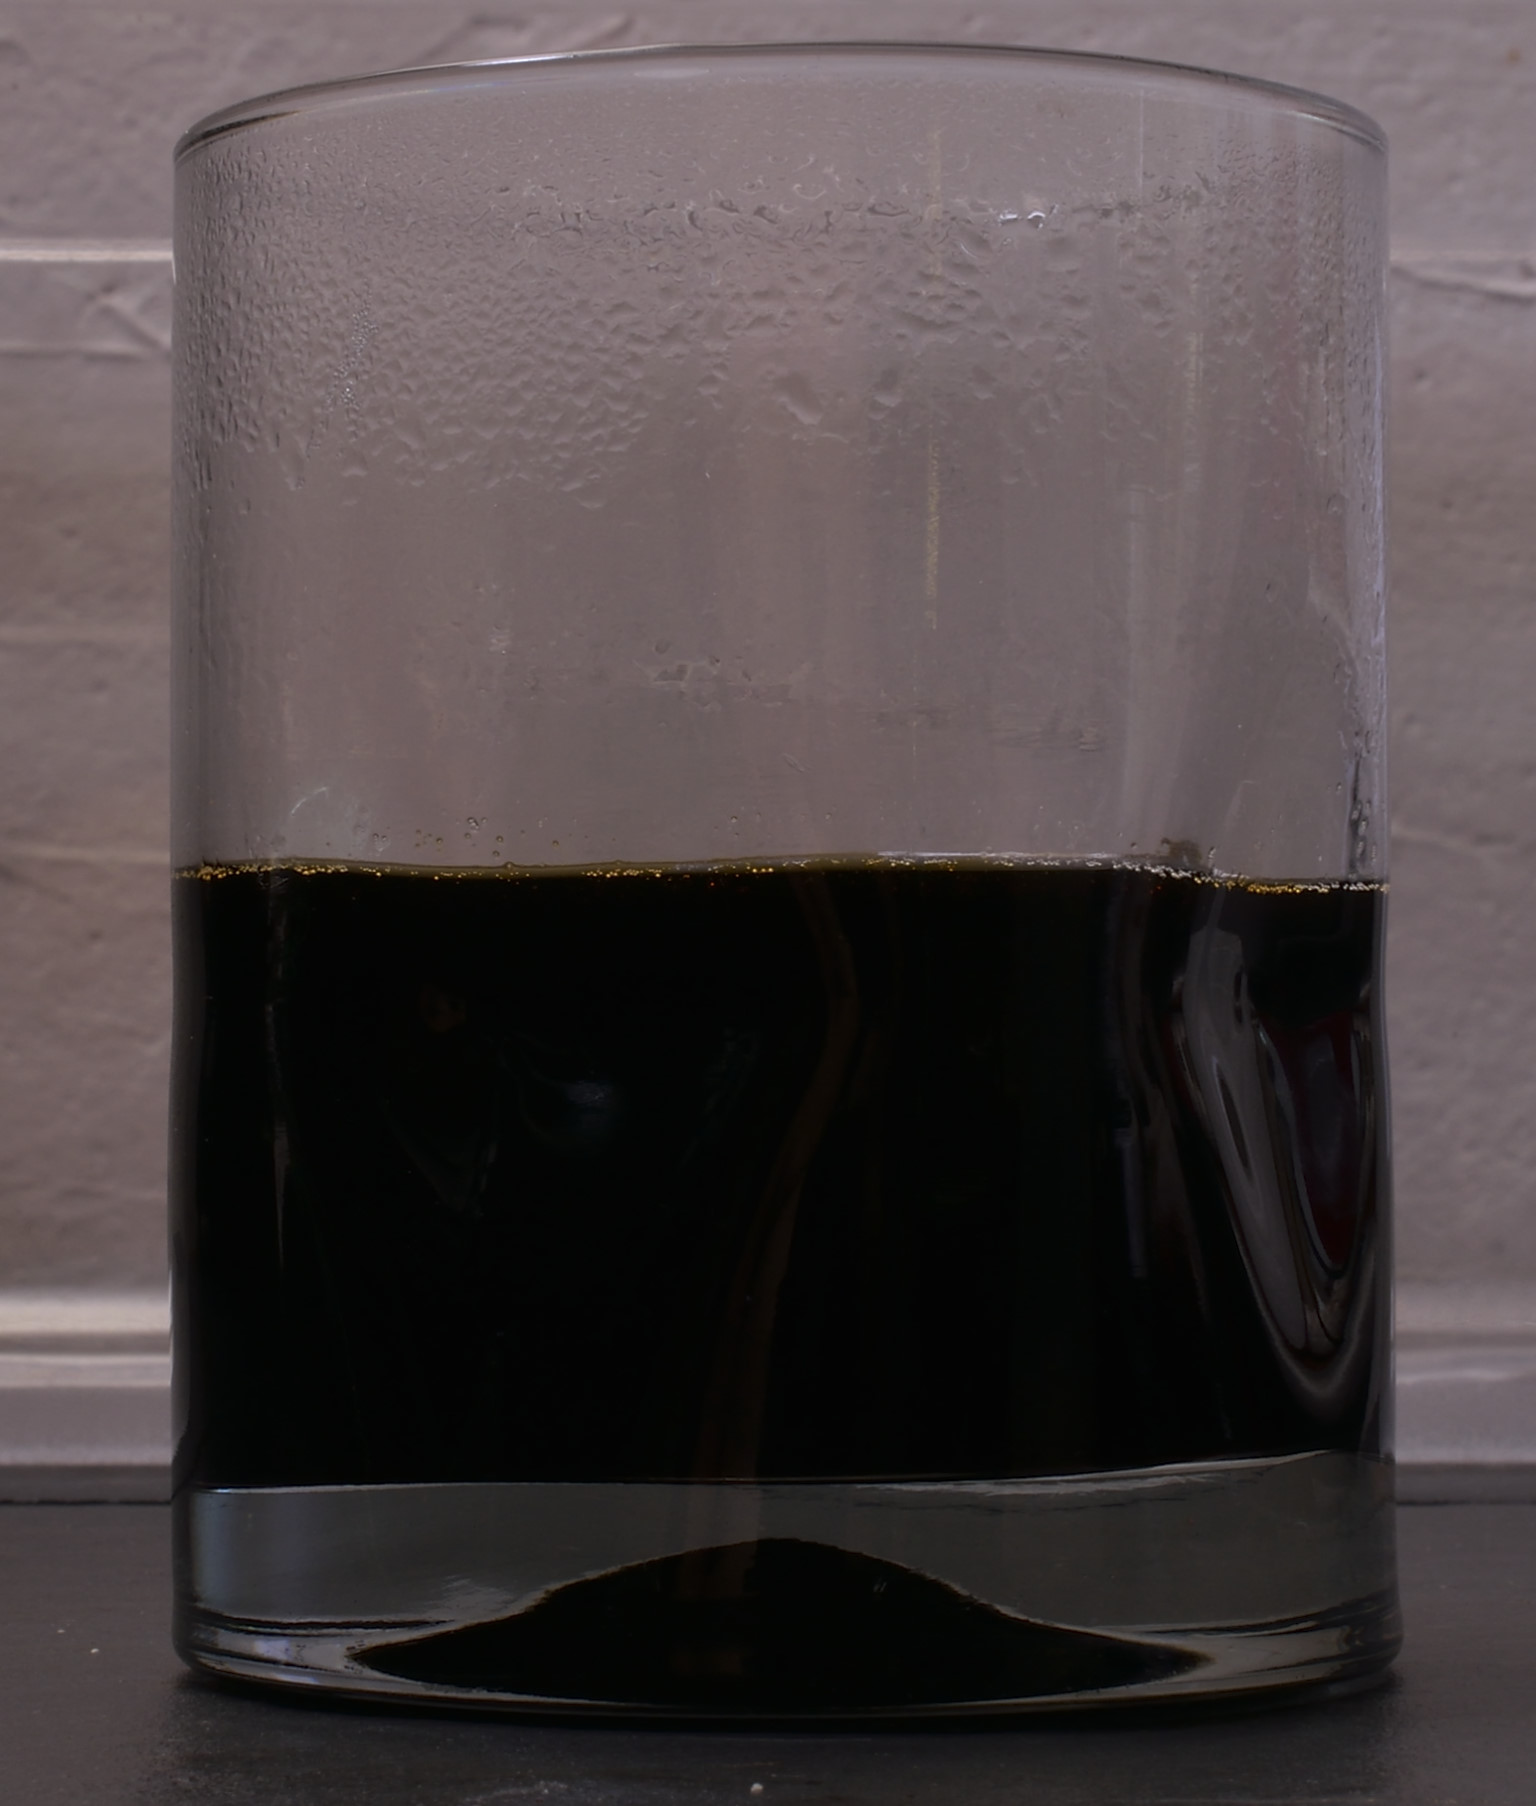
it will be glossy and thick enough to dispense from a squirt bottle–that’s what I usually do with it.
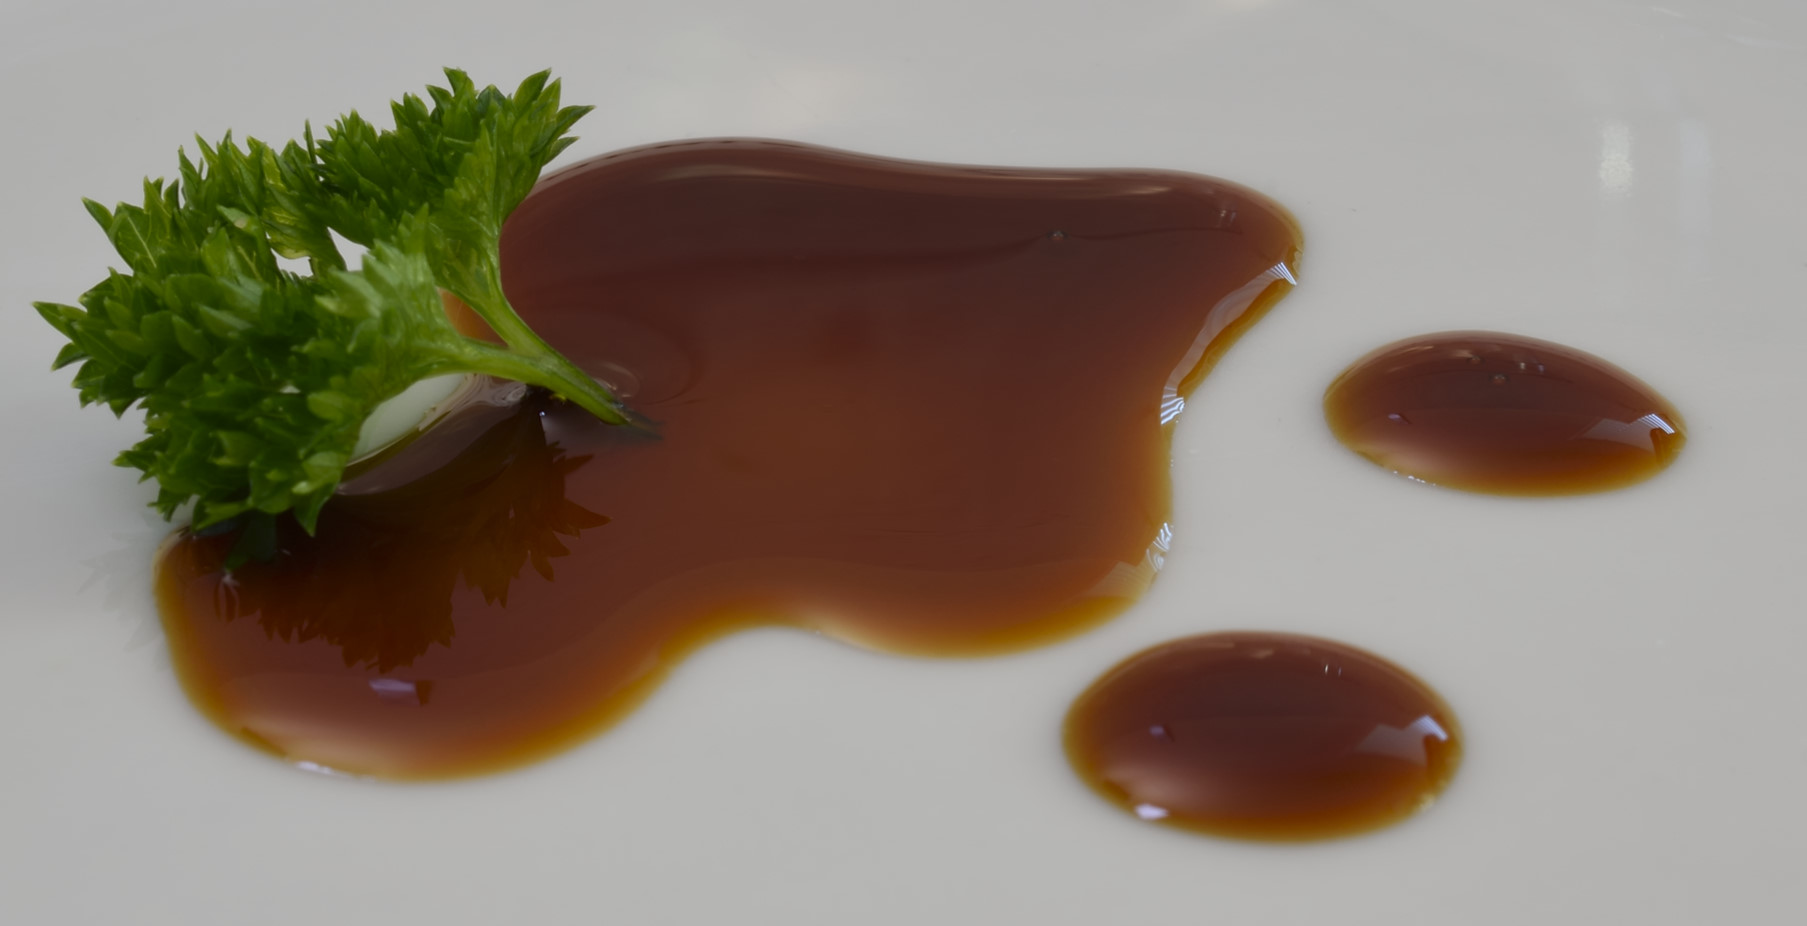
The texture/thickness is a lot like Balsamic syrup or molasses.
Norm
